4th of July Tie Dye! (One shirt, two ways!)

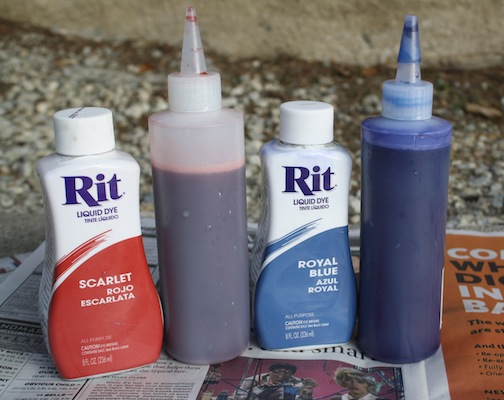
I worked with Rit Dye on this project and my goal was to get an outfit ready to wear for this holiday weekend! I love July 4th and always need to have a patriotic outfit (as well as some nails) to help with the celebration! Start with a basic cotton t-shirt (grab one from your collection!), a handful of rubber bands, and Scarlet and Royal Blue Rit Dye.

Rit Dye - New Dress A Day - tie dye

Add both shades of dye into plastic bottles - this will make it easier to apply dye to the t-shirt in specific areas.

Rit Dye - New Dress A Day - tie dye

Fold or twist the shirt to prep for tie dyeing! I went with a horizontal accordion fold that would give me a vertical stripe with the dyes. I folded, rubber banded sections, and started to apply the dye on each side of the rubber bands, alternating colors.

Rit Dye - New Dress A Day - tie dye

Let the shirt soak and dry (I waited about 6 hours), remove the rubber bands, and unfold the shirt. Rinse the shirt under cold water until the dye runs clear. Toss the tee into the dryer until it's fully dry.

Rit Dye - New Dress A Day - tie dye

The shirt is complete! With some sleeve rolls, it was time to ring in the 4th á la Bruce Springsteen!!

Rit Dye - New Dress A Day - tie dye

I couldn't just stop there. (This step is totally optional. If you love the tee as is, stop once the shirt has been washed/dried.) I loved how the dye turned out, but I like to cut up my tees before actually wearing them. I removed the ribbed neck, the sleeves, and cut a four-inch slit at the center-bottom of the back of the shirt

Rit Dye - New Dress A Day - tie dye

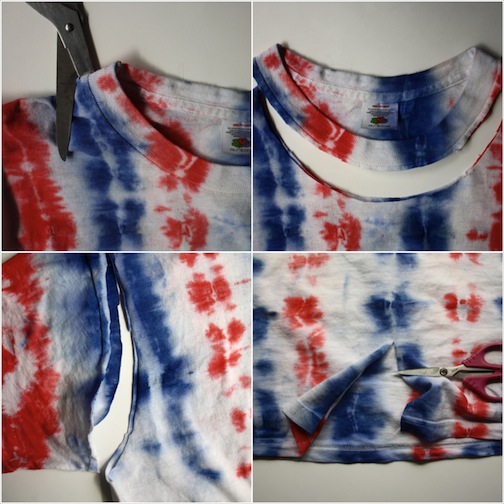
New, refashioned shirt in just a few quick snippy steps!

Rit Dye - New Dress A Day - tie dye

Here's a close up of that knotted back...

Rit Dye - New Dress A Day - tie dye

I'm ready to celebrate 'Merica in my red, white, and blue!! Nothing like some tie dye to feel patriotic!

Rit Dye - New Dress A Day - tie dye

Cue The Star Spangled Banner!!

Rit Dye - New Dress A Day - tie dye

Happy 4th of July, friends!!!

Adrienne's NDAD Creation

Adrienne's piece for today is one of my faves! She used one of my go-to methods for when a vintage dress is just a little too bold or the pattern is super overwhelming. You can simplify and make it rock with just one easy step. Check out Adrienne's piece...

I have been reading your blog for some time now, after I discovered (and bought) the book! I have always been an aspiring DIYer, but didn't really know how to get started. Your book and blog have given me a lot of inspiration and ideas, so when some friends and I decided to go out thrifting, I dared them to find me something awful so I could make it into something wearable. This dress is the one we all agreed on.

New Dress a Day - vintage dress

It was a silk faux wrap dress, and was about 5 sizes too large! I actually loved the fact that it was silk, and the pattern, though, a bit VIVID, was too much for me for a whole dress.

One of my friends didn't think I could do anything with it, and my husband, when he took my before picture at home, started singing the "Three's Company" theme song at me (He said I looked like Mrs. Roper!). 

New Dress a Day - vintage dress

I got it at a Goodwill store in Louisville, KY, and it cost 5 dollars.

New Dress a Day - vintage dress

By cutting it in half and adding a snap...

New Dress a Day - vintage dress

...new fabulous skirt!! The best Goodwill find in Kentucky!!

Love this look, Adrienne! Way to pull off the bold print - you simplified the look to make it something wearable! Way to take that Goodwill find that your friends thought you couldn't tackle, and turn it into the most fabulous skirt! You showed them, lady!! Way to go!

Michelle and Mikhayla's NDAD Creation

I love how Michelle and her gorgeous little kiddo Mikhayla took an outgrown garment and turned it into something so cool and practical! This is something that you can craft for yourself, for your kids, for your office and I can't wait to get started on one myself! Check out what the terrific team of M&M created...

Hi! I have a crafty project made out of an outgrown garment to show you! Mikhayla had a cute little sweatshirt that had our favorite thing in the world on the front of it - SPARKLES! We couldn't just throw it away!

New Dress A Day - DIY - thrift store

See how Michelle and Mikhayla crafted this sparkly piece into something fabulous!

We gathered up all our supplies...a piece of packing styrofoam in a nice square (about an inch thick), some craft glue, LOTS of pins, various ribbons, and our all important hot pink zebra print Duck Brand duck tape! 

New Dress A Day - DIY - thrift store

We cut the design out from the front of the shirt, and used some of the craft glue and pins to tack it into place on the board. We used ribbons to make a little grid over top of the design. 

New Dress A Day - DIY - thrift store

To finish it off, we used our trusty duct tape for a functional and pretty border. 

New Dress A Day - DIY - thrift store

Now she has a cute little memo board for her locker or room! The cost was literally nothing. 

New Dress A Day - DIY - thrift store

I had all the supplies from around the house, and the little shirt was from Mikhayla's growing stack of outgrown clothes.

You get another big thumbs up from me too! I just love this project. So perfect for holding pictures, notes, reminders... You guys were able to create something super practical while still holding onto a garment that you loved so much. This is such a fab example of how you can really upcycle anything. Kudos gals - such a fun crafternoon you both must have had making this!! xo