DIY Fascinators (Hello ROYAL WEDDING!)

It's Royal Wedding time!! Who else has the fever? Maybe it's especially exciting since I just got married, but I really can't wait for all the pomp and circumstance!

To celebrate, I've got a few little projects up my sleeve...(you can snag everything at JOANN!) You can't go to a Royal Wedding without a fascinator, so there's two easy DIYs to prep for the church bells. One that's a bit more springy and femme and the other that's more British feeling! You know, a perfect pair to capture the relationship of Meghan Markle & Prince Harry! 😂😍

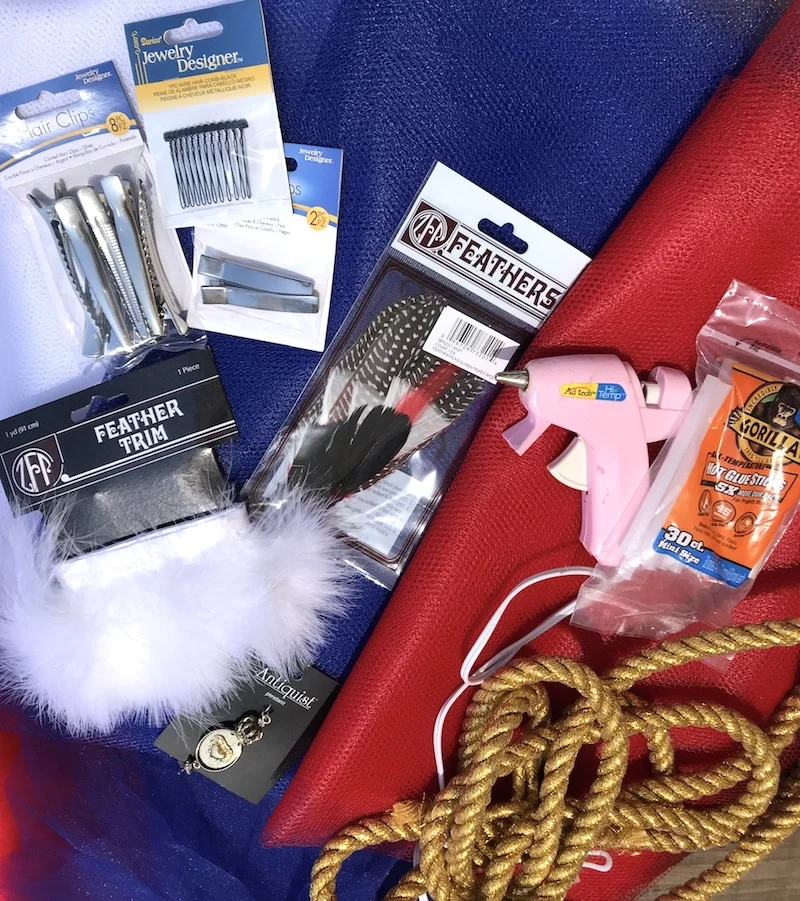
Here's what you'll need for a British Themed Fascinator: Tulle (or sinamay), assorted trims (ribbons, feathers, cording, charms), glue gun & glue sticks, hair clips or combs

Brit Fascinator - Supplies

Start with tulle (or sinamay - depending on how easy it is to find) and fold in 1.5 inch pieces like an accordion to create a thicker strip of material and then iron flat. Next trim the strip from the main piece of tulle and then create a rounded design and pin into place. Here’s where you can get creative & go wild making any kinds of shapes - circles, figure eights, whatever comes to you! These pieces will be the centerpiece of the fascinator.

Brit Fascinator - Tulle

Taking a page from the real royals - who could forget Princess Beatrice from Prince William & Duchess Kate’s wedding with the HUGE pinkish bow shaped fascinator - it’s time for some BIGGER moves. Cording and floral wire were used to make teardrop shaped pieces. Again, this is a place to get creative. Make a big star or copy Princess Beatrice’s ribbon-esque shape to make the fascinator uniquely you! Once the shapes were made, it was time to glue the edges before adding a bit more flair.

Brit Fascinator - cording

Feathers, tulle, and a hair clip were affixed to the back making this ready to wear!

British DIY Fascinator

I tossed on a LRD (little red dress) and got wedding ready!

British DIY Fascinator - After Look

Super chic and I totally feel like the 6th Spice Girl! Victoria Beckham, what’s up girl?

British DIY Fascinator

I might be wearing fascinators to all my formal events moving forward, just an FYI :)

British DIY Fascinator

For something a little softer and floral, here’s another fascinator to DIY that’s perfect for high tea!

Here's what you'll need for a Floral Fascinator: Wedding Netting / Tulle, assorted faux flowers, pliers (for flower snipping), assorted accoutrements (feathers, small butterflies/birds, charms), glue gun & glue sticks, headband, felt (not pictured to assist with flower attaching on a smaller headband)

DIY Fascinator Supplies

Start with a headband and a round piece of felt, and glue the felt to the headband. This will act as a base to glue your flowers onto. Snip your flowers from their stems and hot glue those buds to your felted base. I went with one large center flower and then added smaller flowers around it in accent colors to pop. Feel free to choose any flower that suits your fancy though! All pink or all peonies or all daisies - whatever is most uniquely you!  

DIY Fascinator steps

Next grab your netting or tulle and affix a portion (anywhere from 6 to 12”, depending on how much you’d like it to cover your face) with glue to the headband base. I loved the idea of adding little feathered butterflies to the netting for a more garden chic look as well as feathers. I went with Goose biots (the thin stringy ones)...

DIY Fascinator Supplies

...to give the fascinator some height.

Floral DIY Fascinator

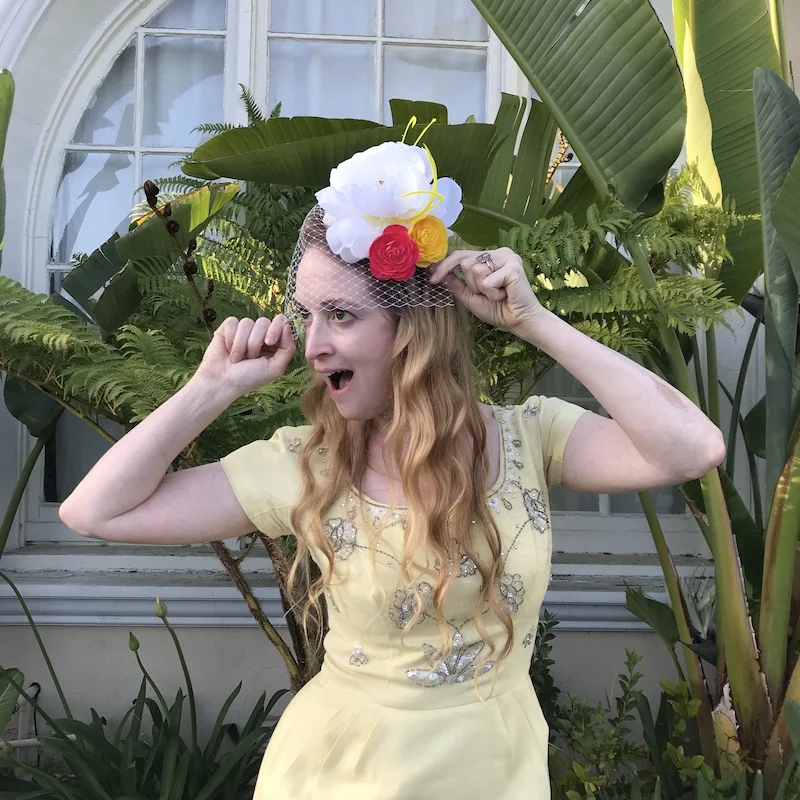
I paired this with a vintage yellow dress and got ready for an afternoon wedding party!

Floral DIY Fascinator - After

This is also totally perfect for a tea party!

Floral DIY Fascinator

Who doesn’t love a little bit of hair flair?The feathers give it just that extra bit of street cred, you know what I mean? The Brits would totally approve!

Floral DIY Fascinator

This might be enough reason to plan garden parties all summer.

Floral DIY Fascinator

Duchess Marisa, at your service!

Floral DIY Fascinator

Wedding Dress Recycle: Whole Lotta Ruffles

I recreated so many vintage wedding dresses to wear around my wedding and honeymoon and this one was one of my favorites!

Ruffled Wedding Dress - Before

Look at all these ruffles!!!

Ruffled Wedding Dress - Before 2

It feels oh, so, Marie Antoinette.

Kirsten Dunst as Marie Antoinette

Kirsten Dunst as Marie Antoinette

Look at those sleeves!

And that lace collar?! 

Ruffled Wedding Dress - Before 3

I have a fairly certain idea what's going to happen to those sleeves.

IMG_0501.JPG

But first, DYE!

IMG_1669.jpg

The dress went into a bath of emerald dye and came out a lovely lightish aqua color. This dress was fully polyester and I didn't use a poly-friendly dye just to get a more subtle shade. 

IMG_1980.jpg

I grabbed my seam ripper and got to town around those sleeves... The used to be attached...

Ruffled Wedding Dress - Dyed

I was OBSESSED with how the tiered ruffles turned out and just couldn't touch the skirt portion of the dress. I mean, hello new lewk!

IMG_3014.JPG

I'm obsessed with the way fuschia/hot pink goes with this aqua color, so I took some remnant tulle (YES, THAT'S TULLE AROUND MY WAIST!) and got myself a gorg rose to pose in front of this super chic door.

Ruffled Wedding Dress - After 2

Greens on yellows on pinks, oh my!

Ruffled Wedding Dress - After

When in such serious ruffles like these, you must find a hammock and swing!

This is most definitely on my favorites list. I couldn't have been more excited with how this turned out!

IMG_8051.jpg

17 Days Til I Do!

Hello friends! Sorry for the delay in the series - I've been abroad prepping for the wedding and well the wifi just wasn't strong enough to upload all the imagery. So I'm going to get these in where I can! Thank you all for your patience!

This dress was one of my faves!

NDAD - Day 17 - Vintage Wedding Dress

I used a portion of the dress on Day 25 to craft the super snazzy bag below but there was so much left to work with!

Day 25 - Before/After

I just loved the full skirt. 

NDAD - Day 17 - Vintage Wedding Dress 2

I had some ideas for this piece from the get go! 

NDAD - Day 17 - Vintage Wedding Dress

I wanted to remove all the appliques (which I did), dye it graphite (which I did) and hopefully wear it with any basic t-shirt or a short sleeved cashmere sweater to snazz it up! (which I did...NOT!)

Day 17 - Dye & DIY

Sadly post dye, the skirt ended up looking like the below! I realized when I removed the appliques, there was still portions of glue on the skirt where they were applied. They weren't just sewn on, they were also glued!

IMG_1656 2.JPG

So, what to do now? I still loved the idea of creating a skirt, but needed a different plan. Off to tie dyeing I went!

I took a kit with colors that would mesh well with the already dyed grey on the skirt. I was thinking black, blue and aqua would be the perfect match!

Day 17 - Dye DIY.png

I wet the skirt, rubber banded the skirt and then got to dyeing! (Little trick - take a baking pan and line it with a plastic trash bag to keep all the colors together and from getting all over the place!

Day 17 - Dye Process

When I was complete, my skirt looked like this!

IMG_1668.JPG

I let it sit overnight to fully saturate all the dyes...

IMG_1937.JPG

...then de-rubber banded it, washed it out with cold water until the colors stopped running and then let it hang dry.

The outcome...

IMG_2026.JPG

Pretty fantastic, right?

IMG_2030.JPG

I would never have gone the tie dye route if it weren't for the little snafu with the glue spots! I'm actually super thankful this little issue came up because the skirt is just awesome now!

Day 17 - After

And I still have plans to wear it the same way! T shirt and short sleeved cashmere sweater (when it gets cold) here I come!

NDAD - Day 17 - Upcycled Wedding Dress

Such a fun upcycle here...can't wait to mix and match this skirt with everything!

NDAD - Day 17 - Before/After

17 days til I do!