holiday DIY

DIY Holiday Poncho

This is a sponsored conversation written by me on behalf of JOANN. The opinions and text are all mine.

The holidays are right around the corner which means there's a whole lot of travel (who else is braving the airports like I am this year?), family (my mom is already talking about day trips), food (banana pudding is going to be in FULL EFFECT - hello NC!) and warm and cozy outfits (get ready for this project) going on!

To prep for some time away from LA to watch sleigh bells ring in Charlotte, I thought a poncho (see "warm and cozy" above :) ) would be just the thing to wear on Christmas.

I went fabric scouring at JOANN and came across some deliciously plaid knits. I wanted to cozy up on this shelf with these fabrics, not gonna lie :)

Plaiditudes

How perfectly plaid is this?

Plaid Fabric #1

BUT WAIT. The best part - look at that reversible fabric.

Plaid Fabric #3

I just went from making a holiday poncho to a holiday REVERSIBLE poncho. I'm going to get a TON of wear out of this puppy.

IMG_4611 - Before 1 (1).JPG

This project is super easy and can really be crafted by anyone. Sewer, non-sewer - there's no judgment here!

To start, you'll need a yard and a half of fabric. I got two yards and then trimmed a portion off that I think is going to become a scarf in 5, 4, 3, 2…

Steps - Poncho.png

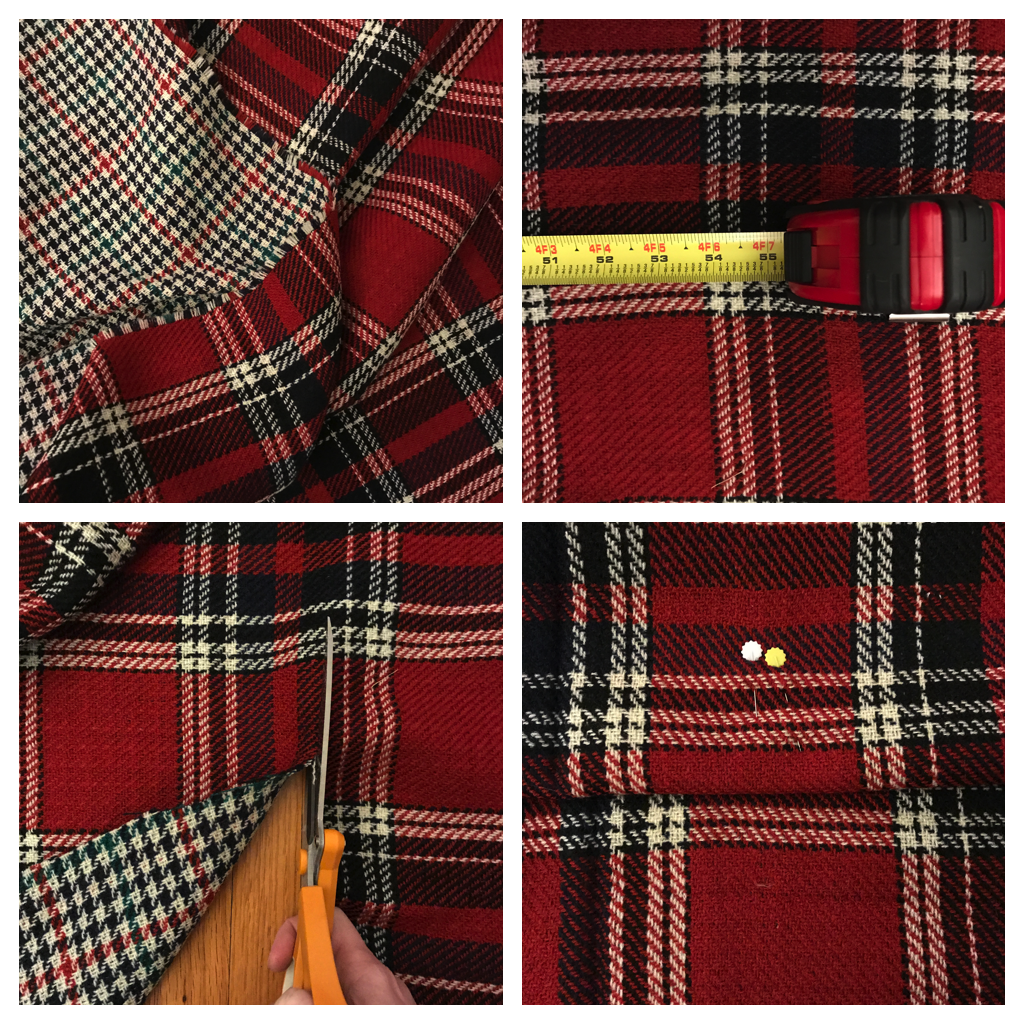
Fold your fabric in half lengthwise and mark the center of your fabric at the crease on the top of the fabric with some pins. This is where the back of your neck will be touching the fabric!

Next trim a straight line on the top layer of fabric. (Remember the fabric is folded and we only want the line to be cut on the top layer.) Trim from the bottom up to where your pins are at the crease.

Steps 2 - Poncho.png

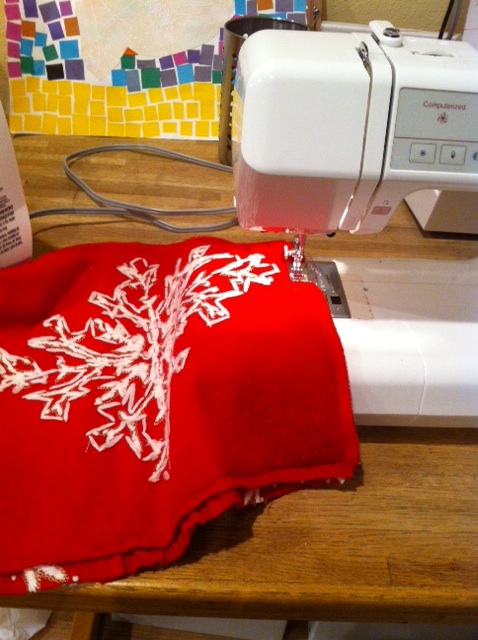
You're almost there! See how much fray is at the bottom of the fabric? (PS. THAT FRAY CRAY!)

An easy straight stitch around all the edges of your fabric will help prevent more fraying if you're using a woven fabric.

Steps 3 - Poncho.png

For those non-sewers out there, go for a fleece or flannel which won't fray and require a stitch! Some say that's cheating? I say that's being successful at managing time :)

VOILA. New poncho out in action.

Poncho After 2

It's seasonal, it's reversible, and it's just so easy to craft!

Poncho - After

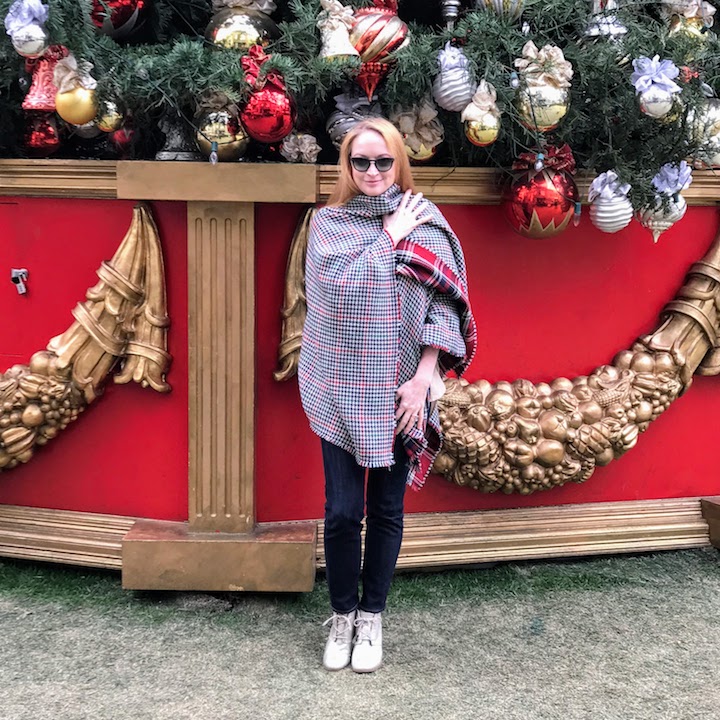
I'm going to be wearing my Christmas poncho wayyyyyyy after this tree is taken down!

Poncho After 4

And there's nothing like photo shoot outtakes...

Poncho Outtakes

...I was in the way of all the kiddos trying to get tree pics!

Poncho After 4

I made a bunch of friends in my new poncho! 

Holiday Bestie

One poncho, endless poncho-bilities. YOU GUYS. Come on.

Before/After Poncho

4th of July Tie Dye! (One shirt, two ways!)

I worked with Rit Dye on this project and my goal was to get an outfit ready to wear for this holiday weekend! I love July 4th and always need to have a patriotic outfit (as well as some nails) to help with the celebration! Start with a basic cotton t-shirt (grab one from your collection!), a handful of rubber bands, and Scarlet and Royal Blue Rit Dye.

Rit Dye - New Dress A Day - tie dye

Add both shades of dye into plastic bottles - this will make it easier to apply dye to the t-shirt in specific areas.

Rit Dye - New Dress A Day - tie dye

Fold or twist the shirt to prep for tie dyeing! I went with a horizontal accordion fold that would give me a vertical stripe with the dyes. I folded, rubber banded sections, and started to apply the dye on each side of the rubber bands, alternating colors.

Rit Dye - New Dress A Day - tie dye

Let the shirt soak and dry (I waited about 6 hours), remove the rubber bands, and unfold the shirt. Rinse the shirt under cold water until the dye runs clear. Toss the tee into the dryer until it's fully dry.

Rit Dye - New Dress A Day - tie dye

The shirt is complete! With some sleeve rolls, it was time to ring in the 4th á la Bruce Springsteen!!

Rit Dye - New Dress A Day - tie dye

I couldn't just stop there. (This step is totally optional. If you love the tee as is, stop once the shirt has been washed/dried.) I loved how the dye turned out, but I like to cut up my tees before actually wearing them. I removed the ribbed neck, the sleeves, and cut a four-inch slit at the center-bottom of the back of the shirt

Rit Dye - New Dress A Day - tie dye

New, refashioned shirt in just a few quick snippy steps!

Rit Dye - New Dress A Day - tie dye

Here's a close up of that knotted back...

Rit Dye - New Dress A Day - tie dye

I'm ready to celebrate 'Merica in my red, white, and blue!! Nothing like some tie dye to feel patriotic!

Rit Dye - New Dress A Day - tie dye

Cue The Star Spangled Banner!!

Rit Dye - New Dress A Day - tie dye

Happy 4th of July, friends!!!

Julia's NDAD Creation: Holiday Edition

How many of you out there have holiday attire that needs a little facelift?  The lovely Julia submitted a piece that turned out SO well and her project is going to give you a bit of inspiration on tweaking those pieces.  Check it out... I got crafty last night with a Coldwater Creek vest I found in a thrift shop and loved...

New Dress A Day - DIY - Ugly Holiday Vest - thrift store

...but ultimately would never wear.

New Dress A Day - DIY - Ugly Holiday Vest - thrift store

Snowflake vest!! What will Julia craft this into??

I cut out the lovely snowflake motif for the front...

New Dress A Day - DIY - Ugly Holiday Vest - thrift store

...and used the vest's zipper for the back...

New Dress A Day - DIY - Ugly Holiday Vest - Holiday Pillow

...of what would become a cozy holiday pillow! 

New Dress A Day - DIY - Ugly Holiday Vest - Holiday Pillow

It sits so pretty on Julia's couch!!

New Dress A Day - DIY - Ugly Holiday Vest - Holiday Pillow

Thanks for all your inspirational remakes of 2013. Happy Holidays and may 2014 bring you joy and opportunity!

Thank you so much for submitting your piece, Julia!!  I absolutely love how the pillow turned out.  From a vest that you'd never actually wear to a pillow that you'd show the world, you rocked this remake!  It's so lovely for winter - I hope that you keep it out past the new year!!  Cheers to 2014, J! xo