DIY: A Christmas Story Inspired Ugly Sweatshirt 🎄👢🛋

This is my favorite time of year! The smells, the sounds, the outfits! I have a slew of vintage sweaters that are coming out for the holidays, but what to wear for the office ugly sweater party?? I’m going to DIY the ultimate piece inspired by A Christmas Story that’s on repeat in my household all Christmas day!

I grew up watching A Christmas Story and there are so many iconic scenes (the tongue on the lamp post still gives me agida!) but my favorite involves the leg lamp that Ralphie’s dad orders! I think I was obsessed as a kid with this lamp purely because it was a leg with a stiletto! But I’m using the leg as inspiration for my project and need to score all the supplies to recreate from JOANN.

Joann - DEC - Supplies.JPG

I grabbed a red sweatshirt (ugly sweatshirt party sounds about right!), felt, fringe, mesh fabric, fabric glue, velvet ribbon, iron-on lettering, and an LED light necklace to get this project rolling.

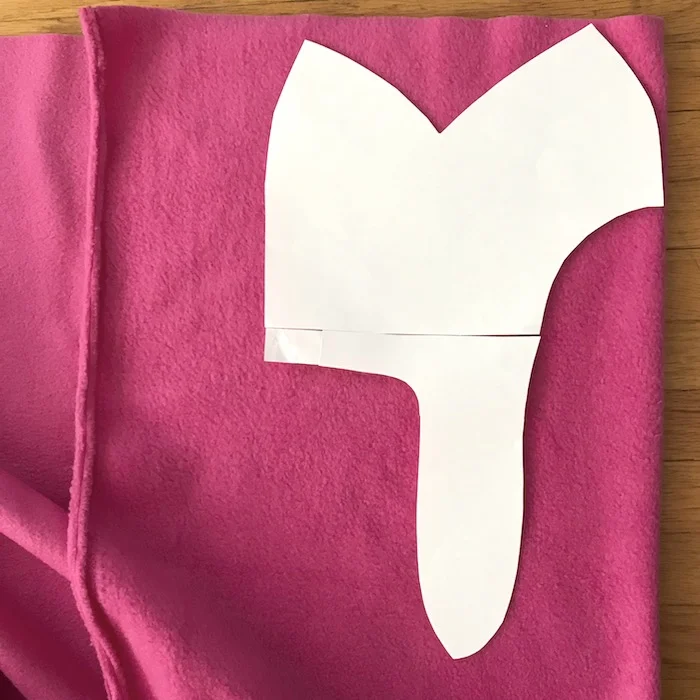
I started with a template of the leg lamp I found online.

Joann - DEC - Leg Lamp Drawing.JPG

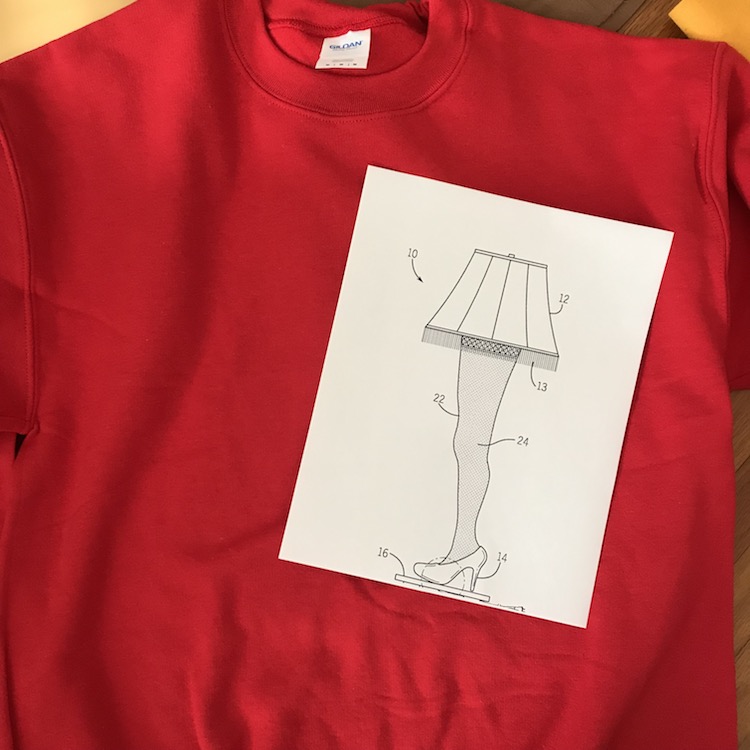
I’m not the best freehand artist, so using a pattern was the best move for me! I trimmed it into three main portions - the shoe, the leg, and the lampshade - that will be traced onto the coordinating fabrics.  

Joann - DEC - Trimmed Leg Lamp Drawing.JPG

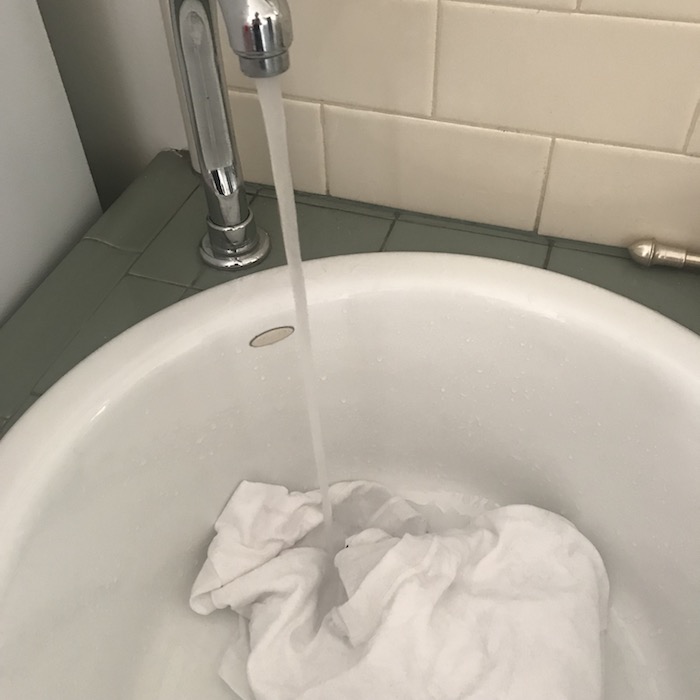
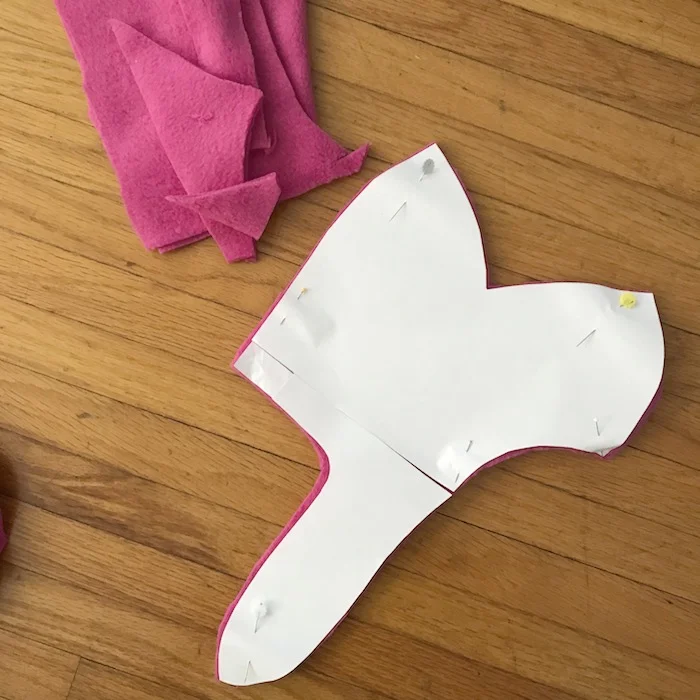
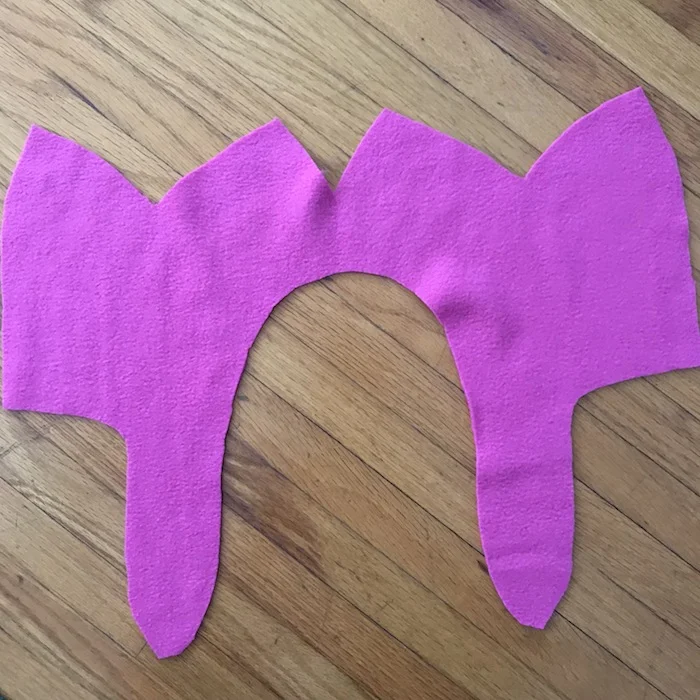
I started with the leg and used a light beige felt! (Felt is used for all three portions of the lamp just because it’s a bit sturdier.) I traced then trimmed out my fabric.

Joann - DEC - Legs!.JPG
Joann - DEC - Legs Trimmed.JPG

I moved onto the shoe next! I grabbed adhesive-backed black felt for this piece and traced and trimmed.

Joann - DEC - Shoe Tracing.JPG

The leg was cut out, but it was missing a very important part...the fishnet tights! I found a mesh fabric that I wanted to place on top of the felt to give it a fishnet vibe. I placed the mesh on top of the felt and then trimmed and tucked the edges. Next came applying it to the sweatshirt along with the shoe which I affixed with fabric glue.

Joann - DEC - Fishnets & Shoes.png

Next came the lamp! I cut out a basic trapezoid-esque shape and wanted to give the shade a bit of a 3D feel so I took some matching velvet ribbon and glued down three lines to make it look like boning of sorts.  

Joann - DEC - Lamp Trim Gluing.JPG

With the leg and shoe attached, it was time to move the lampshade to the sweatshirt! And the lamp needs her fringe, so black fringe was added to the bottom of the lamp right off the bat. BUT, this is the coolest part of the sweatshirt. I wanted the lamp to light up, so I put some LED lights from a cute light up necklace right under the felt lampshade! This was the only portion of the sweatshirt that I sewed.

I started stitching down the left side of the felt piece going counterclockwise around the shade. As I stitched, I kept molding the lights in areas I wanted them to shine (and pushed them into place) as I went around the edges.

Joann - DEC - Lamp Assembly.png

Once I was happy with the light placement, I made my way around the rest of the shade and then made little stitches on the ribbon in the center to keep the lights in place. There’s a push button to turn the lights on that I placed at the top of the shade for easy access.

And there’s only one more piece to the sweatshirt puzzle to finish! A box with the letters FRAGILE (“fra gee lay”) on it, just like the one the leg came in, in the movie. I bought some brown corduroy and trimmed seven rectangular panels to form a box and layered two on each edge.

Joann - DEC - Fragile Box.png

I took small iron-on letters and placed them on a diagonal to cover the box and ironed in place.

The final bit of flare? Some “packing material” for the box which is just pillow stuffing. Stitch or glue...whatever tickles your fancy!

Joann - DEC - Fragile Box Stuffing.JPG

The final look was complete!

Joann - DEC - After Outside 3.jpg

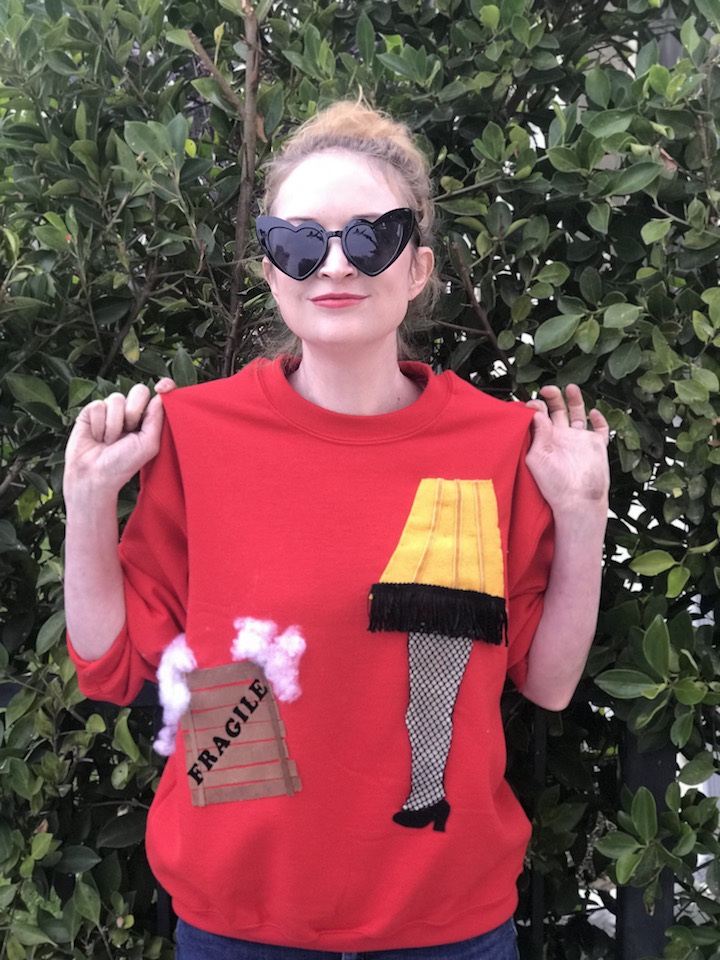
I am SO in love with how this turned out!

Joann - DEC - After Inside 3 copy.jpg

The perfect piece to wear to my ugly sweater party!

Joann - DEC - After Outside.JPG

It’s LIT!!!! (Sorry, couldn’t help it! 😂)

Joann - DEC - After with Lights On.JPG

I promise you won’t shoot your eye out!

Joann - DEC - After Inside 4 copy.jpg

I think after I’m done wearing this sweatshirt, I’m just going to hang it on the fireplace because “it’s a major award!”

Joann - DEC - After Inside Lights 2 copy.jpg

You’re guaranteed to win Christmas with this interactive holiday sweater!

I “double dog dare you” that you won’t have the most fun wearing this!!

Joann - DEC - After Inside 5 copy.jpg
Joann - DEC - After Inside Lights copy.jpg

Happy Holidays!!

This post was sponsored by JOANN. 😃

DIY: Riverdale Inspired Embellished Collar

I’m a bit of a TV addict (who else is a Netflix & Chill-er??) but when I watch, it’s not just for entertainment, it’s also for inspiration! I’m constantly getting outfit ideas from classic movies and TV series and this project is inspired by one of my faves...RIVERDALE! I’m obsessed with Betty’s embellished collars so I had to make one of my own. I snagged all my beads and rhinestones from JOANN to help get my DIY off the ground.

(Lili Reinhard as Betty - ℅ CW/Riverdale)

(Lili Reinhard as Betty - ℅ CW/Riverdale)

My white button down shirt BEFORE

My white button down shirt BEFORE

I snagged a thrifted white blouse as the base for my Betty lookalike and gathered all my shiny materials! To match Betty’s collar (which is Ted Baker) I needed some sew-on rhinestones, bugle beads, and thread to stitch them to the collar.

Embellished Collar Supplies

I opened all the bags of rhinestones to pull out the right stone sizes and colors to match Betty’s collar. Some round clear stones mixed with some pink ones were going to do the trick.

Rhinestones

I had my computer open the entire time using the images I found of the collared top to guide me in my rhinestone and bead placement!

Computer Close Up of Rhinestones

Once I knew where everything was going to go, I began stitching the clear stones to the collar first. I threaded my needle with white thread, tied a knot at one end and went in and out of the holes in the rhinestones securing them to the collar.

White Collar Shirt with Rhinestones
Sewing Rhinestones to Collar

PS - I purchased the sew-on rhinestones to hand stitch the stones in place, however if you’re less inclined to use a needle and thread and want to craft your collar faster, regular rhinestones (without the holes) and some fabric glue will also do the trick!

With the clear stones stitched down…

Rhinestone Collar

I began to add the pink stones and silver bugle beads next until my collar was matching Betty’s!

Rhinestone Collar

Wanting to really match my Riverdale fave, I added a thin pink sweater on top of my blouse to complete the look.

Riverdale Betty Embellished Collar DIY

I feel so studious, yet chic in this combo!

Riverdale Betty Embellished Collar DIY

Betty isn’t the only embellished collar-wearer!

Riverdale Betty Embellished Collar DIY

Veronica has killed this look as well.

(Camila Mendes as Veronica - ℅ CW/Riverdale)

(Camila Mendes as Veronica - ℅ CW/Riverdale)

An easy adjustment to make your look more Veronica chic, DIY a pearl necklace to lie right below the collar!

Embellished Collar Supplies

Taking some pearl beads, elastic, and a longer pearl charm, string your pearls, knot them, then use a ready made pearl charm or make your own with jewelry pliers and a headpin.

DIY Pearl Necklace

Since Veronica has a darker vibe, a mulberry-colored sweater was put on to really channel her aesthetic.

Riverdale Veronica Embellished Collar DIY

I feel like I totally belong in Riverdale!

Riverdale Veronica Embellished Collar DIY

Whether you’re a Betty or a Veronica...

(Betty/Veronica - ℅ CW/Riverdale)

(Betty/Veronica - ℅ CW/Riverdale)

...it’s easy to join the club!

DIY: Halloween Bob's Burgers Louise Belcher Costume

October is here! It’s my favorite month because of two things...my birthday falls right in the middle and HALLOWEEN! Costumes and costume making are up there on my favorites list and I’ve been planning this year’s ‘stume since I finished binging a certain show recently - Bob’s Burgers! Louise Belcher costume, coming right up! I snagged all my supplies from JOANN, including this XL tee that’s going to be the base of the costume!

Louise Belcher c/o Fox/Bob’s Burgers

Louise Belcher c/o Fox/Bob’s Burgers

OCT - Before White T.jpeg

On top of the shirt, I needed some wire and pink fleece for the ears as well as some green dye to match Louise’s dress color!

Louise Belcher Costume - Supplies

It’s dye time! I prepped my t-shirt and submersed it in water before tossing it into the washing machine and adding my dye.

Louise Belcher Costume - Apple Green Dye

The pre-wash wetting maneuver will help ensure the color stays bold and even!

Louise Belcher Costume - Wet T Shirt

While the shirt was cycling in the dye, I moved onto the hat portion of the costume. To create a hat, you can make one from scratch like I did OR you can always buy a pink beanie base and then add ears if you’re on a time crunch. I feel like Halloween always ends up arriving so quickly, so if you don’t have enough prep time, there are ways to still make it work!

Louise Belcher Costume - pattern

I crafted a pattern similar to one based off of a basic beanie, just adding length on each side to match Louise’s flaps. The circumference around my head was 20 inches and 13 inches from my head to my shoulders.


Louise Belcher Costume - Louise pattern trimmed

(The pattern is for one side of the hat, as I’ll be cutting out two layers of fleece at once to double the size.) Hello soon to be hat!

Louise Belcher Costume - cut material for pattern

Next on the agenda...the ears and the little rectangular bits that go at the end of each flap. I made freehand patterns and used remnant fleece to create. I trimmed out four of each ear and rectangular piece (2/piece) and pinned them together.

Louise Belcher Costume - Pinned patterns

With everything pinned, it was time to stitch! First came the ears...

Louise Belcher costume - Ears Collage

Then came the flap ends …

Louise Belcher costume - flap ends.JPG

To help make the ears stand up, I added wire to the interior of both ears. Little trick...use hot glue to keep the wire in place!

Louise Belcher costume - ears and wire

Next it was time to stitch the base of the hat together. The front and back of the hat (where it was pinned) was stitched first, leaving the top of the hat open.

Louise Belcher costume - hat stitching.JPG

Here’s where the ears come in! I placed the ears on the right side of the fabric facing down and then stitched them together. This will close up the open portion of the hat while setting the ears in place!


Louise Belcher costume - hat ears

The little rectangular bits were stitched to the end of the flaps next, getting this hat ready to go

Louise Belcher costume - final hat

The final step before being fully costume ready was the t-shirt! It was dyed perfectly and all it needed was a quick take-in! I pinned and then stitched it to make it a smidge smaller.

Louise Belcher costume - green T shirt

And with the help of a black bob wig, my Louise Belcher costume was complete!

Louise Belcher costume - Louise After Look

I just love how the hat looks!

Louise Belcher costume - Louise After Look

I mean, we’re twins!.

Louise Belcher costume - Louise After with Louise

It’s just such a fun costume to wear!

Louise Belcher costume - Louise After Look

Wearing a wig is always add an extra element of mystique to any costume!

Louise Belcher DIY Costume - Louise After Look

When something is this enjoyable (and pretty simple to DIY) - that calls for a celebration!

Louise Belcher Costume

Happy Halloween!!!