DIY Holiday Poncho

This is a sponsored conversation written by me on behalf of JOANN. The opinions and text are all mine.

The holidays are right around the corner which means there's a whole lot of travel (who else is braving the airports like I am this year?), family (my mom is already talking about day trips), food (banana pudding is going to be in FULL EFFECT - hello NC!) and warm and cozy outfits (get ready for this project) going on!

To prep for some time away from LA to watch sleigh bells ring in Charlotte, I thought a poncho (see "warm and cozy" above :) ) would be just the thing to wear on Christmas.

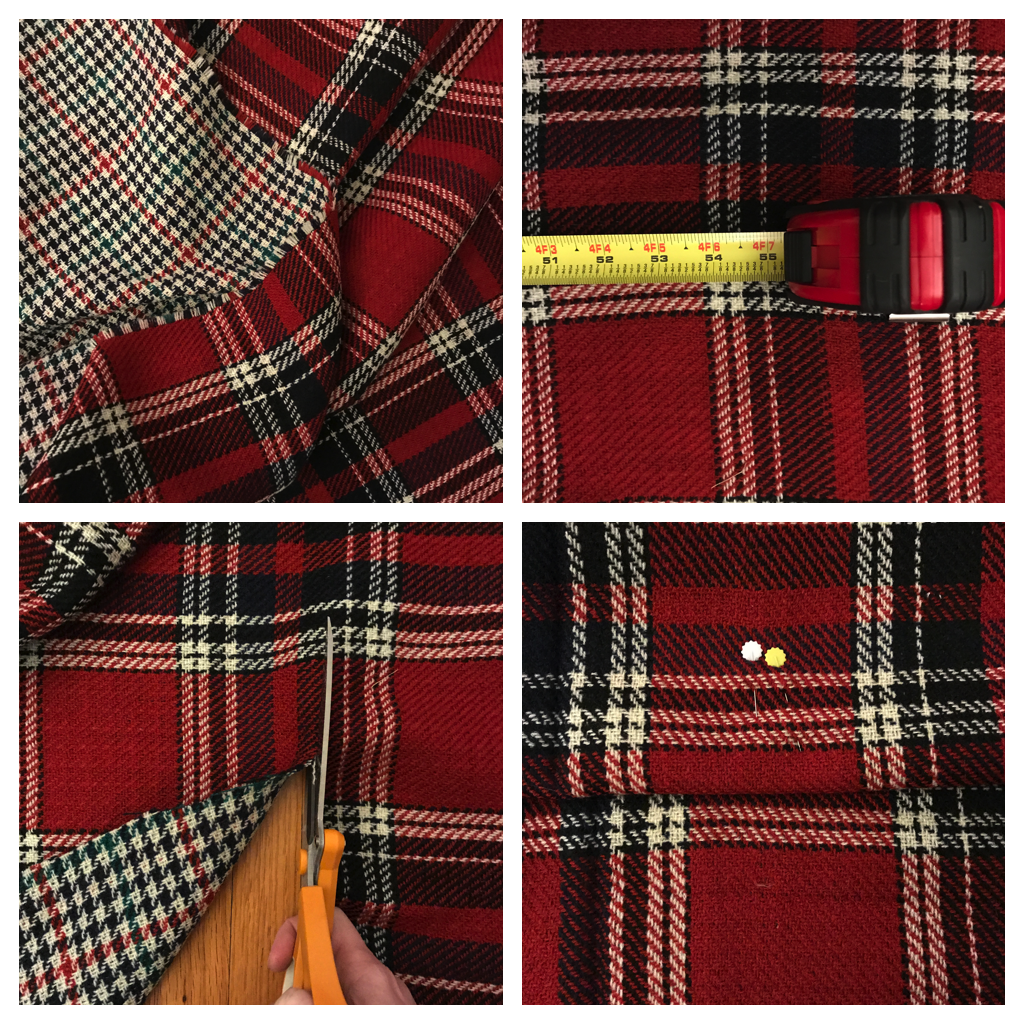
I went fabric scouring at JOANN and came across some deliciously plaid knits. I wanted to cozy up on this shelf with these fabrics, not gonna lie :)

Plaiditudes

How perfectly plaid is this?

Plaid Fabric #1

BUT WAIT. The best part - look at that reversible fabric.

Plaid Fabric #3

I just went from making a holiday poncho to a holiday REVERSIBLE poncho. I'm going to get a TON of wear out of this puppy.

IMG_4611 - Before 1 (1).JPG

This project is super easy and can really be crafted by anyone. Sewer, non-sewer - there's no judgment here!

To start, you'll need a yard and a half of fabric. I got two yards and then trimmed a portion off that I think is going to become a scarf in 5, 4, 3, 2…

Steps - Poncho.png

Fold your fabric in half lengthwise and mark the center of your fabric at the crease on the top of the fabric with some pins. This is where the back of your neck will be touching the fabric!

Next trim a straight line on the top layer of fabric. (Remember the fabric is folded and we only want the line to be cut on the top layer.) Trim from the bottom up to where your pins are at the crease.

Steps 2 - Poncho.png

You're almost there! See how much fray is at the bottom of the fabric? (PS. THAT FRAY CRAY!)

An easy straight stitch around all the edges of your fabric will help prevent more fraying if you're using a woven fabric.

Steps 3 - Poncho.png

For those non-sewers out there, go for a fleece or flannel which won't fray and require a stitch! Some say that's cheating? I say that's being successful at managing time :)

VOILA. New poncho out in action.

Poncho After 2

It's seasonal, it's reversible, and it's just so easy to craft!

Poncho - After

I'm going to be wearing my Christmas poncho wayyyyyyy after this tree is taken down!

Poncho After 4

And there's nothing like photo shoot outtakes...

Poncho Outtakes

...I was in the way of all the kiddos trying to get tree pics!

Poncho After 4

I made a bunch of friends in my new poncho! 

Holiday Bestie

One poncho, endless poncho-bilities. YOU GUYS. Come on.

Before/After Poncho

17 Days Til I Do!

Hello friends! Sorry for the delay in the series - I've been abroad prepping for the wedding and well the wifi just wasn't strong enough to upload all the imagery. So I'm going to get these in where I can! Thank you all for your patience!

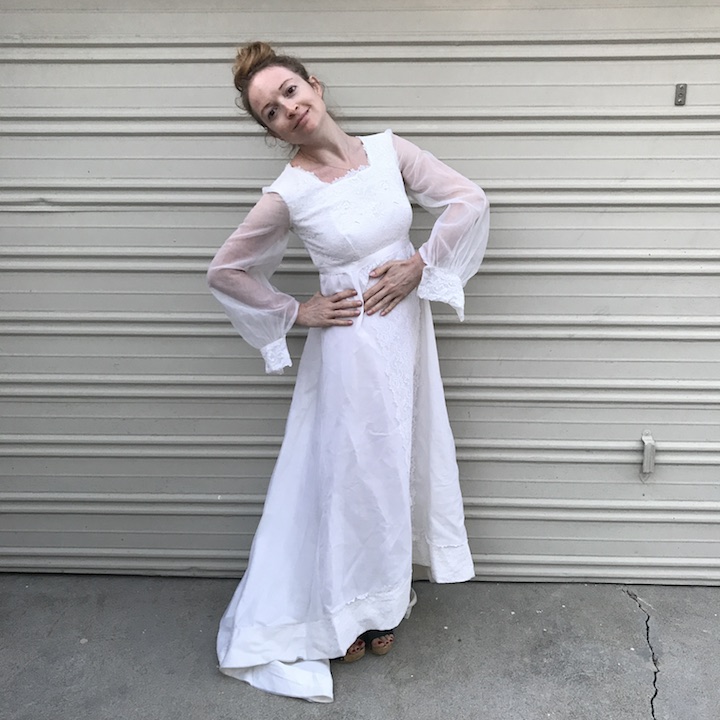
This dress was one of my faves!

NDAD - Day 17 - Vintage Wedding Dress

I used a portion of the dress on Day 25 to craft the super snazzy bag below but there was so much left to work with!

Day 25 - Before/After

I just loved the full skirt. 

NDAD - Day 17 - Vintage Wedding Dress 2

I had some ideas for this piece from the get go! 

NDAD - Day 17 - Vintage Wedding Dress

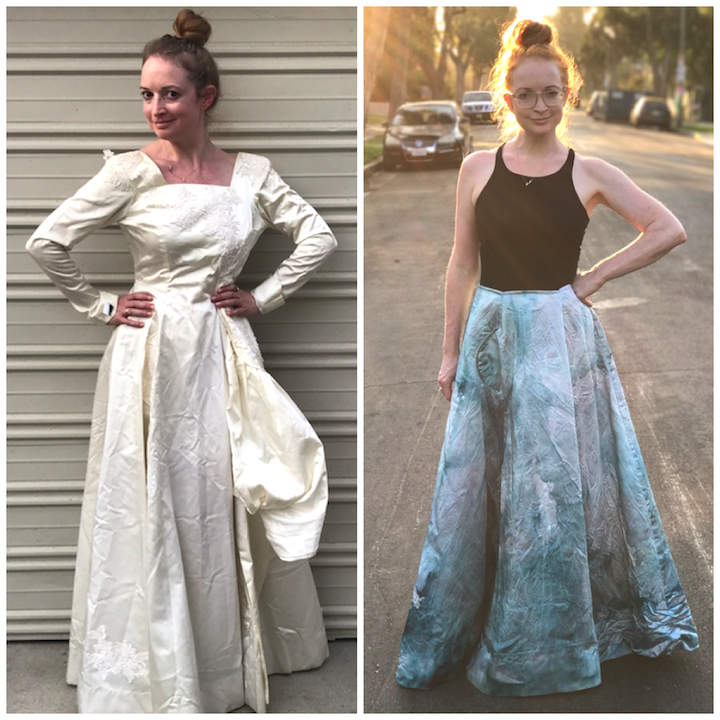
I wanted to remove all the appliques (which I did), dye it graphite (which I did) and hopefully wear it with any basic t-shirt or a short sleeved cashmere sweater to snazz it up! (which I did...NOT!)

Day 17 - Dye & DIY

Sadly post dye, the skirt ended up looking like the below! I realized when I removed the appliques, there was still portions of glue on the skirt where they were applied. They weren't just sewn on, they were also glued!

IMG_1656 2.JPG

So, what to do now? I still loved the idea of creating a skirt, but needed a different plan. Off to tie dyeing I went!

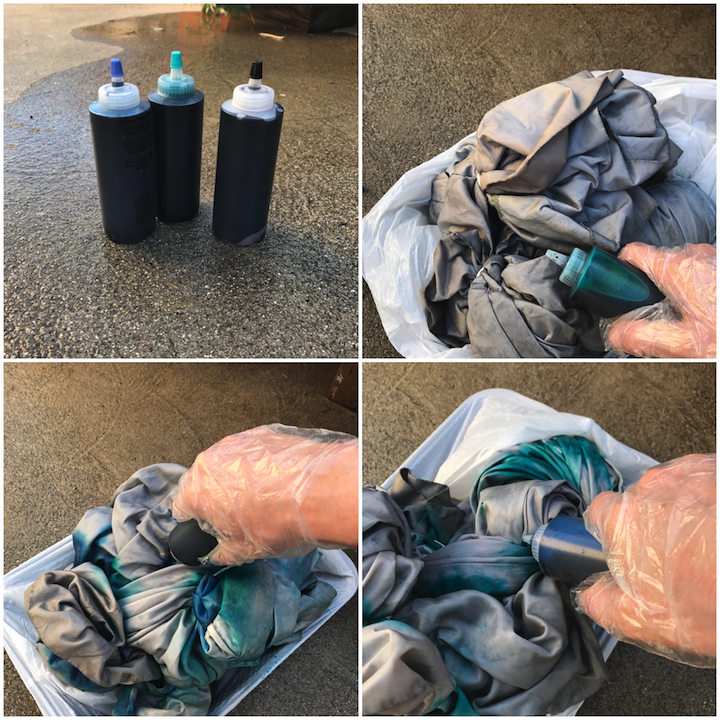
I took a kit with colors that would mesh well with the already dyed grey on the skirt. I was thinking black, blue and aqua would be the perfect match!

Day 17 - Dye DIY.png

I wet the skirt, rubber banded the skirt and then got to dyeing! (Little trick - take a baking pan and line it with a plastic trash bag to keep all the colors together and from getting all over the place!

Day 17 - Dye Process

When I was complete, my skirt looked like this!

IMG_1668.JPG

I let it sit overnight to fully saturate all the dyes...

IMG_1937.JPG

...then de-rubber banded it, washed it out with cold water until the colors stopped running and then let it hang dry.

The outcome...

IMG_2026.JPG

Pretty fantastic, right?

IMG_2030.JPG

I would never have gone the tie dye route if it weren't for the little snafu with the glue spots! I'm actually super thankful this little issue came up because the skirt is just awesome now!

Day 17 - After

And I still have plans to wear it the same way! T shirt and short sleeved cashmere sweater (when it gets cold) here I come!

NDAD - Day 17 - Upcycled Wedding Dress

Such a fun upcycle here...can't wait to mix and match this skirt with everything!

NDAD - Day 17 - Before/After

17 days til I do!

18 Days Til I Do!

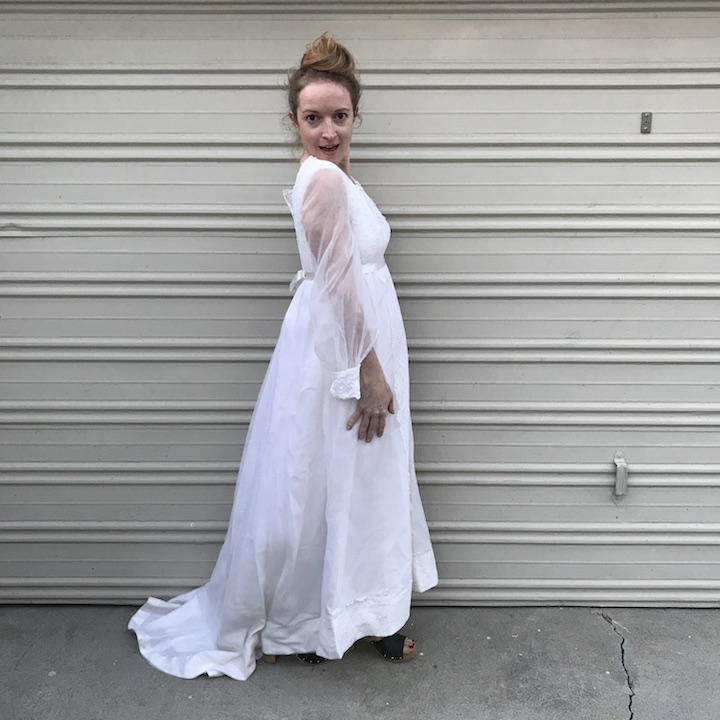
18 days! Today's dress was super soft and flowy!

IMG_1685.JPG

The cuffs didn't snap for me...

IMG_1687.JPG

...because they were too tight, but we can fix that!

NDAD - Day 18 - Vintage Wedding Dress 2

The neckline was fabulous and you might not be able to see so well in this shot, but there's a few spots of sequin detailing.

NDAD - Day 18 - Vintage Wedding Dress 3

There's the detailing!! I started with some dye, Navy Blue this time!

IMG_1738.JPG

When the dress came out, it was more of a bluish / lavender color - not as dark as I was planning for, BUT it still turned out so pretty!

I started off with some trimming! I cut the length a bit to create more of a short and summery dress.

NDAD - Day 18 - Vintage Wedding Dress Trimming Length

After pinning the bottom of the dress to prep for a new seam, I moved onto the rest of the piece. There was a ribbon that was falling apart sewn to the back of the dress that I removed along with the sleeves!

NDAD - Day 18 - Vintage Wedding Dress Sleeve Removing & Sewing

I just loved the lace detail and felt that the sleeves didn't totally do it justice. Then it was time to sew everything together!

Voila, new dress is done!

NDAD - Day 18 - Upcycled Vintage Wedding Dress

I just love how this turned out. The lace detail down the front pops now!

NDAD - Day 18 - Upcycled Vintage Wedding Dress

My ring matches this dress pretty awesomely too! (Thanks to my fiancé for calling that out to my attention and taking this lovely shot!)

Upcycled Vintage Wedding Dress

The dress is so much lighter feeling and something that I would have bought off the rack. I love how the neckline is shaped the most!

NDAD - Day 18 - Upcycled Vintage Wedding Dress 2

We were off to one of our last dinner date nights before the wedding and the lovely servers and team at our favorite Italian restaurant treated us to some cannolis. 

NDAD - Day 18 - Upcycled Vintage Wedding Dress Cannolis

I was obsessed with "Congratulations" written on the plate and then those cannolis...❤️ ❤️❤️ As a kid my favorite cake filling was cannoli! We used to go to this Italian bakery in my town for birthdays growing up and it's still one of my favorites! 

NDAD - Day 18 - Upcycled Vintage Wedding Dress Wine

I also brought a leather jacket to wear on top of my dress for when it got a bit chillier later on in the evening. I think this is a super fun way to give this soft look a little edge. 

NDAD - Day 18 - Upcycled Vintage Wedding Dress with Leather Jacket

I just love the color - another one down! 

Day 18 - Before:After.png

18 days til I do!