Remake: Floral Pleated Dress Part II

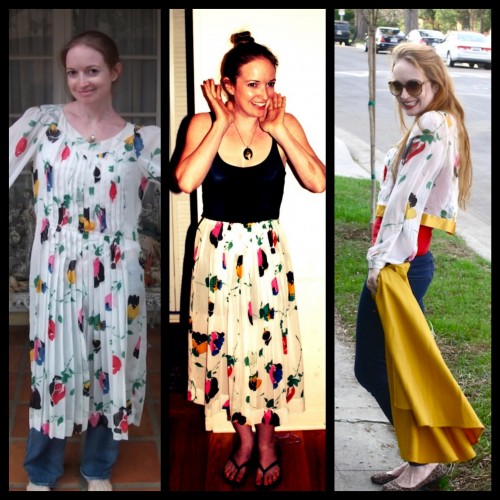
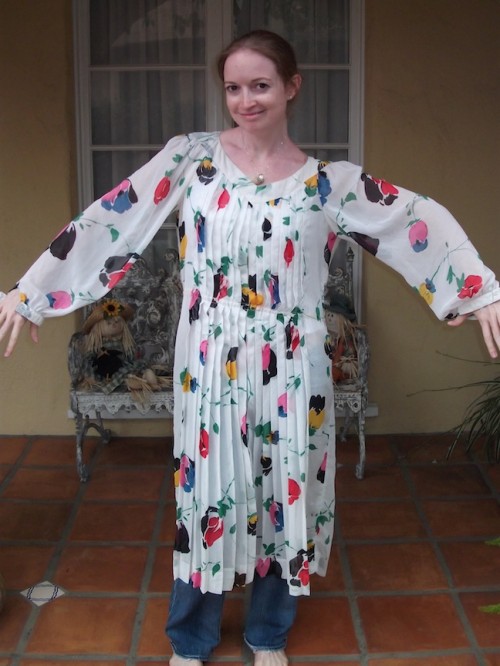
Today's piece is one that I've used already!!  Back on July 12, 2012, I made this sheer-ish crepe dress... New Dress A Day - DIY - Floral Sheer Dress - Vintage

...into this lovely skirt!  (For a full post refresher, click HERE!)

New Dress A Day - DIY - Floral Sheer Dress - Vintage

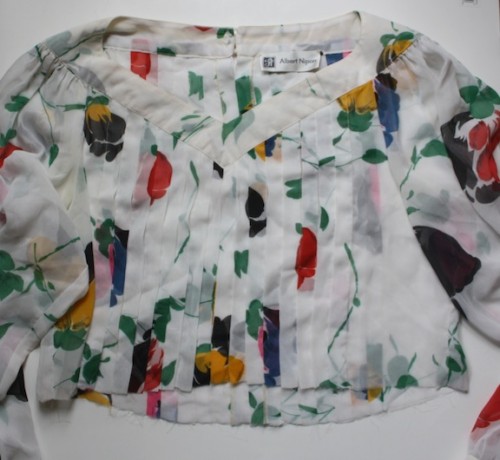
I was left with this top portion...

New Dress A Day - DIY - Floral Sheer Dress - Vintage

...that I finally got around to working on today!  I love playing around with the leftovers and this piece is finally seeing its sequel today, a full year and a half later!  I mean, totally typical for sequels.  The Hunger Games and I were on a similar release track :)

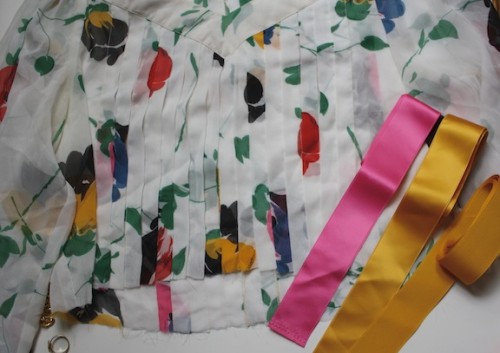
I'm actually keeping it as a crop top. I know, I know (SHOCKER), who knew I'd be into crop tops again post-1995??  Not a big fan of midriff showing, but I had plans.  I pulled a few options out of my ribbon stash in colors that matched the flowers on the piece...

New Dress A Day - DIY - Floral Sheer Dress - Vintage

...and decided that I would line the edge of the top with one of them.  Not only will the ribbon hide the frayed edging, it'll bring out more of the color.  I went with the satin mustard shade...

New Dress A Day - DIY - Floral Sheer Dress - Vintage

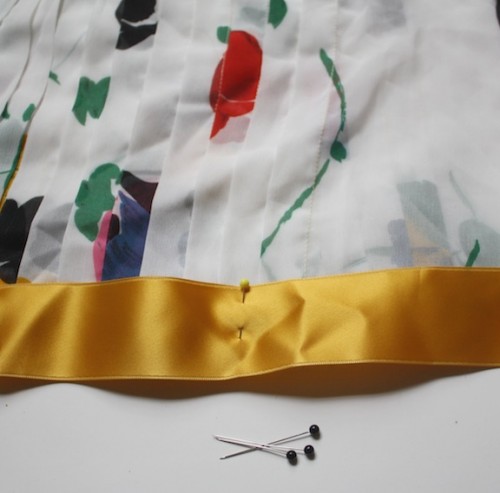
...and pinned the trim around the bottom of the shirt.

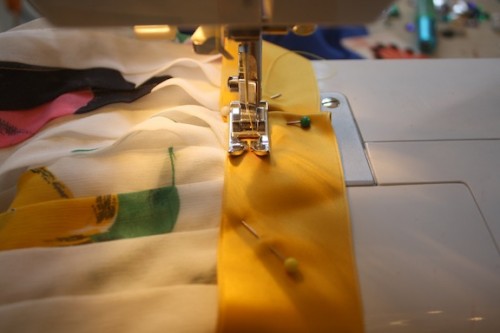
I stitched it in place...

New Dress A Day - DIY - Floral Sheer Dress - Vintage

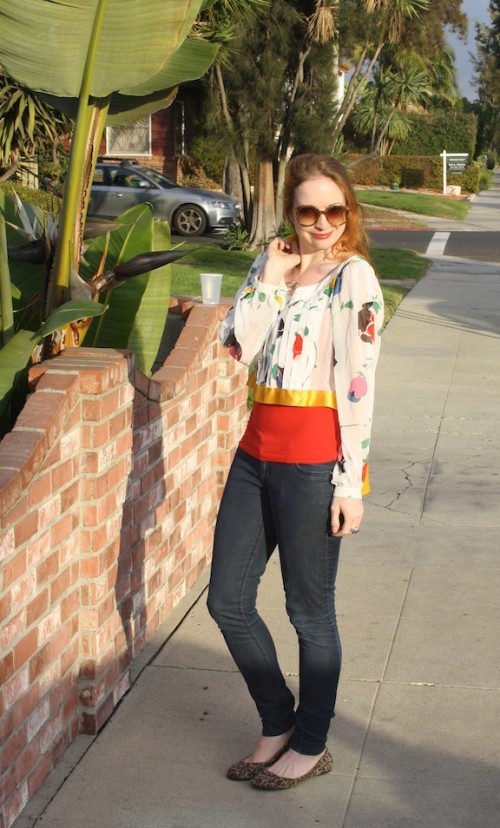
...and had a chic new top to wear!!

New Dress A Day - DIY - Floral Sheer Dress - Vintage

I paired it with a red camisole underneath to A, make me less self-conscious about the cropped nature and B, to help with the sheerness.

New Dress A Day - DIY - Floral Sheer Dress - Vintage

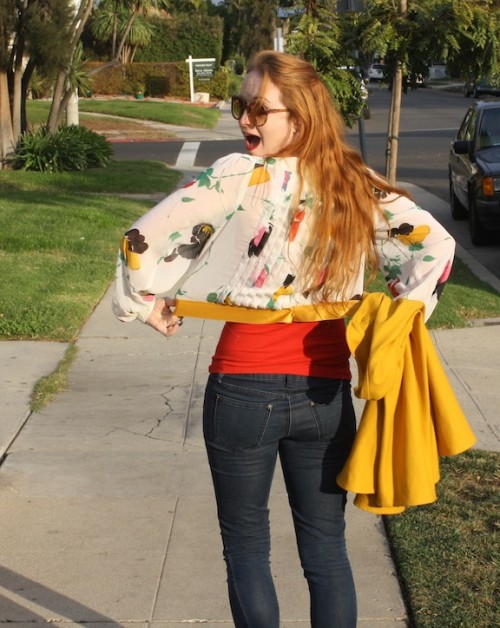
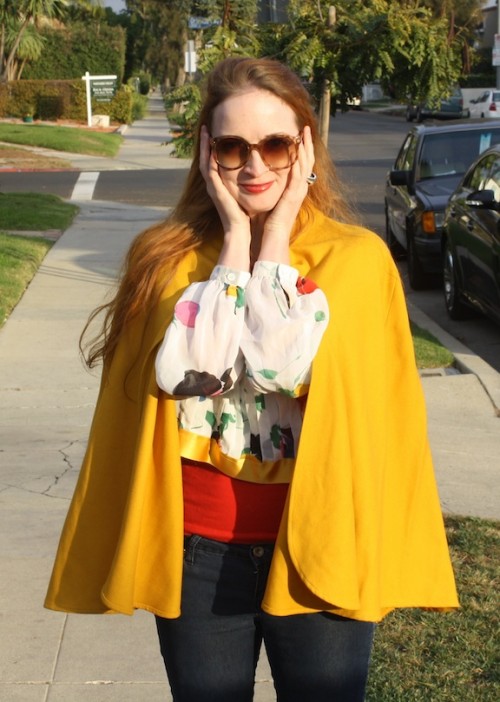
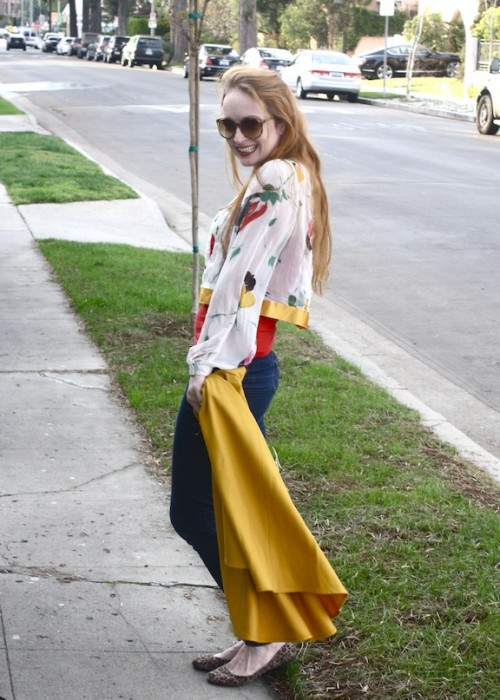
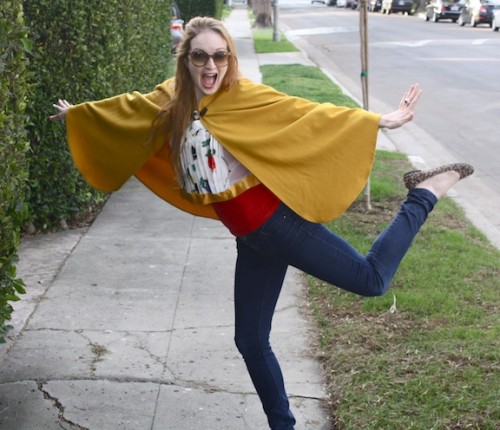
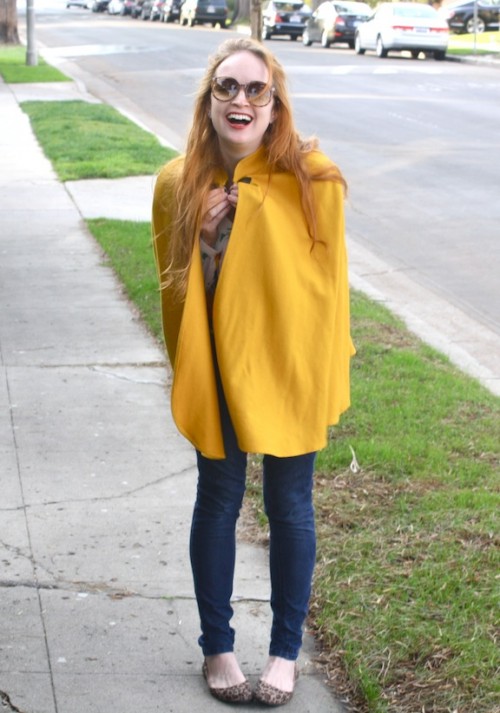
A pair of dark Forever 21 skinnies, my Target leopard flats (PS - they're on sale here for $12 now!! I think I might grab a backup pair to wear when these are totally worn out) and a vintage Harve Bernard mustard cape (best purchase ever) rounded out the ensemble.

New Dress A Day - DIY - Floral Sheer Dress - Vintage

I love how light and floaty the top is - it's really such a cute piece to toss on top of anything.  Hey gym tank...guess what's going on top of you to hide those not so cute spots??

New Dress A Day - DIY - Floral Sheer Dress - Vintage

I finally just saw The Incredibles (I mean, how did I miss it for 10 years??) and have only been pretending to be a super hero for the past few days.

New Dress A Day - DIY - Floral Sheer Dress - Vintage

I know I'm in a cape which is a no-no...

...however it made me feel like a chic tough cookie.

New Dress A Day - DIY - Floral Sheer Dress - Vintage

One who's ready to join the live action remake of Clue.  Looks like Colonel Mustard just got cast as a female.

New Dress A Day - DIY - Floral Sheer Dress - Vintage

DIY: Heart Friendship Bracelet

I was asked by eHow to contribute a Valentine's Day article on how to make heart friendship bracelets and I couldn't wait to finish so I could post here! I made a slew of them for my wrists and will be wearing them loud and proud, not just on V-Day but all the time. DIY Heart Friendship Bracelet - ehow - Marisa Lynch - Valentine's Day
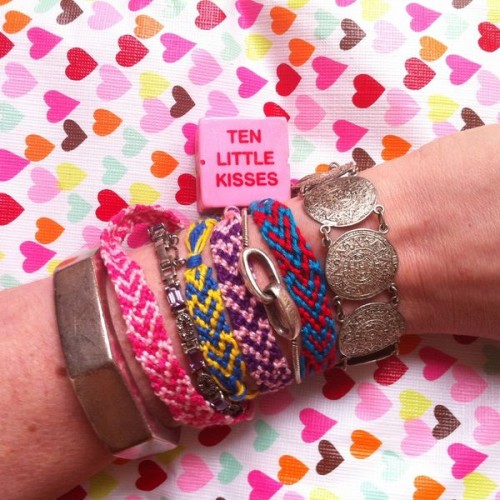
If you would like to see the project steps in slideshow mode, head on over HERE to eHow to check it out with clickable slides!

In order to create your heart friendship bracelet, you'll need: 2 skeins of embroidery floss, 4 30" strands per color, a pair of scissors, and a clipboard or tape to hold the bracelet in place while working.
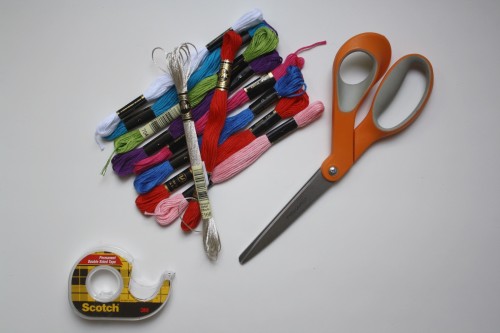
DIY Heart Friendship Bracelet - ehow - Marisa Lynch - Valentine's Day

Take the eight strands of embroidery floss and tie them together in a knot leaving about an inch and a half of floss above the knot. (This will be used to tie the bracelet together at the end.) Lay out the eight strands and split them up (four and four) onto the right side and left side of the workspace. Alternate colors (in this case - blue, red, blue, red) on the left side and then mirror these four on the right side (in this case - red, blue, red, blue).
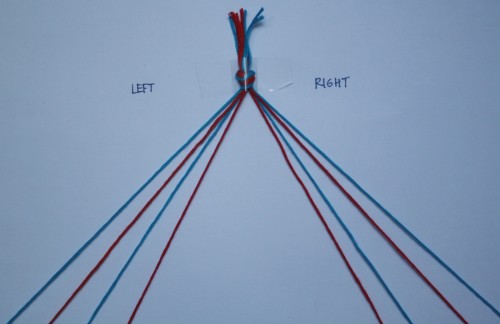
DIY Heart Friendship Bracelet - ehow - Marisa Lynch - Valentine's Day

Begin the bracelet on the left side by making a forward knot using the strand all the way on the left outer end (blue) and the second strand right next to it (red).

(*To create a forward knot, make a 4 with the working string, loop it under the other string, pull it through the opening and bring it to the top of the bracelet. Do this two times to create one forward knot.)
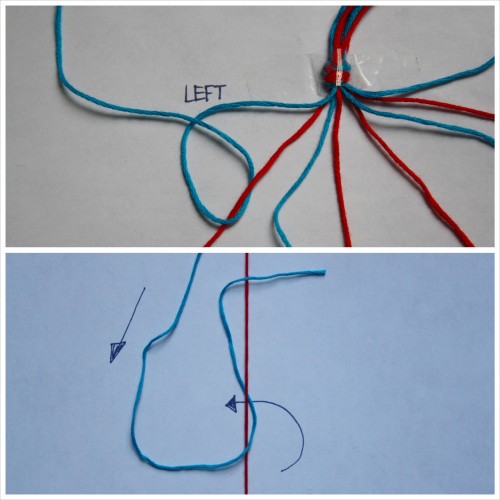
DIY Heart Friendship Bracelet - ehow - Marisa Lynch - Valentine's Day

Repeat this step with the next two strands (third and fourth threads, corresponding blue and red colors) and stop at the center.
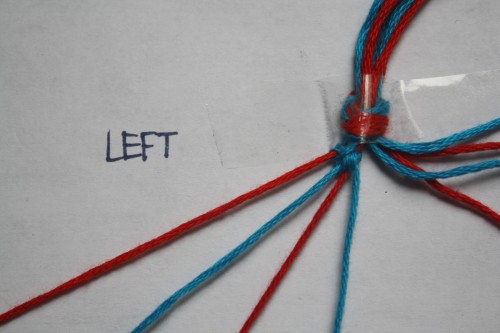
DIY Heart Friendship Bracelet - ehow - Marisa Lynch - Valentine's Day

Now that the left side has been completed, these same steps will be mirrored on the right side of the bracelet. Instead of a forward knot that was used on the left side, a backward knot will be made using the strand all the way on the right outer end (blue) and the second strand right next to it (red).

(*To create a backward knot, which is virtually a mirror of the forward knot on the right side, make a backwards 4 with the working string, loop it under the other string, pull it through the opening, and bring it to the top of the bracelet. Do this two times to create one backward knot.)
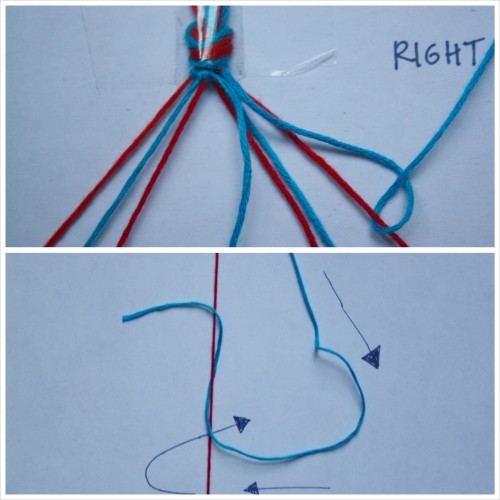
DIY Heart Friendship Bracelet - ehow - Marisa Lynch - Valentine's Day

Repeat this step with the next two strands (third and fourth threads, corresponding blue and red colors) and stop at the center.
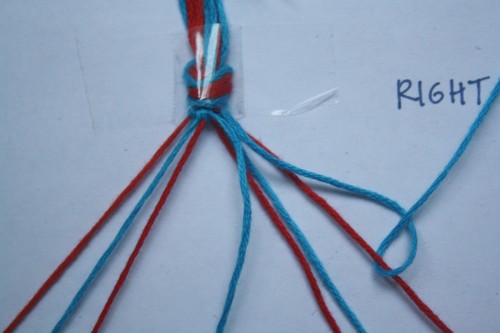
DIY Heart Friendship Bracelet - ehow - Marisa Lynch - Valentine's Day

Connect the two middle strands by creating a backward knot using the strand on the right (the last one used). This brings both sides together as one.
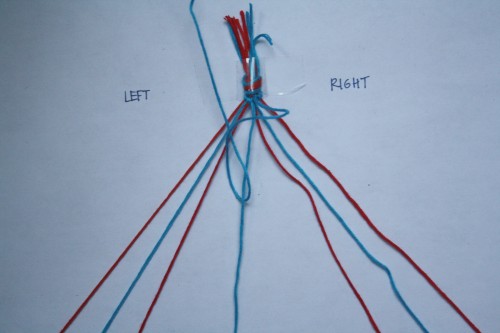
DIY Heart Friendship Bracelet - ehow - Marisa Lynch - Valentine's Day

Repeat the above steps and create one more row in the exact same way, using the outermost string on each side.
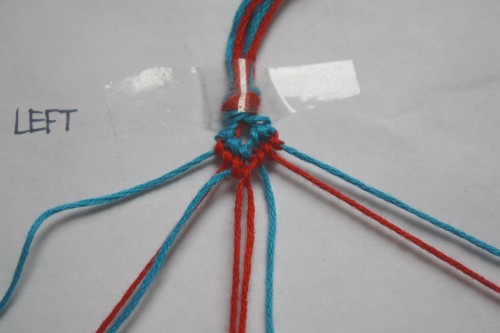
DIY Heart Friendship Bracelet - ehow - Marisa Lynch - Valentine's Day

Now that the second row is completed (we’ll call these the REGULAR rows as they will look like a traditional chevron styled friendship bracelet), the third row is going to be done a little differently (we’ll call these the NEW rows). Take the second string on the left side (red) and make a backward knot on the first string (blue).
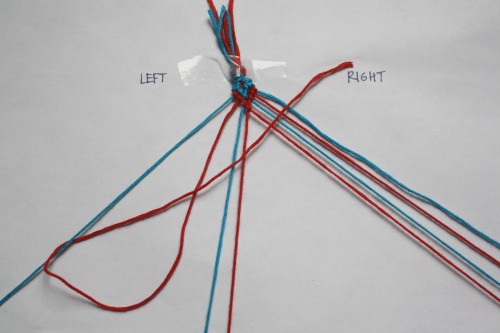
DIY Heart Friendship Bracelet - ehow - Marisa Lynch - Valentine's Day

After the backward knot is completed, move the string that was used (second string in red) to the top left side and create two more forward knots using the first string (blue) on the third and fourth strings and stop at the center. This is where the heart shape begins to take form.
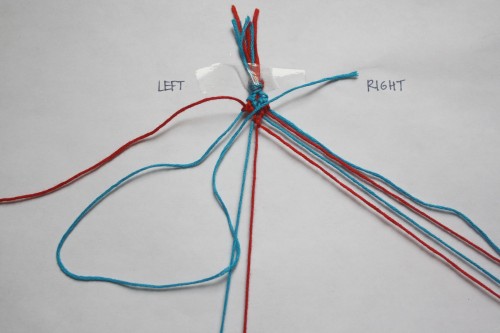
DIY Heart Friendship Bracelet - ehow - Marisa Lynch - Valentine's Day

This same step will be mirrored for the right side. Take the second string on the right side (red) and make a forward knot on the first string (blue).
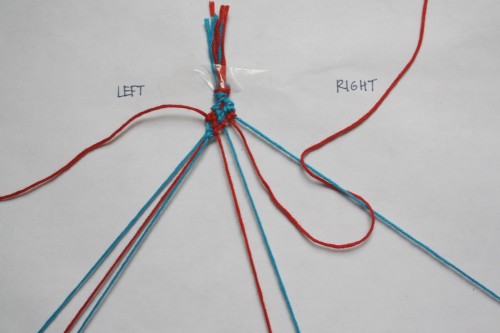
DIY Heart Friendship Bracelet - ehow - Marisa Lynch - Valentine's Day

After the forward knot is completed, move the string that was used (second string in red) to the top right side and create two more backward knots using the first string (blue) on the third and fourth strings and stop at the center.
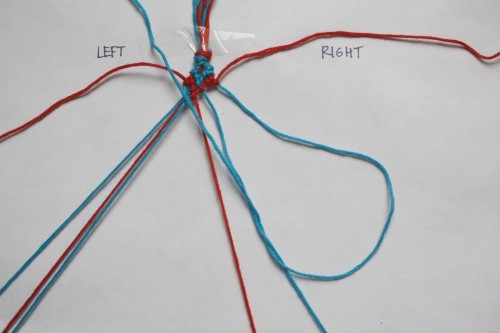
DIY Heart Friendship Bracelet - ehow - Marisa Lynch - Valentine's Day

Connect the two middle strands by creating a backward knot using the strand on the right (the last one used). This brings both sides together as one.
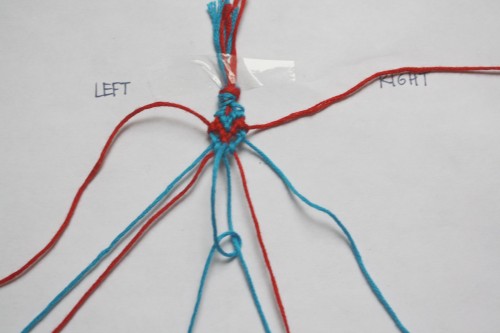
DIY Heart Friendship Bracelet - ehow - Marisa Lynch - Valentine's Day

Repeat the above steps for making a NEW row and create one more NEW row in the exact same way, using the second string on each side.
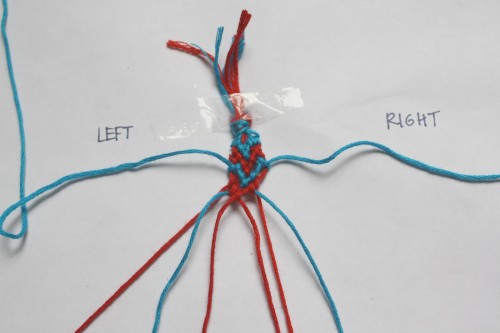
DIY Heart Friendship Bracelet - ehow - Marisa Lynch - Valentine's Day

The bracelet pattern is now set. Two REGULAR rows of the basic forward knots on the left side and backward knots on the right side followed by two NEW rows of the backward/forward knots on the left side and forward/backward knots on the right side.
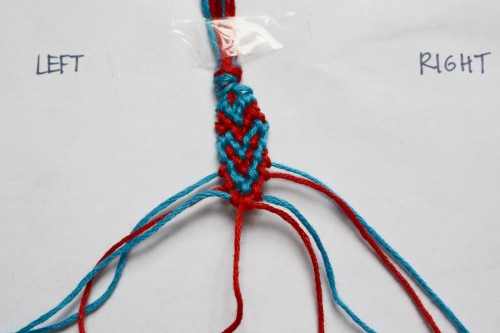
DIY Heart Friendship Bracelet - ehow - Marisa Lynch - Valentine's Day

Repeat and continue these steps until enough bracelet has been made to fit your wrist.
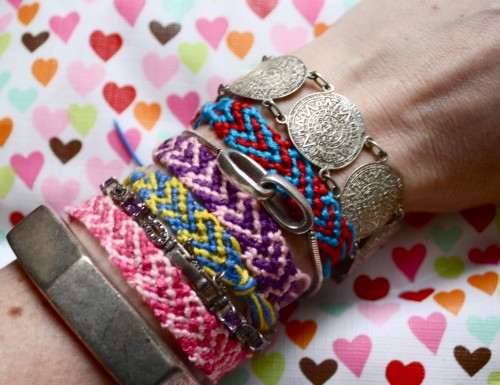
DIY Heart Friendship Bracelet - ehow - Marisa Lynch - Valentine's Day

This is such fun to make bracelets in school colors, fave sports teams, or just colors you heart. I just might make a few more before next week!
Linda's NDAD Creation (Part II)

My gal Linda, who I met at my book signing in San Francisco last year, submitted a fantabulous piece after I met her - click here for the refresher post. She started with this skirt before she remade it... New Dress A Day - DIY pillow - vintage skirt - Goodwill

...and today has come back with another remake using the leftovers! This is such a great idea for all those excess scraps of fabric that accumulate, and especially this time of year. You'll see what I mean...

Hello again, Marisa! I finally made the boot stands with the scraps from the two skirts I shortened a long while back. They were very easy to make and help keep my boots nice and upright. 

New Dress A Day - DIY boot stands - vintage skirt - Goodwill


I stuffed the stands with plastic shopping bags to make them even more "green". Did you know that I still had leftover material after the boot stands were made?? So, I decided to make a pillow, too!

New Dress A Day - DIY pillow - vintage skirt - Goodwill

What do you think? I liked how the pillow turned out, but now I'm thinking about making a tote bag with the same owl design. Many thanks for inspiring me to be more creative! Happy hugs!

LINDA!!!! I am OBSESSED with the owl pillow. There are really no words to describe the cuteness. Also the boot stands are just so perfect - not only are they practical, they look super chic. That material is just insane and I'm so glad that you used it all up! Please make a tote bag with the same owl design! I'm so looking forward to seeing it. I'm declaring you Queen Green, Linda!! xo

Sat, Feb 1 and Sun, Feb 2. It's the Groundhog Day Sale at DiscountMags.com! Come shop for magazines at great prices!

$10 and under sale! Magazines for $10 or less.

Shop 6PM: Spring Preview - Women's Shoes Up to 70% Off! (01/31-02/02)