DIY: Heart Friendship Bracelet

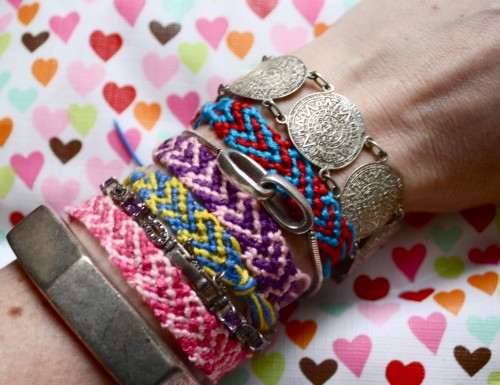
I was asked by eHow to contribute a Valentine's Day article on how to make heart friendship bracelets and I couldn't wait to finish so I could post here! I made a slew of them for my wrists and will be wearing them loud and proud, not just on V-Day but all the time. DIY Heart Friendship Bracelet - ehow - Marisa Lynch - Valentine's Day
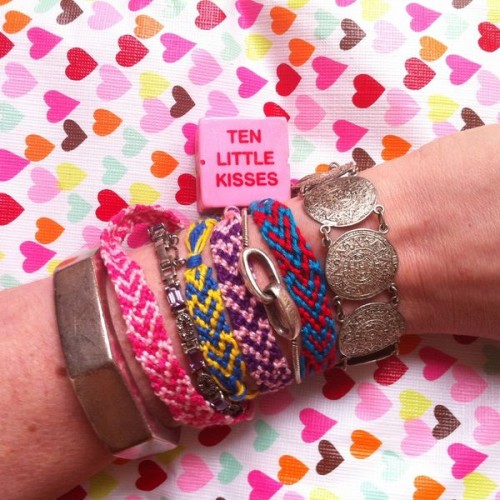
If you would like to see the project steps in slideshow mode, head on over HERE to eHow to check it out with clickable slides!

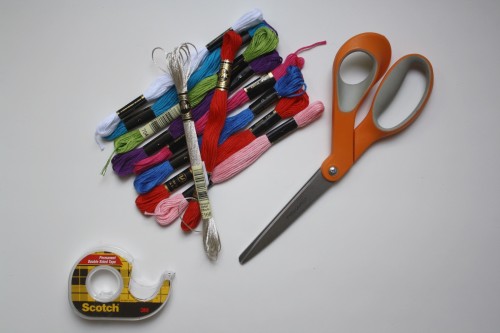
In order to create your heart friendship bracelet, you'll need: 2 skeins of embroidery floss, 4 30" strands per color, a pair of scissors, and a clipboard or tape to hold the bracelet in place while working.

DIY Heart Friendship Bracelet - ehow - Marisa Lynch - Valentine's Day

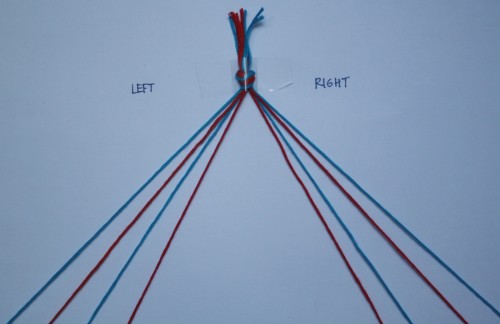
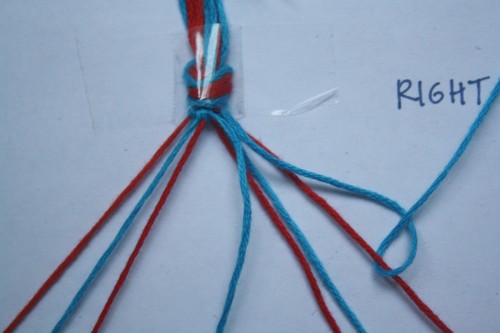
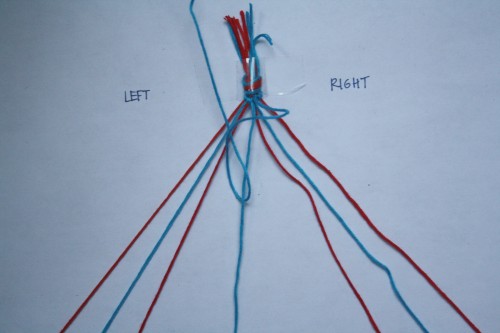
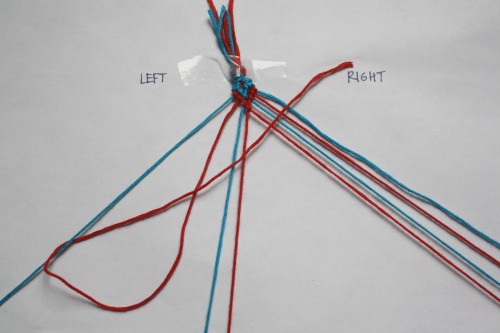
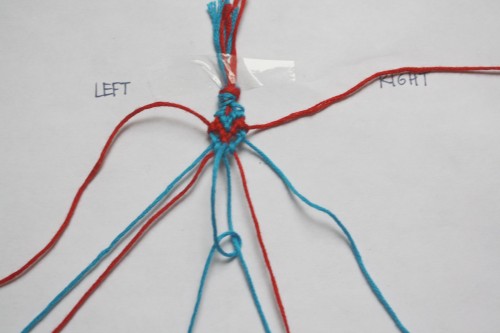
Take the eight strands of embroidery floss and tie them together in a knot leaving about an inch and a half of floss above the knot. (This will be used to tie the bracelet together at the end.) Lay out the eight strands and split them up (four and four) onto the right side and left side of the workspace. Alternate colors (in this case - blue, red, blue, red) on the left side and then mirror these four on the right side (in this case - red, blue, red, blue).

DIY Heart Friendship Bracelet - ehow - Marisa Lynch - Valentine's Day

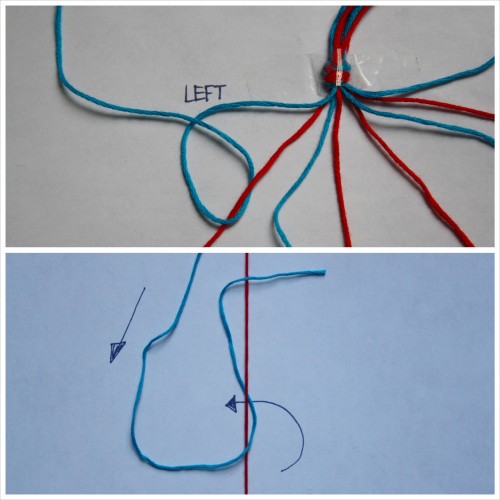
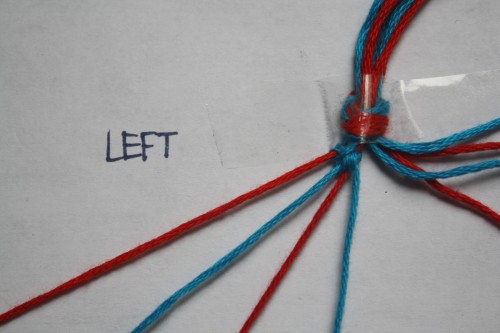
Begin the bracelet on the left side by making a forward knot using the strand all the way on the left outer end (blue) and the second strand right next to it (red).

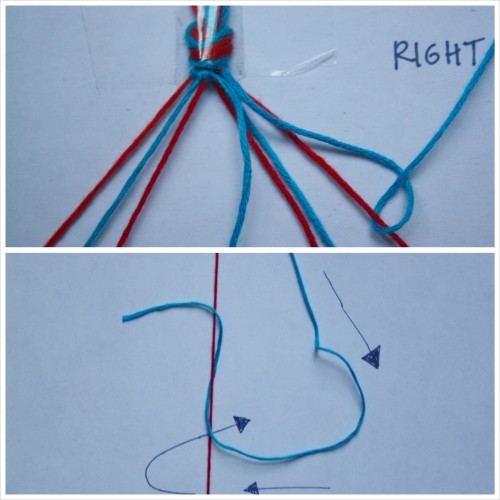
(*To create a forward knot, make a 4 with the working string, loop it under the other string, pull it through the opening and bring it to the top of the bracelet. Do this two times to create one forward knot.)

DIY Heart Friendship Bracelet - ehow - Marisa Lynch - Valentine's Day

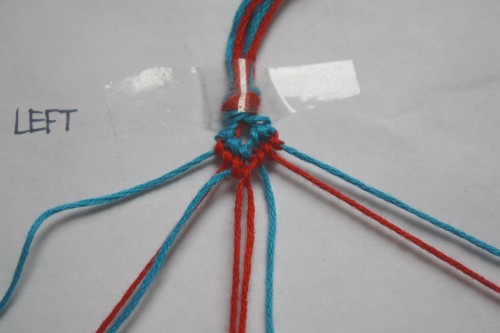
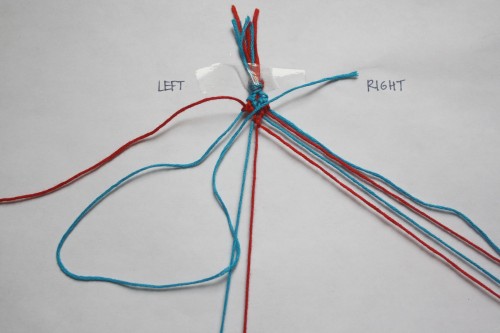
Repeat this step with the next two strands (third and fourth threads, corresponding blue and red colors) and stop at the center.

DIY Heart Friendship Bracelet - ehow - Marisa Lynch - Valentine's Day

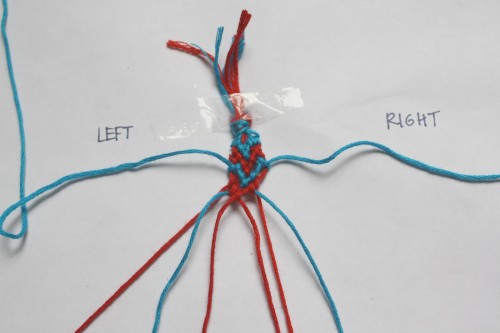
Now that the left side has been completed, these same steps will be mirrored on the right side of the bracelet. Instead of a forward knot that was used on the left side, a backward knot will be made using the strand all the way on the right outer end (blue) and the second strand right next to it (red).

(*To create a backward knot, which is virtually a mirror of the forward knot on the right side, make a backwards 4 with the working string, loop it under the other string, pull it through the opening, and bring it to the top of the bracelet. Do this two times to create one backward knot.)

DIY Heart Friendship Bracelet - ehow - Marisa Lynch - Valentine's Day

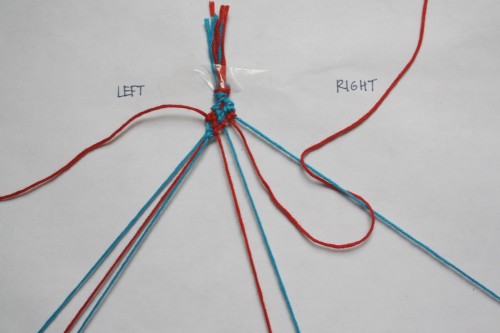
Repeat this step with the next two strands (third and fourth threads, corresponding blue and red colors) and stop at the center.

DIY Heart Friendship Bracelet - ehow - Marisa Lynch - Valentine's Day

Connect the two middle strands by creating a backward knot using the strand on the right (the last one used). This brings both sides together as one.

DIY Heart Friendship Bracelet - ehow - Marisa Lynch - Valentine's Day

Repeat the above steps and create one more row in the exact same way, using the outermost string on each side.

DIY Heart Friendship Bracelet - ehow - Marisa Lynch - Valentine's Day

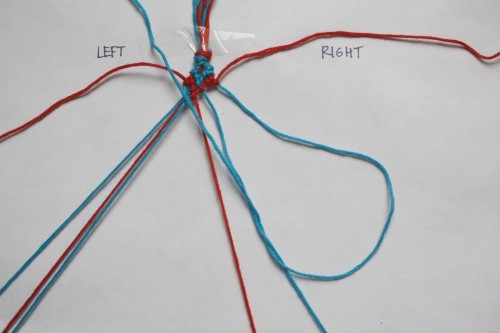
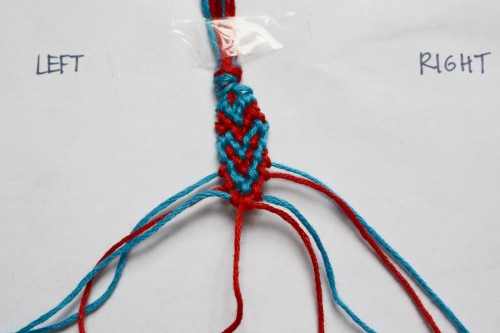
Now that the second row is completed (we’ll call these the REGULAR rows as they will look like a traditional chevron styled friendship bracelet), the third row is going to be done a little differently (we’ll call these the NEW rows). Take the second string on the left side (red) and make a backward knot on the first string (blue).

DIY Heart Friendship Bracelet - ehow - Marisa Lynch - Valentine's Day

After the backward knot is completed, move the string that was used (second string in red) to the top left side and create two more forward knots using the first string (blue) on the third and fourth strings and stop at the center. This is where the heart shape begins to take form.

DIY Heart Friendship Bracelet - ehow - Marisa Lynch - Valentine's Day

This same step will be mirrored for the right side. Take the second string on the right side (red) and make a forward knot on the first string (blue).

DIY Heart Friendship Bracelet - ehow - Marisa Lynch - Valentine's Day

After the forward knot is completed, move the string that was used (second string in red) to the top right side and create two more backward knots using the first string (blue) on the third and fourth strings and stop at the center.

DIY Heart Friendship Bracelet - ehow - Marisa Lynch - Valentine's Day

Connect the two middle strands by creating a backward knot using the strand on the right (the last one used). This brings both sides together as one.

DIY Heart Friendship Bracelet - ehow - Marisa Lynch - Valentine's Day

Repeat the above steps for making a NEW row and create one more NEW row in the exact same way, using the second string on each side.

DIY Heart Friendship Bracelet - ehow - Marisa Lynch - Valentine's Day

The bracelet pattern is now set. Two REGULAR rows of the basic forward knots on the left side and backward knots on the right side followed by two NEW rows of the backward/forward knots on the left side and forward/backward knots on the right side.

DIY Heart Friendship Bracelet - ehow - Marisa Lynch - Valentine's Day

Repeat and continue these steps until enough bracelet has been made to fit your wrist.

DIY Heart Friendship Bracelet - ehow - Marisa Lynch - Valentine's Day

This is such fun to make bracelets in school colors, fave sports teams, or just colors you heart. I just might make a few more before next week!

Linda's NDAD Creation (Part II)

My gal Linda, who I met at my book signing in San Francisco last year, submitted a fantabulous piece after I met her - click here for the refresher post. She started with this skirt before she remade it... New Dress A Day - DIY pillow - vintage skirt - Goodwill

...and today has come back with another remake using the leftovers! This is such a great idea for all those excess scraps of fabric that accumulate, and especially this time of year. You'll see what I mean...

Hello again, Marisa! I finally made the boot stands with the scraps from the two skirts I shortened a long while back. They were very easy to make and help keep my boots nice and upright. 

New Dress A Day - DIY boot stands - vintage skirt - Goodwill


I stuffed the stands with plastic shopping bags to make them even more "green". Did you know that I still had leftover material after the boot stands were made?? So, I decided to make a pillow, too!

New Dress A Day - DIY pillow - vintage skirt - Goodwill

What do you think? I liked how the pillow turned out, but now I'm thinking about making a tote bag with the same owl design. Many thanks for inspiring me to be more creative! Happy hugs!

LINDA!!!! I am OBSESSED with the owl pillow. There are really no words to describe the cuteness. Also the boot stands are just so perfect - not only are they practical, they look super chic. That material is just insane and I'm so glad that you used it all up! Please make a tote bag with the same owl design! I'm so looking forward to seeing it. I'm declaring you Queen Green, Linda!! xo

Sat, Feb 1 and Sun, Feb 2. It's the Groundhog Day Sale at DiscountMags.com! Come shop for magazines at great prices!

$10 and under sale! Magazines for $10 or less.

Shop 6PM: Spring Preview - Women's Shoes Up to 70% Off! (01/31-02/02)

Cartwheelin' with Target (+ a $1000 Target GiftCard® Giveaway!)

Today I’m doing a post with Target and their new Cartwheel app. Now I tend to use Target as my go-to for everything - cosmetics, check. Groceries, check. Project supplies, check. Clothes, check. You name it, I’ve gotten it at Target. There happens to be one right down the street from me, so instead of having major weekly hauls there, I just go when I need something. Like at 10pm when my printer cartridge bails (blerg, printer cartridge) or if I just want a medley of fro-yo, thank you notes, daily multi-vitamins, and holiday decorations, like you do. New Dress A Day - Cartwheel App - Target Post

Their new app called Cartwheel is an all-in-one coupon database that doesn’t involve any coupon clipping. Basically, you sort through the categories of items you’re shopping for (there are over 700 available offers that are constantly changing!), choose the Target coupons that you’re interested in, and then as easy as that, they’re all saved in your passbook.

New Dress A Day - Cartwheel App - Target Post

Because they only work for in-store purchases, when you’re ready to check out, open the app, show the barcode that is unique to you to the checker, and then the savings are automatically deducted. You can access Cartwheel through your desktop or tablet as well and then print out your barcode and bring into the store to use if that’s an easier option!

For those coupon clippers (I’m so envious of you!) you can still use the app on top of the coupons you clip – just extra cash back!

I had my cooking club this week and needed to pick up ingredients for The Barefoot Contessa’s baked cinnamon donuts that I’m making (along with Mexican hot chocolate…images and post to come!). So I piled up a bunch of offers from flour to sugar and chocolate…

New Dress A Day - Cartwheel App - Target Post

…and then flashed my barcode to the checker when I left. It really couldn’t have been any easier to save a little bit of change!

New Dress A Day - Cartwheel App - Target Post

So let’s get down to the nitty gritty. Target is hosting a fab contest with all the participating blogs giving away a $1,000 Target GiftCard®! $1000, wahoo! Just let me know in the comments below what you’d spend your Target bucks on if you win? I'd love for the winner to be one of you guys, so leave a comment below and get in it to win it! I’d do a little necessities stocking up (contact solution, fo sho), then hit the accessories (I always find the cutest bags) section, before a quick stroll down the cosmetics aisle for a new hair dryer. That would just be on trip #1 :)

New Dress A Day - Cartwheel App - Target Post

Contest runs until 2/28!!

Sweepstakes Rules:

No duplicate comments.

You may receive (2) total entries by selecting from the following entry methods:

Leave a comment in response to the sweepstakes prompt on this post

Tweet (public message) about this promotion; including exactly the following unique term in your tweet message: “#SweepstakesEntry”; and leave the URL to that tweet in a comment on this post

Blog about this promotion, including a disclosure that you are receiving a sweepstakes entry in exchange for writing the blog post, and leave the URL to that post in a comment on this post

For those with no Twitter or blog, read the official rules to learn about an alternate form of entry.

This giveaway is open to US Residents age 18 or older. Winner will be selected via random draw, and will be notified by e-mail. You have 72 hours to get back to me, otherwise a new winner will be selected.

The Official Rules are available here.

This sweepstakes runs from 1/30 - 2/28.

Be sure to visit the Target Cartwheel brand page on BlogHer.com where you can read other bloggers’ posts!