DIY: Cabochon Stud Earrings

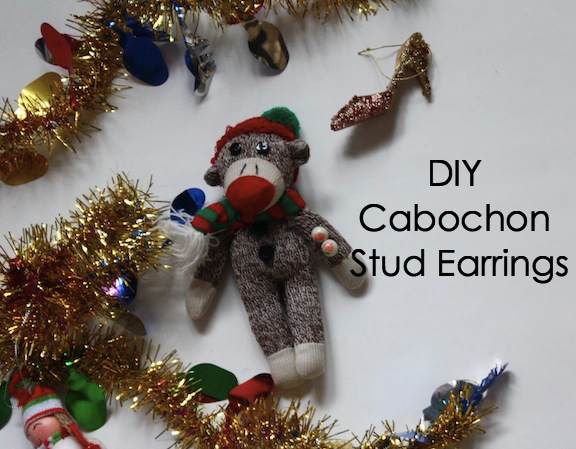
On the 2nd day of DIY my true love gave to me. Two flower earrings and (yesterday's) partridge in a (pair of gloves) tree.  I think this lyric modifying is going to get difficult from here on out.  Bear with me and the puns :) DAY 2: Cabochon Stud Earrings

New Dress A Day - Holiday DIY - stud earrings

This is a project that I love to make for myself, just because I basically only wear stud earrings.  I love hanging ones, but I can only wear them if I put a clip-on back on them all thanks to wearing big, heavy pairs when I was an 80s kid!  My lobes never recovered.  Le sigh.

Here's another quick and easy DIY to add to your gifting list!

The project needs only a few supplies...

New Dress A Day - Holiday DIY - stud earrings

1. Cabochons (These are flat backed beads that you can score at any craft store.  I found these vintage-feeling ones in the fabric district downtown for 20 cents a pop, but here's a cute stash I found online.)

2. Earring pin posts/stud backs (I bought a big bag of these years ago and am still using them. There's a pack of 100/$4 here!)

3. Toothpick (The best tool for applying glue!  Feel free to use whatever you have close by to apply.)

4. E-6000 (The glue of champions. This stuff works SO well.)

I opened my tube o'glue and dipped in the toothpick to get a good amount on the tip (1) and then dabbed the back of one of the cabochons (2).  I took the pin post and pushed it into the glue to stick (3)...

New Dress A Day - Holiday DIY - stud earrings

...and then repeated this process for the other cabochon.  Once the earrings were put together, I let them dry for a few hours.

New Dress A Day - Holiday DIY - stud earrings

And in no time, a brand new pair of earrings are done and ready to be rocked!

New Dress A Day - Holiday DIY - stud earrings

This would also work really well for metal backed ring bases, using a larger cabochon to create a statement ring!  Hmm, maybe you'll see that DIY in a few days?

Two DIYs down, 10 more to go!

DIY: Metallic Pom Pom Gloves

I love the holidays and I love all the gifting associated with them (picking out and wrapping gifts is my favorite thing to do!), but I'm not going to lie...it's definitely a bit overwhelming!  I make sure I include everyone on the list from the BFFs, the family membz, and the UPS dudes, to the Secret Santa/white elephant partygoers, and it is a lot. To alleviate some of the gifting stresses this season, I've been getting my DIY on, crafting gifts like a madwoman!!  I'm going to show all the projects here on a fun "12 Days of Easy DIY's" and the best part is that they're $5 and less.  Woo hoo, they're totally budget friendly and easy which puts a big smile on my face!  Let's begin!

On the 1st day of DIY my true love gave to me. A partridge in a (pair of gloves) tree!

DAY 1: Metallic Pom Pom Gloves

New Dress A Day - Holiday DIY - metallic pom pom gloves

I LOVE this project because it not only picks up on the pom pom trend...

New Dress A Day - Holiday DIY - pom pom embellished sweaters

...but it adds a little bit of holiday glamour to the wardrobe!  Keep reading to find out how to make these easy gloves!

This project needs only three basic supplies:

New Dress A Day - Holiday DIY - pom pom gloves

1. Sparkle pom poms (These were a 99 Cent store score in the seasonal aisle.)

2. Thread & needle

3. Gloves (Magic stretchy gloves! These were a pair for $2 at Target)

With supplies in hand (totaling less than $3), all that needed to be done was a little bit of hand stitching.  I threaded my needle, knotted the end of the thread, and pushed it through the underside of the glove (1).  Once the needle was through the glove, I put a pom pom through the needle and stitched the needle back through the cuff (2). I repeated steps 1 and 2 again with my second pom pom (3), as well as my third (4), and continued this process until my glove's cuff was covered in pom poms.

New Dress A Day - Holiday DIY - pom pom gloves

I repeated the steps again to finish my second glove and ended up with a fabulous new pair of glitzy finger warmers!

New Dress A Day - Holiday DIY - pom pom gloves

I love this as a gift for your girlfriends - you can get all different colored gloves in jewel tones or create the same ones to match!

New Dress A Day - Holiday DIY - pom pom gloves

I see lots of jazz hands in our future!

One DIY down, 11 to go!!

Copycat: DIY Marc Cross Personalized Black Satchel

I created another post for HelloGiggles that I wanted to share here because it's so super easy to do and makes you feel like an artist.  No joke - I totally felt like a Pollock-in-the-making!

After catching a few episodes of the "Sex and the City" prequel, "The Carrie Diaries", mostly to check out the 80s wardrobe, I saw the perfect DIY - the personalized purse that young Carrie wears to her coveted Interview mag internship.  Yep, I knew I just had to make my own!

New Dress A Day - Hello Giggles - The Carrie Diaries DIY - painted purse

The show version is a personalized Marc Cross purse, but my copycat piece was a garage sale score for just a few bucks! I found one that had a gold buckle to recreate a similar clasp found on Carrie’s.

Here’s a rundown of the supplies you’ll need:

New Dress A Day - Hello Giggles - The Carrie Diaries DIY - painted purse

1. Purse (This one from Forever 21 is virtually identical!)

2. Assorted shades of nail polish

3. Straws/toothpicks/coffee stirrers – any tool to move/adjust/arrange the polish

The first step is to put your purse on top of a layer of cardboard, newspaper, poster board; anything to protect the floor that you’re working on. and begin to flick the nail polish wands onto your bag. There’s no right or wrong way to do this - get into the groove and wave away! (Jackson Pollock would be very proud of this piece!)

New Dress A Day - Hello Giggles - The Carrie Diaries DIY - painted purse

I repeated the previous step with each new color of polish until I felt my design was complete. I used a whipping motion with my hand to get longer lines and let the wand drip directly onto the purse to create dots.

New Dress A Day - Hello Giggles - The Carrie Diaries DIY - painted purse

I opted to leave my name off of it, but go ahead and personalize if you feel like some monogramming!

New Dress A Day - Hello Giggles - The Carrie Diaries DIY - painted purse

Lil’ Carrie and I have matching bags!

New Dress A Day - Hello Giggles - The Carrie Diaries DIY - painted purse


This is something super easy to do to any of your older purses that might need a little TLC. And honestly, this is a little bit of 80s flair that won’t have you totally looking like Flock of Seagulls, unless pompadours are your jam.

New Dress A Day - Hello Giggles - Flock of Seagulls Pompadour - 80s Hair

More fun TV show remakes to come (and if there are any wardrobe items that you swoon over), be sure to let me know!  I'm always adding ideas to the list!!