

These vintage reindeer flats are giving me all the holiday feels! Hitting the thrift stores while visiting my family in NC is on the agenda this week. Can’t wait to see what else I find! xo

DIY: A Christmas Story Inspired Ugly Sweatshirt 🎄👢🛋
This is my favorite time of year! The smells, the sounds, the outfits! I have a slew of vintage sweaters that are coming out for the holidays, but what to wear for the office ugly sweater party?? I’m going to DIY the ultimate piece inspired by A Christmas Story that’s on repeat in my household all Christmas day!
I grew up watching A Christmas Story and there are so many iconic scenes (the tongue on the lamp post still gives me agida!) but my favorite involves the leg lamp that Ralphie’s dad orders! I think I was obsessed as a kid with this lamp purely because it was a leg with a stiletto! But I’m using the leg as inspiration for my project and need to score all the supplies to recreate from JOANN.

I grabbed a red sweatshirt (ugly sweatshirt party sounds about right!), felt, fringe, mesh fabric, fabric glue, velvet ribbon, iron-on lettering, and an LED light necklace to get this project rolling.
I started with a template of the leg lamp I found online.
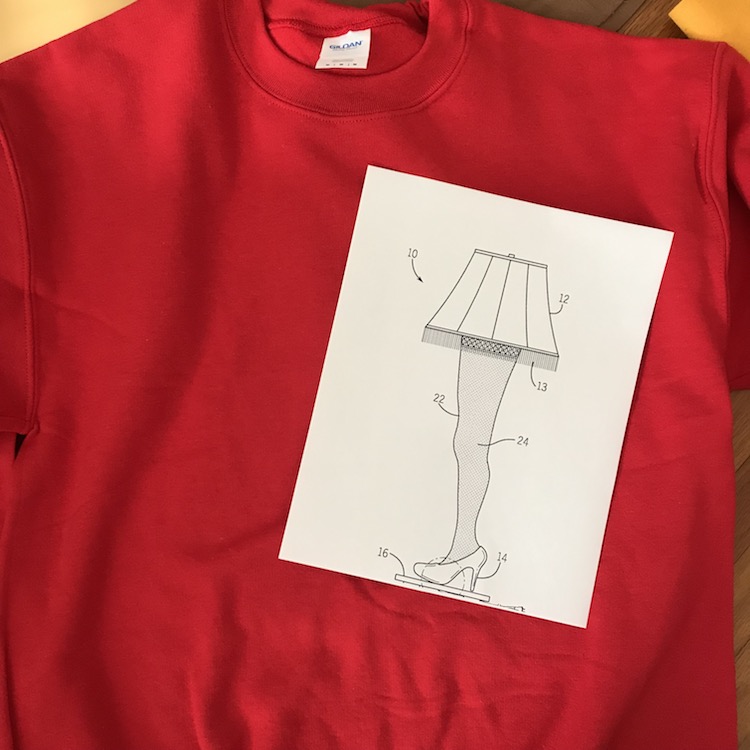
I’m not the best freehand artist, so using a pattern was the best move for me! I trimmed it into three main portions - the shoe, the leg, and the lampshade - that will be traced onto the coordinating fabrics.

I started with the leg and used a light beige felt! (Felt is used for all three portions of the lamp just because it’s a bit sturdier.) I traced then trimmed out my fabric.


I moved onto the shoe next! I grabbed adhesive-backed black felt for this piece and traced and trimmed.

The leg was cut out, but it was missing a very important part...the fishnet tights! I found a mesh fabric that I wanted to place on top of the felt to give it a fishnet vibe. I placed the mesh on top of the felt and then trimmed and tucked the edges. Next came applying it to the sweatshirt along with the shoe which I affixed with fabric glue.

Next came the lamp! I cut out a basic trapezoid-esque shape and wanted to give the shade a bit of a 3D feel so I took some matching velvet ribbon and glued down three lines to make it look like boning of sorts.

With the leg and shoe attached, it was time to move the lampshade to the sweatshirt! And the lamp needs her fringe, so black fringe was added to the bottom of the lamp right off the bat. BUT, this is the coolest part of the sweatshirt. I wanted the lamp to light up, so I put some LED lights from a cute light up necklace right under the felt lampshade! This was the only portion of the sweatshirt that I sewed.
I started stitching down the left side of the felt piece going counterclockwise around the shade. As I stitched, I kept molding the lights in areas I wanted them to shine (and pushed them into place) as I went around the edges.

Once I was happy with the light placement, I made my way around the rest of the shade and then made little stitches on the ribbon in the center to keep the lights in place. There’s a push button to turn the lights on that I placed at the top of the shade for easy access.
And there’s only one more piece to the sweatshirt puzzle to finish! A box with the letters FRAGILE (“fra gee lay”) on it, just like the one the leg came in, in the movie. I bought some brown corduroy and trimmed seven rectangular panels to form a box and layered two on each edge.

I took small iron-on letters and placed them on a diagonal to cover the box and ironed in place.
The final bit of flare? Some “packing material” for the box which is just pillow stuffing. Stitch or glue...whatever tickles your fancy!

The final look was complete!
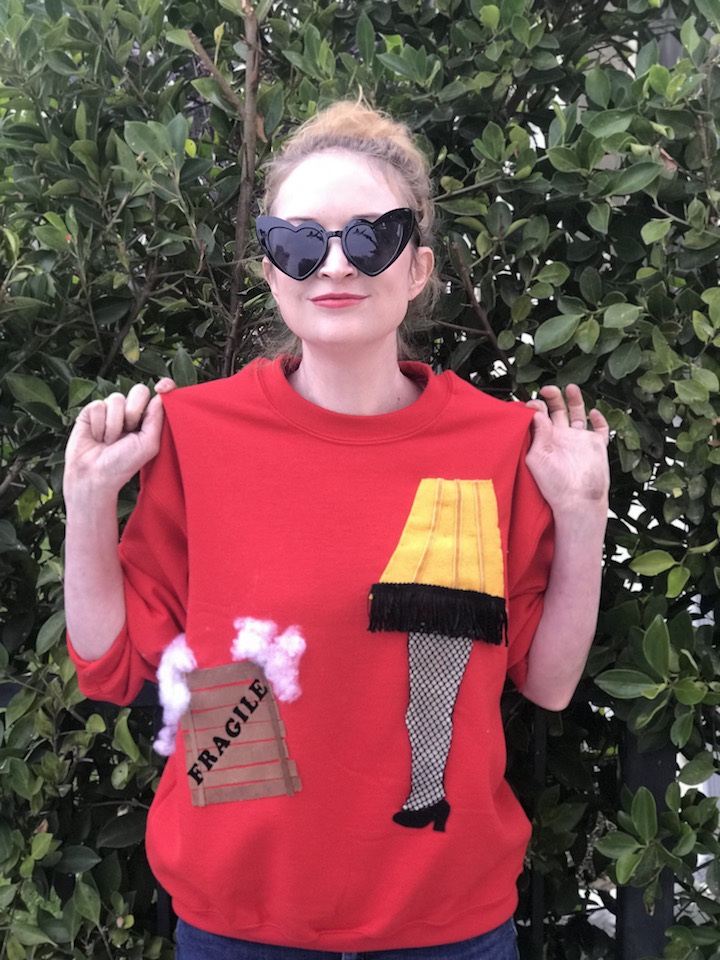
I am SO in love with how this turned out!

The perfect piece to wear to my ugly sweater party!

It’s LIT!!!! (Sorry, couldn’t help it! 😂)

I promise you won’t shoot your eye out!

I think after I’m done wearing this sweatshirt, I’m just going to hang it on the fireplace because “it’s a major award!”

You’re guaranteed to win Christmas with this interactive holiday sweater!
I “double dog dare you” that you won’t have the most fun wearing this!!


Happy Holidays!!
This post was sponsored by JOANN. 😃
DIY: Home Alone Inspired Holiday T Shirt 🍕🎄
I’m in the holiday spirit going nuts DIY-ing everything! From the mantle at home to my desk at work, there’s a bit of seasonal flair in all my spaces. I’ve been jonesing to make a custom t-shirt for YEARS that has one of my most favorite lines from my favorite Christmas movie (Home Alone!!!) on it and I finally made it with the help of Cobalt Cricut Explore Air 2!

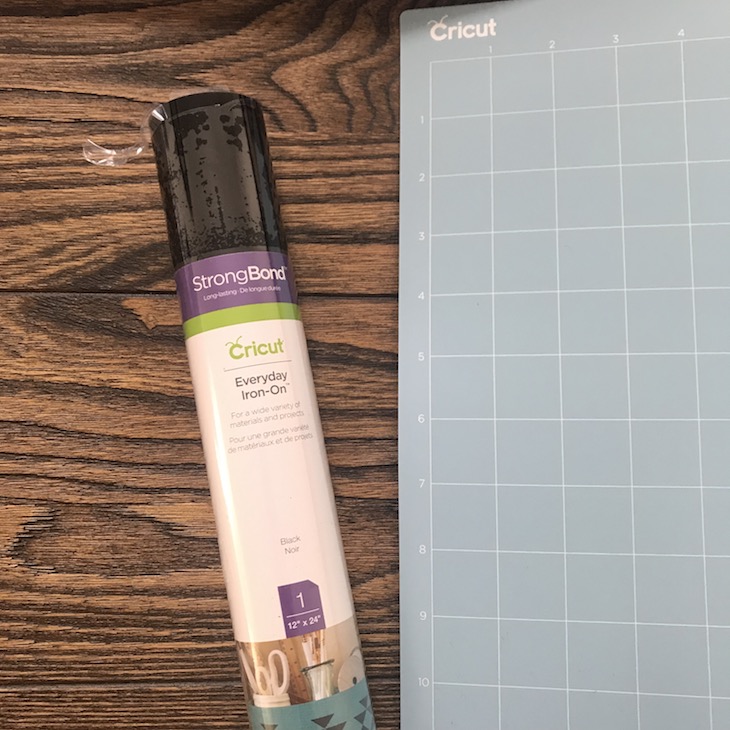
This is the first time I’ve used a Cricut machine to create an iron-on appliqué and after crafting what I made, I’m obsessed. Everyone is getting custom gear beginning, now! The Cobalt Cricut Explore Air 2 cuts everything from cardstock and iron-on vinyl to specialty materials like glitter paper and bonded fabric, so I went with the iron-on vinyl to craft my T!
I wasn’t totally sure what colors I wanted to go with, so I snagged a few options from basic black to glitter and figured I’d make an executive decision once I started planning out my design! I snagged all my materials at JOANN (ps, the Cobalt Cricut Explore Air 2 is exclusively found there which just might be the perfect holiday gift for yourself!) including a few basic Ts and some Cricut tools.

I set up the machine up and started to plot out my creation! There’s one scene in Home Alone that always makes me happy. The pizza delivery scene! Kevin McAllister trying to order a pizza and using the audio from Angels With Filthy Souls to “talk” to the delivery person is just beyond classic. So, my shirt is an homage to the cherished film I look forward to watching each December!

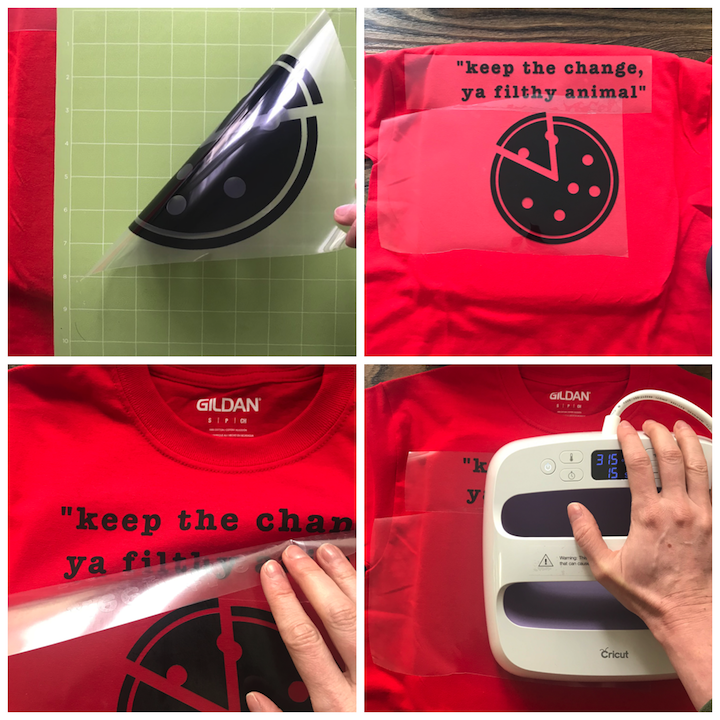
I logged onto Cricut’s design site and began a new project worksheet - I typed in my quote and then selected a pizza image to use from the options on their site. Because I went with pizza, I used a red T shirt as well as the matte black iron-on vinyl. (I’ll use those glitter options soon!)
I took the black matte vinyl and attached it to the adhesive mat that came with the machine (rough side up) and lined it up in the machine before pressing start. And like that my font and image were getting cut out from the iron-on material. (I also followed all the directions on the site and watched a bunch of Cricut’s YouTube videos for extra help since I’m still pretty new at this!)

Once the material was cut, I pulled away the excess (or negative vinyl) with a weeding tool and then placed my design on my shirt, plastic side up.

Now it was time to affix the design I crafted! You can use an iron, but I tried out a Cricut EasyPress to heat the design directly onto the shirt. I programmed the tool for 30 seconds and in a jif, the design was set. After waiting for the plastic sheet to cool, I removed it from my shirt and had a brand new top to celebrate the holidays!
I can’t even begin to describe how happy I am!

I paired my new T with a vintage plaid knit skirt to dress it up a bit, but it’ll work with a pair of jeans or pajama pants depending on your holiday vibe.

I have all the feels for my new outfit!

Who wants to watch Home Alone with me?

I think Kevin would totally approve of my shirt...except he’d pick an all cheese pie instead of one with pepperoni!

Pizza + Home Alone = Best Night Ever!

I cannot wait to start zhuzh-ing some sweatshirts and old Ts to give them a second life with my new iron-on obsession!

Disclosure: This is a sponsored post created by me on behalf of JOANN and Cricut.


