DIY: Lace Embellished Dress

It’s warm outside and the summer soirees and (bridal/baby) showers are in full effect! Even though I have plenty to wear, I was excited to craft a dress for a girlfriend’s baby shower! She’s having a boy, so I went with something blue to tie into the theme. I hopped over to JOANN to grab all the accoutrements to craft my dress! 

I was inspired by a blue Dolce & Gabbana lace dress from 2012 and knew this was the piece I wanted to recreate. I started with a cotton dress base. (I had this one in my closet and it needed a refresh! Go with something you own or pop into a thrift store to score the perfect piece)

White Cotton Dress - Before

You'll also need:

Beads (Mix it up! They’re for the center of the flowers and I went with some shinier black ones.)
Fabric Dye (I picked two shades of RIT - Evening Blue and Royal Blue.)
Thread (Something that matches the beads or dress shade.)
Appliqués or Ribbon (Flower shaped lace or appliqués are perfect for this piece!)

Dress Supplies

It’s dye time! Begin by rinsing your dress and appliqués in water to fully saturate before adding into your dye bath or washing machine.

Soak Dress in Water - Dye Process

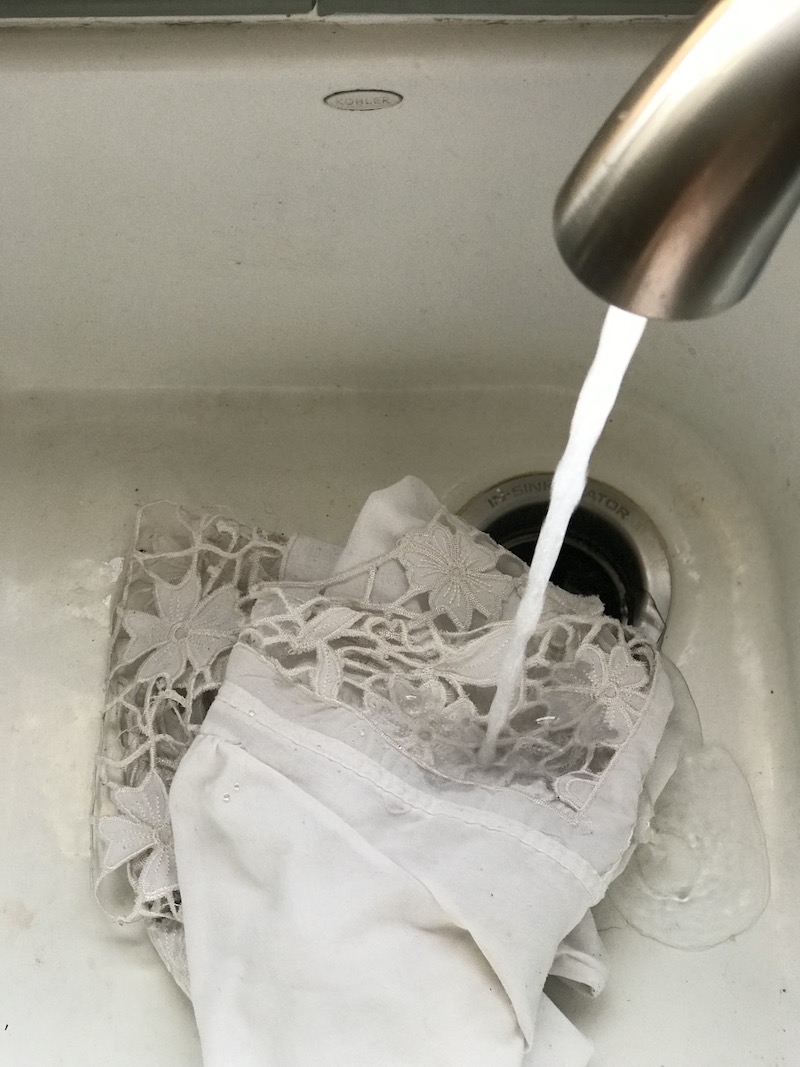
Next add them into your dye bath. You can do this on the stove top in a pot or use your washing machine and the amount of dye used is dependent on how dark or light you want your piece to be. I wanted a light blue shade, so I put in two capfuls of Evening Blue with a few drops of Royal Blue in hopes for something lightish blue.

Dye Choices


I always get so excited to see how the color turns out post-wash

I was especially excited to see the appliqués because they’re made of all different kinds of materials (polyesters, cottons, linens, oh my!

Dyed Appliqués

Now that the dress and appliqués are dyed, it’s time to stitch the beads to the center of the floral appliques. String a bead onto a piece of thread attached to a needle and weave through the center of the floral appliques and out the bottom. Tie a knot to hold into place. (I went with 1-3 for each flower depending on size.) Continue until all flowers have center beads.

Create beaded centers on appliqués

Now place the beaded appliqués onto the dress!

Garden of beaded flowers

Scatter them around or place them in groups - totally up to you! With the dress covered in flowers, it’s time to put it on!

After Look - 1

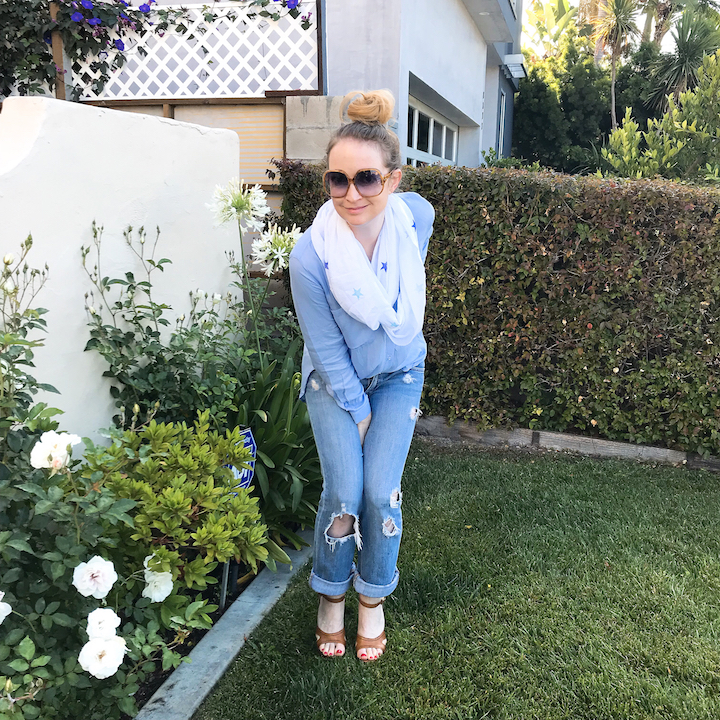
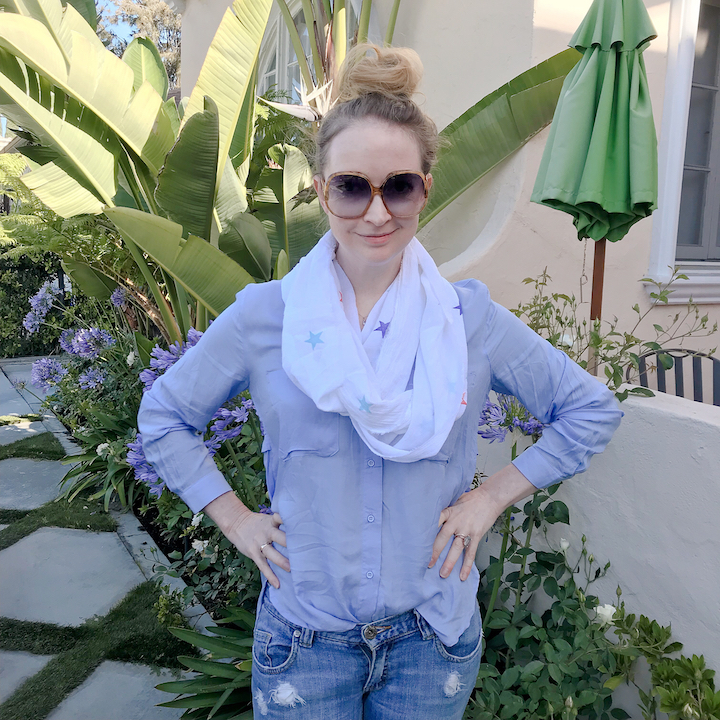
I really loved how the different shades of blue complimented the dress!

After Look 2

Nothing like florals to make me smile!

After Look 3

Fabric dye has a way of giving an old garment a whole new look!

After Look 4

It’s more fun, more flirty, and the just the thing to wear to the baby shower!

After Look 5

Bye old dress! Hello new look!

Before / After Look - Blue Flower Appliqués

DIY Starry Summer Scarf

School’s out for summer!! OK, that doesn’t apply to me anymore, but I am still getting into the summertime mood! You know when weekend BBQs, pool parties, and outdoor concert invites start popping up, summer is officially here!

We still have chilly nights here in Los Angeles, so I thought that a summer scarf would be the perfect DIY to celebrate independence next month while also feeling super chic as the sun goes down. (Because you know I’m already planning my 4th of July outfits! 😆) The beauty of this scarf is that it’ll feel super festive on the 4th, but it’ll work any other time of year as well!

You can snag everything at JOANN and here's what you'll need!

2 yards of cotton fabric (I went with white solid gauze, but got lost in the rows trying to make a final decision! Pick something that will feel softest against your skin.)
A star stamp (...or any stamp you feel most excited about.)
Ink pads (I chose red, white, and two blues.)
Thread (...to match fabric)
Shears (My go-to are these Fiskars!)

Summer Scarf Supplies

Start with your fabric and lay it down flat on the ground. I got two yards of gauze and trimmed it in half lengthwise.

Fiskars & Fabric

Next I took my stamp and began to get inky!

I started with the light blue and made diagonal lines down the length of the fabric. This is the fun part! Go rogue and stamp anywhere you please or create your own pattern. I kept to the lines creating my next batch of royal blue stars in another parallel pattern and then finished with some sporadic red stars!

June Post - Fabric Stamping

PS - post stamping, just to help set the ink a bit, I took an iron and did a quick press. No steam, just some heat! (Then when it’s time for a hand wash, the inks will be a bit more stable.) I wanted to make this an infinity scarf, so I pinned the edges of the scarf together, inside out, and prepped for a quick stitching.

June Post - Pinned Fabric

(This part is totally optional! If you want an open ended scarf!) Stitch, stitch, stitch!

June Post - Sewing Machine

New festive neckwear, ready for action!

June Post - After Scarf

I love the stars and how subtle they are depending on how the scarf is twisted!

June Post - After Scarf 5

Light blue blousin’ to tie all the shades of blue together!

June Post - After Scarf 3

Summer style that’ll work with anything - shorts and a tank, a maxi dress, or with a bathing suit and a sarong!

June Post - Final Scarf

And the perfect thing to wear on the 4th!

June Post - After Scarf 1

DIY Fascinators (Hello ROYAL WEDDING!)

It's Royal Wedding time!! Who else has the fever? Maybe it's especially exciting since I just got married, but I really can't wait for all the pomp and circumstance!

To celebrate, I've got a few little projects up my sleeve...(you can snag everything at JOANN!) You can't go to a Royal Wedding without a fascinator, so there's two easy DIYs to prep for the church bells. One that's a bit more springy and femme and the other that's more British feeling! You know, a perfect pair to capture the relationship of Meghan Markle & Prince Harry! 😂😍

Here's what you'll need for a British Themed Fascinator: Tulle (or sinamay), assorted trims (ribbons, feathers, cording, charms), glue gun & glue sticks, hair clips or combs

Brit Fascinator - Supplies

Start with tulle (or sinamay - depending on how easy it is to find) and fold in 1.5 inch pieces like an accordion to create a thicker strip of material and then iron flat. Next trim the strip from the main piece of tulle and then create a rounded design and pin into place. Here’s where you can get creative & go wild making any kinds of shapes - circles, figure eights, whatever comes to you! These pieces will be the centerpiece of the fascinator.

Brit Fascinator - Tulle

Taking a page from the real royals - who could forget Princess Beatrice from Prince William & Duchess Kate’s wedding with the HUGE pinkish bow shaped fascinator - it’s time for some BIGGER moves. Cording and floral wire were used to make teardrop shaped pieces. Again, this is a place to get creative. Make a big star or copy Princess Beatrice’s ribbon-esque shape to make the fascinator uniquely you! Once the shapes were made, it was time to glue the edges before adding a bit more flair.

Brit Fascinator - cording

Feathers, tulle, and a hair clip were affixed to the back making this ready to wear!

British DIY Fascinator

I tossed on a LRD (little red dress) and got wedding ready!

British DIY Fascinator - After Look

Super chic and I totally feel like the 6th Spice Girl! Victoria Beckham, what’s up girl?

British DIY Fascinator

I might be wearing fascinators to all my formal events moving forward, just an FYI :)

British DIY Fascinator

For something a little softer and floral, here’s another fascinator to DIY that’s perfect for high tea!

Here's what you'll need for a Floral Fascinator: Wedding Netting / Tulle, assorted faux flowers, pliers (for flower snipping), assorted accoutrements (feathers, small butterflies/birds, charms), glue gun & glue sticks, headband, felt (not pictured to assist with flower attaching on a smaller headband)

DIY Fascinator Supplies

Start with a headband and a round piece of felt, and glue the felt to the headband. This will act as a base to glue your flowers onto. Snip your flowers from their stems and hot glue those buds to your felted base. I went with one large center flower and then added smaller flowers around it in accent colors to pop. Feel free to choose any flower that suits your fancy though! All pink or all peonies or all daisies - whatever is most uniquely you!  

DIY Fascinator steps

Next grab your netting or tulle and affix a portion (anywhere from 6 to 12”, depending on how much you’d like it to cover your face) with glue to the headband base. I loved the idea of adding little feathered butterflies to the netting for a more garden chic look as well as feathers. I went with Goose biots (the thin stringy ones)...

DIY Fascinator Supplies

...to give the fascinator some height.

Floral DIY Fascinator

I paired this with a vintage yellow dress and got ready for an afternoon wedding party!

Floral DIY Fascinator - After

This is also totally perfect for a tea party!

Floral DIY Fascinator

Who doesn’t love a little bit of hair flair?The feathers give it just that extra bit of street cred, you know what I mean? The Brits would totally approve!

Floral DIY Fascinator

This might be enough reason to plan garden parties all summer.

Floral DIY Fascinator

Duchess Marisa, at your service!

Floral DIY Fascinator