23 Days to Go: $1 Remake

So this dress is pretty limey green.  Not only is the color bold... New Dress A Day - DIY - Vintage Dress - Before - 23

...there are holes at the waist...

New Dress A Day - DIY - Vintage Dress - Holes - 23

...and holes under the arm.

New Dress A Day - DIY - Vintage Dress - Holes - 23

I wasn't sure what I was going to do with this until I was out and about and came across this Corey Lynn Calter dress...

New Dress A Day - DIY - Vintage Dress - Corey Lynn Calter Top - 23

New Dress A Day - DIY - Vintage Dress - Corey Lynn Calter Bottom - 23

Now I know exactly what I'm going to do!!

Lucky for me those holes at the arms were perfectly placed for me to remove just by ripping them off!!  Both of them!!

New Dress A Day - DIY - Vintage Dress - Sleeve Removal - 23

And with those sleeves, I'm using them to help make little flutters at the shoulders, totally like the Corey Lynn Calter inspiration piece!  I trimmed a strip off...

New Dress A Day - DIY - Vintage Dress - Sleeve Remnants - 23

...then started pinning it around the tops of the sleeves.

New Dress A Day - DIY - Vintage Dress - Pinning Sleeve - 23

Once the fabric was fully attached...

New Dress A Day - DIY - Vintage Dress - All Pinned - 23

...I sewed the sleeves in place! (...as well as those pesky holes that were found all along seams in multiple areas!)

New Dress A Day - DIY - Vintage Dress - Sewing Machine - 23

With the bones of the dress ready to go, I had to find some buttons.  I had the image of Corey Lynn Calter's dress on my phone so it would be easy to match!  After some serious sifting, I found three perfect buttons!

New Dress A Day - DIY - Vintage Dress - Button Matching - 23

I pinned the buttons in place to get an idea...

New Dress A Day - DIY - Vintage Dress - Button Lining Up - 23

...and then unstitched the one inch seam right next to the buttons, with a seam ripper to really match.

New Dress A Day - DIY - Vintage Dress - Seam Ripper - 23

Corey's dress had button closures, so I decided to make my own out of elastic!  Since I don't have lime colored elastic in my kit, I colored some with a matching Sharpie from their 80s Glam collection!!

New Dress A Day - DIY - Vintage Dress - Sharpie That Elastic - 23

With the elastic colored and pinned in place along with the buttons, I began to work on some hand stitching to keep everything in place!

New Dress A Day - DIY - Vintage Dress - Hand Sewing - 23

Once it was all sewed down, my dress was ready to wear!!

Day 23 - After

It was a super hot day, however this piece was totally breezy and comfortable to wear.  I'm not gonna like, I still sweat my face off, however for being polyester it wasn't as bad as one would think.

I loved the little buttons!

New Dress A Day - DIY - Vintage Dress - ECU!- 23

Sunglasses, a high bun that just wouldn't stay high today, and my flips gave me a most chilled and comf ensemble.

New Dress A Day - DIY - Vintage Dress - Dancing in the Streets - 23

Hope everyone had a fantastic weekend!!

24 Days to Go: Tracy's NDAD Creation

Today's remake comes from Tracy.  I'm loving her ambitious ways as a high schooler because she sounds a lot like me!!

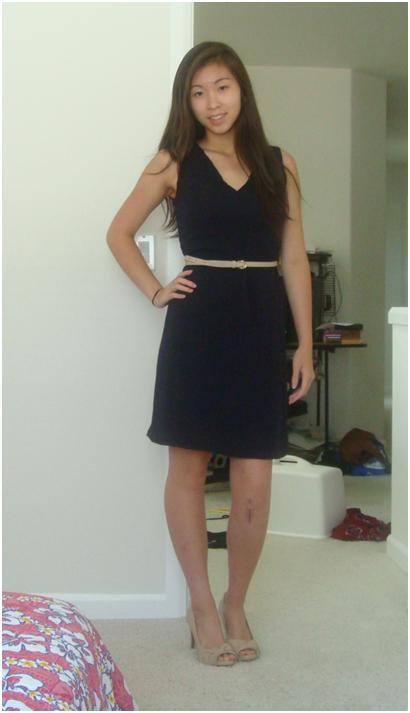
I've been following your blog ever since I saw it on yahoo and I've always been inspired to go remake something of my own but never had the guts to.  As a high school student with no job, I don't have a lot of money for clothes.  This summer, I gave myself a project to try to remake some things.  I begged my mom to sort through her old clothes (there's some really atrocious stuff) and she came up with a navy blue, shapeless, drapey dress that was way too big.

New Dress A Day - DIY - Vintage Dress - Tracy

She didn't wear it anymore so she tossed it into my recreating hands.

Lucky you Tracy that your mom was the bearer of such goods perfectly ready to be made over!

I compete in DECA (a high school business competition) and I'm always in need of professional, more conservative clothes, so I decided to go that route.  I cut a foot off the bottom, hemmed it, took a few inches in to tighten it, and changed that awful high scoop neck to a more flattering v-neck.  I wanted to try creating an exposed back with elastic straps like you did in one of your recent creations, but chickened out last moment.

New Dress A Day - DIY - Vintage Dress - Tracy After

Paired with a nude belt and matching heels, I think it's ready to take on the world.

You do look like you're ready to take on the world Tracy!  You look gorgeous!!  This is just the dress that says, "watch out DECA competitors, my name is Tracy and I'm about to rock your competition world!"  Can't wait to see your next remake!

25 Days to Go: Rachel's NDAD Creation

Today's remake comes from Rachel!!

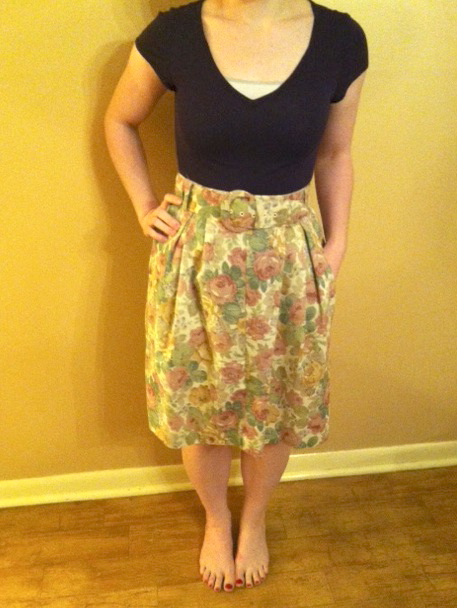
First, I want to say that I LOVE your blog!  It is always exciting to see what new thing you have recreated.  Following your blog has given me the courage to try my hand at re-fashioning some clothing myself.  This one is my favorite!  A few weeks ago, I bought this interesting pair of shorts (which happen to be quite long) at an estate sale.  I paid 50 cents for the shorts, what a steal!  I loved the floral print and the awesome belt...

New Dress A Day - DIY - Vintage Shorts - 26

...but I wasn't going to wear these shorts as is.

I'm not a shorts wearer myself, so I'm totally curious to see what Rachel does!!

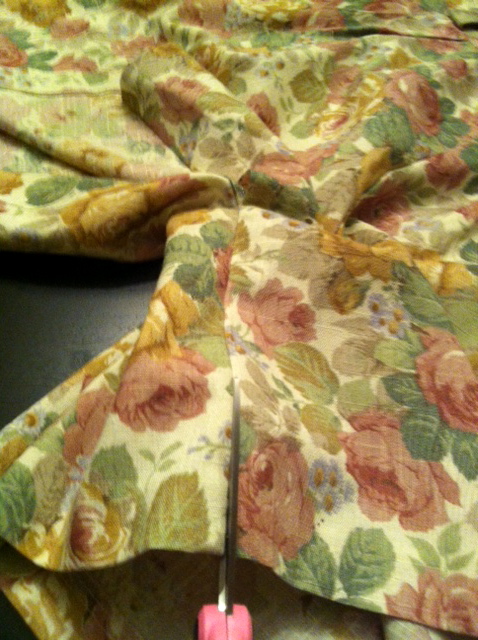
I cut the fabric right where the two legs met...

New Dress A Day - DIY - Cutting Fabric - 26

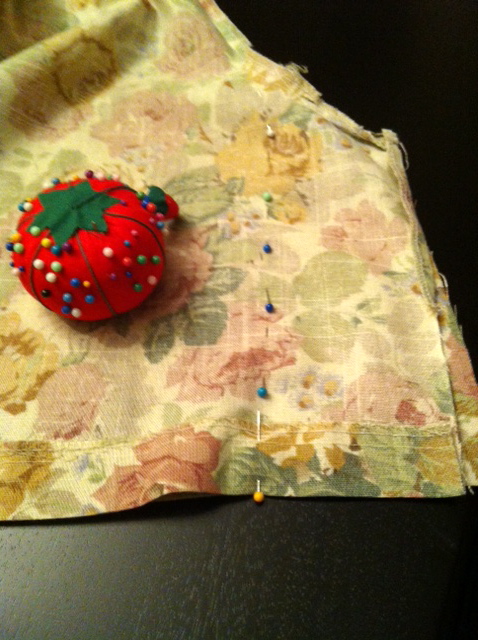
...and pinned where I needed to sew.

New Dress A Day - DIY - Pin Pin Pin - 26

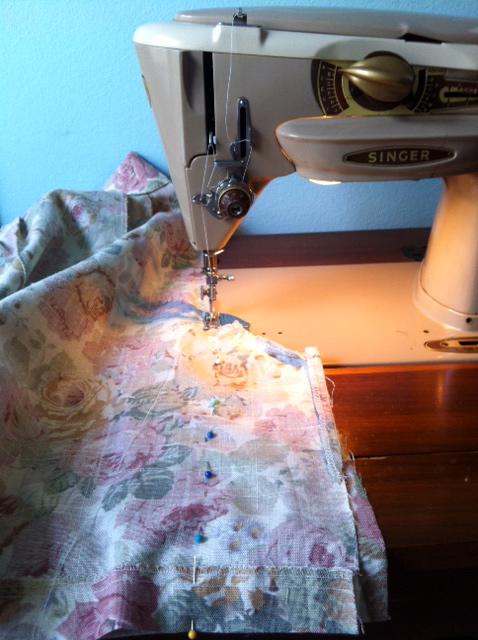
Using my vintage Singer, I sewed straight lines on either side...

New Dress A Day - DIY - Sew Time - 26

...and cut off the excess.

New Dress A Day - DIY - Shorts to Skirt- 26

I love my new skirt! It totally looks like I paid more than two shiny quarters for it!"

Yes it does!  Go shorty, it's your birthday...totally in honor of the Fitty Cent you paid :)  Now these are a pair of shorts I'd wear!!