DIY Gumball Costume

Halloween is over, but here's a rundown of what I actually wore on the big night! Can't wait to hear what you dressed up like this year! I worked with RIT Dye on this year's costume, so I started with a white cotton dress as the base and then played around with dye to really give off a gumball machine feel!

DIY Gumball Costume

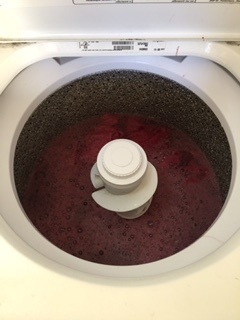
Start a dye bath for your garment next. I used a washing machine, but a stove top works as well. Fill your machine with hot water (run it on a whites wash) or boil the water on your stove top. Add your chosen dye (I went with Cherry Red) to your dye bath...

DIY Gumball Costume

...wet your garment completely in water, and then add your piece to the bath.

DIY Gumball Costume

After the wash is complete (or after you've let the garment marinate on the stove top) toss it into the dryer to dry completely before adding your pompoms!

DIY Gumball Costume

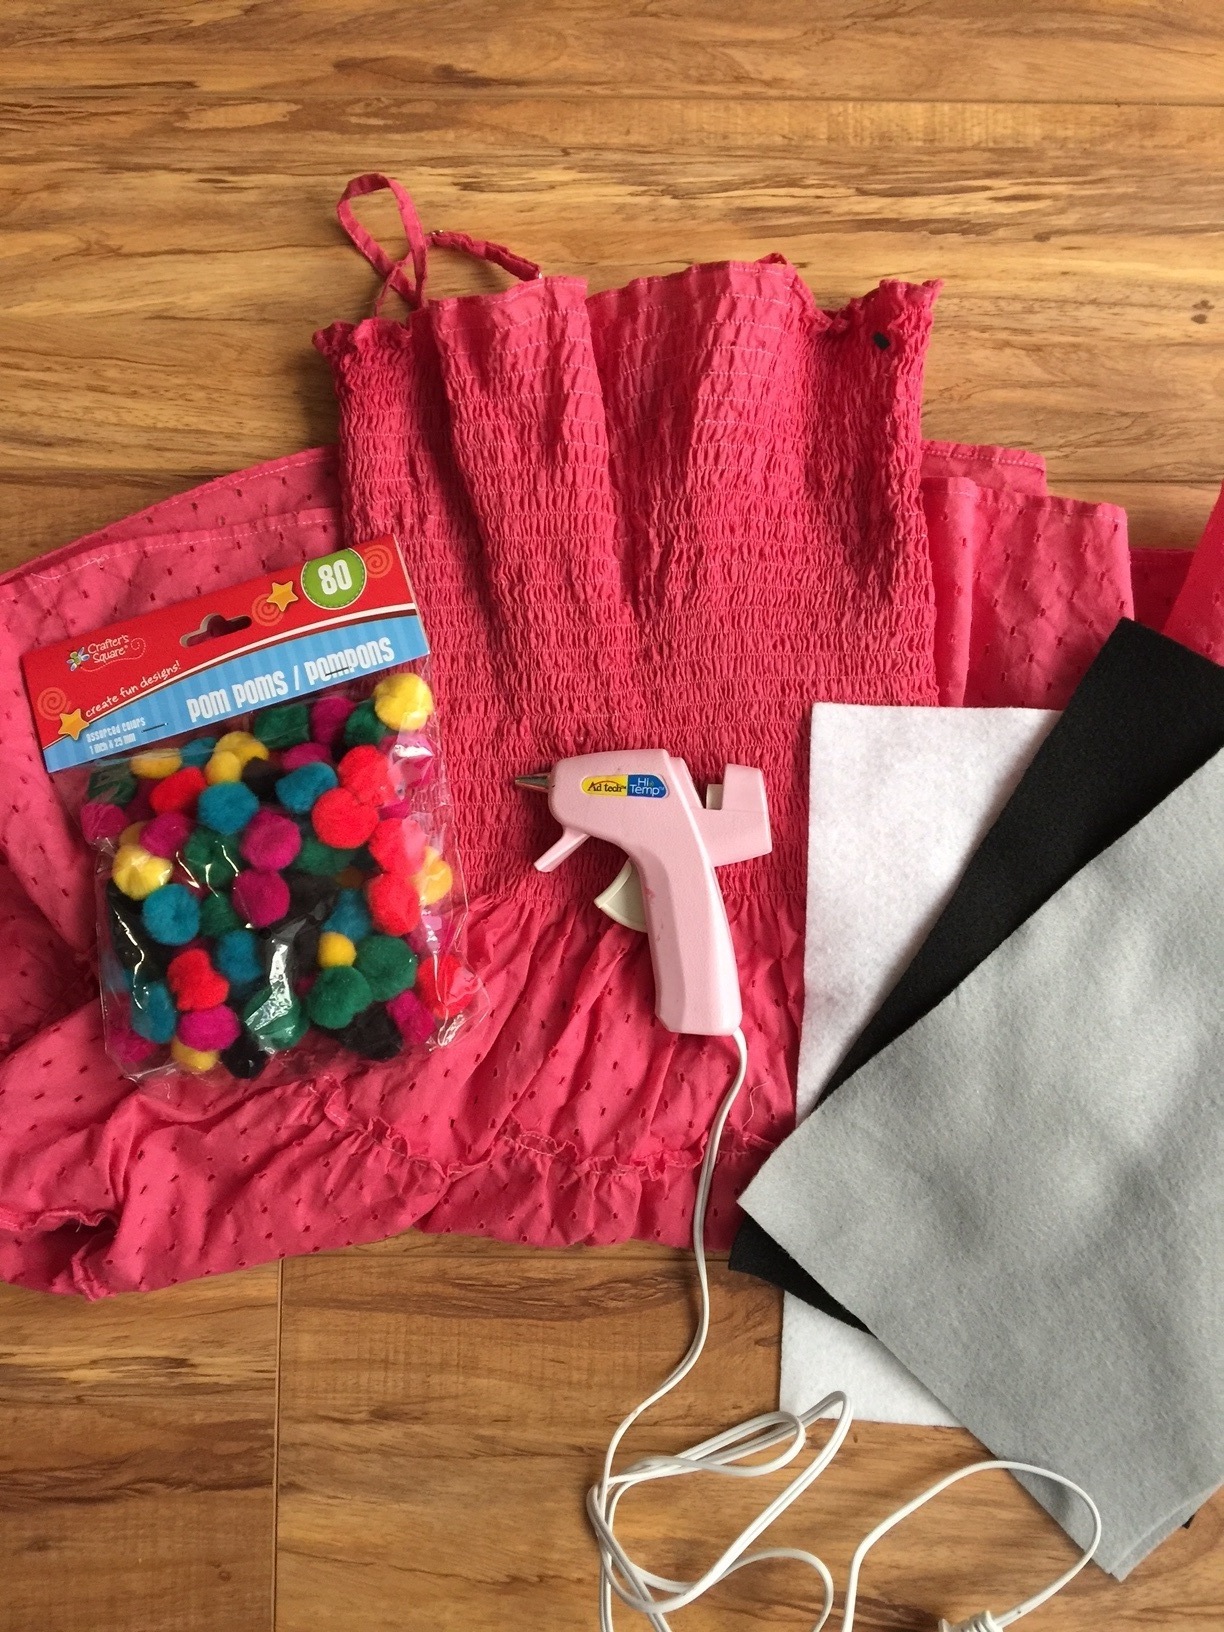
Using a hot glue gun, begin affixing pompoms to the top of the dress.

DIY Gumball Costume

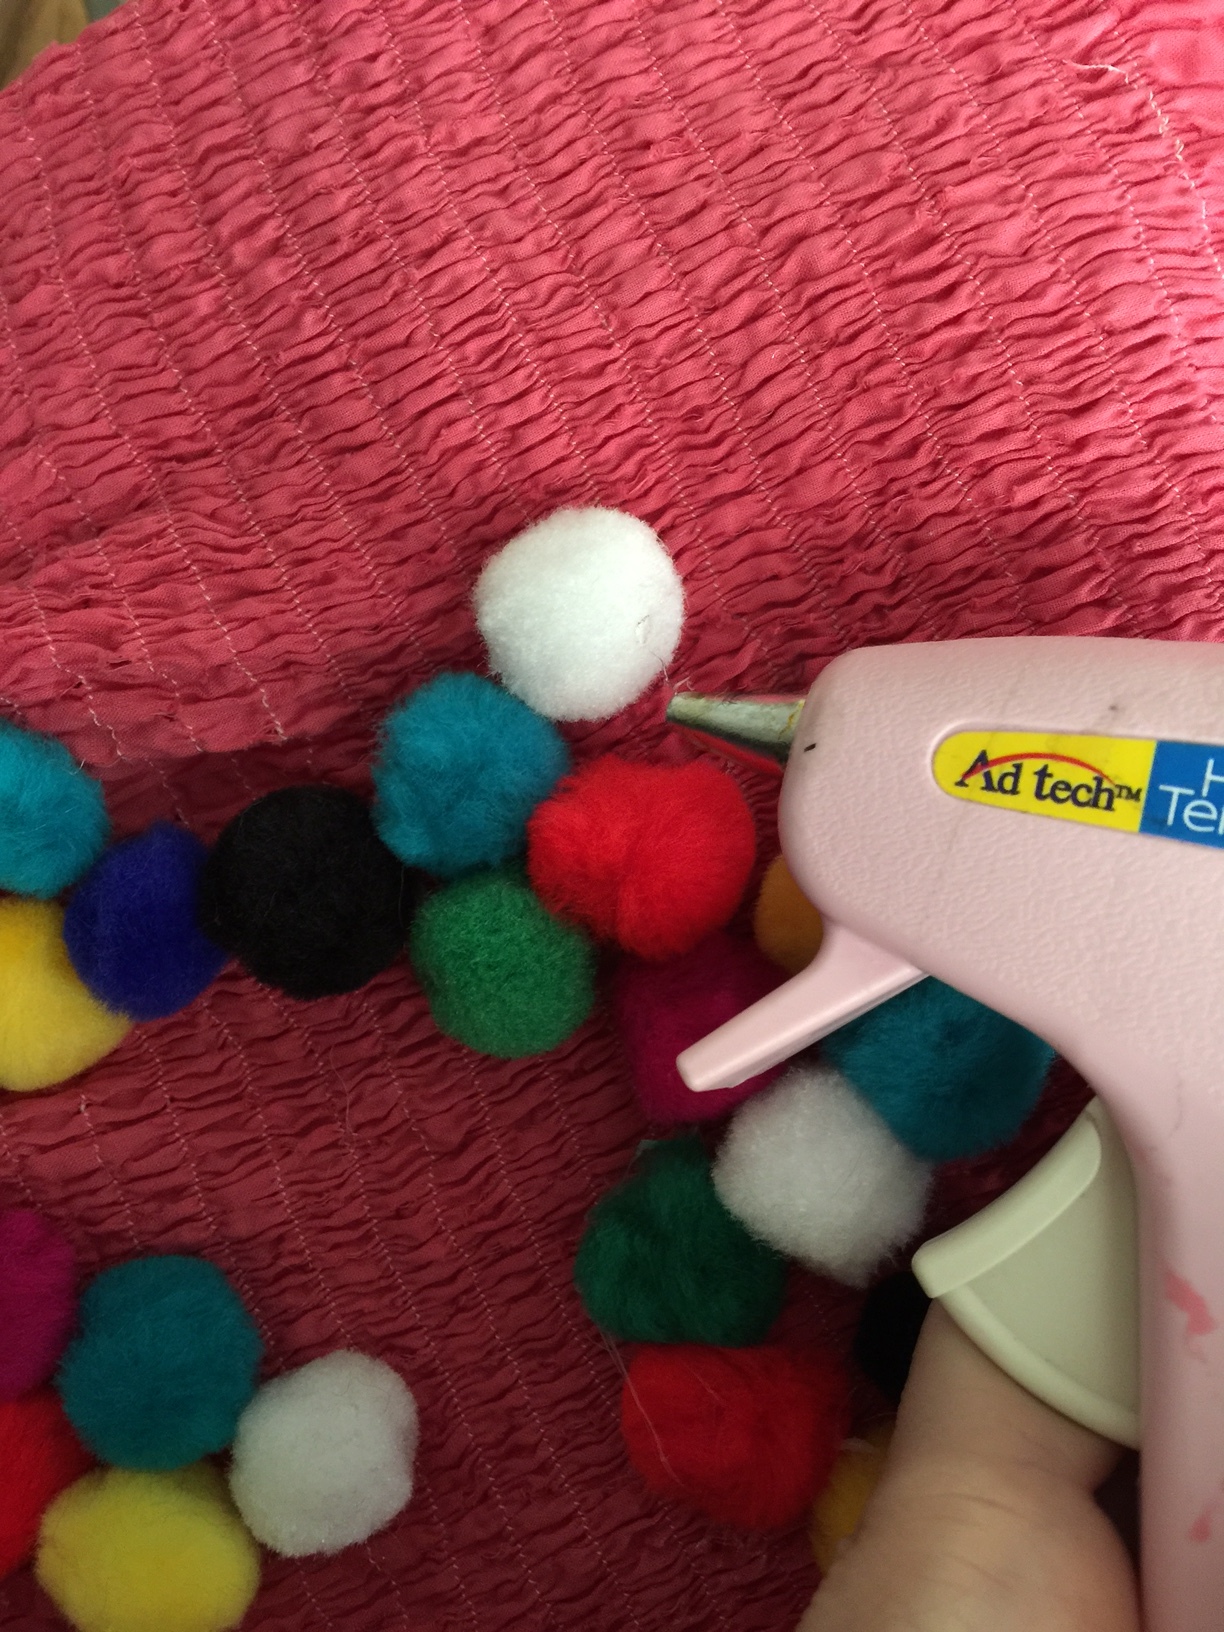
You want to cover the whole front of the bodice.

DIY Gumball Costume

With the pompoms affixed, start creating the rest of the gumball accoutrements with felt!

DIY Gumball Costume

You can create the price sticker using white felt and a marker to write 25 cents on it. The dial can be created by cutting a circle and little rectangle out and gluing them together. The slot where the gumball comes out can be made by trimming a small trapezoid out of the black felt.
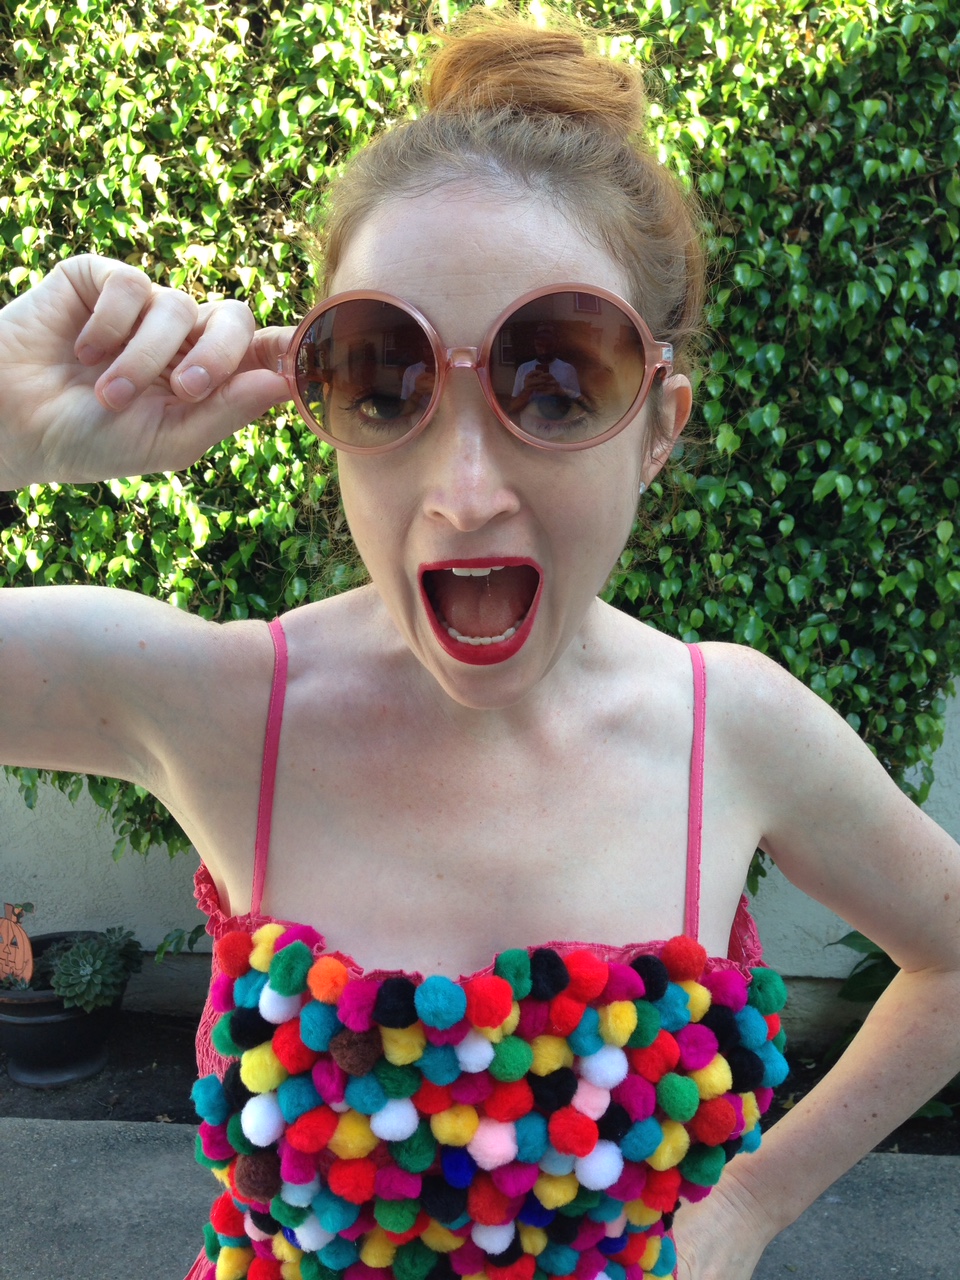
And, voila!

DIY Gumball Costume

Insta-gumball costume!!

DIY Gumball Costume

Time to celebrate Halloween!

DIY Gumball Costume

What did you dress up as this year?? Did you DIY anything fun? Share your costumes in the comment area!!

Copycat: Tarina Tarantino Floral Sunglasses

I first became obsessed with today's DIY after seeing them being worn by Mindy Kaling on The Mindy Project. (For those The Mindy Project-obsessed, you can head over here to HelloGiggles to read the post with the full TV tie in!) The third season premieres tonight and I can't wait! I love sunglasses and have more (cheap) pairs in my collection than I should, however my track record with keeping them from getting scratched/falling off my head and cracking/stretching them out from wearing them on my head all day long is equivalent to me batting a .100. Pretty not-so-hot. So, I felt that there's always room for one more pair!

Mindy rocked out these Tarina Tarantino shades...

Hello Giggles - DIY - The Mindy Project - Mindy Lahiri Skirt and Sunglasses

...and I fell in love.

Hello Giggles - DIY - The Mindy Project - Mindy Lahiri Sunglasses

Super blingy, super floral, super DIY candidate!

Here’s a rundown of the supplies needed for the sunglasses:

Hello Giggles - DIY - The Mindy Project - Mindy Lahiri Sunglasses

1. Black Sunglasses – (these are flea market finds, but Wet Seal and Forever 21 have some cheap options, or you can even scope out a local Dollar Tree to see if they carry.) 2. Rhinestone trim (I used Darice's Bling on a Roll.) 3. Jewelry Glue (I used Aleene's jewelry and metal glue, but you can use a glue gun as well.) 4. Mod Podge Melts and Molds - (the Mod Podge Mold with Flowers is what I used as well as Mod Podge Melts in green/white.) 5. Paint (if you use clear Melts pink or green paint does the trick. Just add a coat to match the color of the frames.) 6. Glue Gun (this is used with the Mod Podge Melts - put them in as you would glue sticks.)

To recreate the flowers on the original Tarina Tarantino sunnies, we'll need four flowers/leaves to put in the center and at the sides of the glasses.

The Mod Podge Melts and Molds were used for this step. Fill the flower and leaf molds with the melts (top L), paint the hardened pieces (if a color melt wasn't used - I used green for the leaves and clear for the flowers, so the leaves were fine) the matching shade of pink (top R), dab glue on the backs of the flowers and leaves (bottom R), and affix to the sunglasses (bottom L).

Hello Giggles - DIY - The Mindy Project - Mindy Lahiri Sunglasses

I went with one leaf in the center, just because it fit nicely in-between the flowers, and then added a strip of rhinestones to the top portion of the glasses.

Hello Giggles - DIY - The Mindy Project - Mindy Lahiri Sunglasses

I added flowers and leaves to the edges of the glasses next and then let the frames dry!

Hey new sunnies!

Tarina Tarantino DIY sunglasses - New Dress A Day

We look like twins!

Tarina Tarantino DIY sunglasses - New Dress A Day

Easy to make, super chic, and totally budge friendly.

Tarina Tarantino DIY sunglasses - New Dress A Day

I love the Tarina pair and I love my pair!

Tarina Tarantino DIY sunglasses - New Dress A Day

I might have to get on a few more DIYs for the sunnies this summer.

Hello Giggles - DIY - The Mindy Project - Mindy Lahiri Skirt and Sunglasses

Good thing I bought extra pairs at the flea market. Stay tuned!

Tie Dye Backpack

The best way to give a white backpack a little face lift for school? TIE DYE! I wanted to put together a fun tutorial that shows how to transform a basic white canvas backpack into something chic for campus. DIY - Tie Dyed Backpack

A little DIY action will make this budget backpack look like you spent beaucoup bucks! The hardest part was picking the dyes!

DIY - Tie Dyed Backpack

All you need is:

Canvas backpack: (I got this one for $10 at Forever 21, but you can thrift one, use one that you have already that needs an update, or hop on over to Target to grab something!)

Dyes: I went with an assortment of brighter colors, but pick any palette that suits your fancy!

Rubber bands/gloves: Gloves are a lifesaver for your hands when you're dyeing! Make sure you protect those fingers.

Time to get to work!

I began to add rubberbands to the backpack next. I pinched a section of the backpack, put a rubber band around the gathered area, and then continued to add bands every few inches.

DIY - Tie Dyed Backpack

I put the backpack under water until the entire piece was saturated.

DIY - Tie Dyed Backpack

Now it was time to add dye! I added dye to plastic bottles to make it easier for application onto the backpack. (Don't forget to wear gloves!)

DIY - Tie Dyed Backpack

Once enough dye was applied, I let the pack dry overnight and when it was dry, I snipped off the rubber bands with a pair of scissors. (It's so much easier trimming them off than trying to pull them off with your fingers, especially if they're tight!)

DIY - Tie Dyed Backpack

From all white, to fashionably dyed!

DIY - Tie Dyed Backpack

What a fun way to get your hands a little dirty to create something so cool for school?

DIY - Tie Dyed Backpack

It's also a great trick to revive an old backpack to make new again!

DIY - Tie Dyed Backpack

If spots are on the darker side, just use darker dyes to hide! This is going to be my new go-to computer travel bag since back to school isn't completely relevant to me anymore! (PS, I miss school!!)