DIY: Revenge Infinity Box

Because I'm obsessed with Revenge (well less obsessed now than I was first season, but I'm invested so I still watch) I was super excited to craft what might be the most important piece from the show. For those fans, you know what I'm talking about - Emily Thorne’s all-important infinity box that holds all her revengeful secrets. (For those Revenge obsessed, you can head over here to HelloGiggles to read the post with the full TV tie in! For those non-fans, we're going to get to some woodworking for the very first time!! Hello Giggles - New Dress A Day - Revenge - wooden infinity box - DIY

Here’s a rundown of the supplies you’ll need:

Hello Giggles - New Dress A Day - Revenge - wooden infinity box - DIY

1. Wood soldering kit (The Darice kit I used is a steal at $14!)

2. Wooden box (I used a 8-1/4 x 5-5/8 chest)

3. Wood stain (I went with a lovely Golden Pecan shade)

I started off by looking online for an infinity symbol template that matched the one from the actual box.

Hello Giggles - New Dress A Day - Revenge - wooden infinity box - DIY

Once I found my template, I printed it out and tested out the location on the top of the box.

Hello Giggles - New Dress A Day - Revenge - wooden infinity box - DIY

Next I trimmed the template to make it easy to trace on the top of the box…

Hello Giggles - New Dress A Day - Revenge - wooden infinity box - DIY

…and then prepped my wood burning tool by finding the right tip, screwing it in, and putting it on the stand that it came with.

Hello Giggles - New Dress A Day - Revenge - wooden infinity box - DIY

(*Be SUPER careful with this puppy because it’s hot. Like 900 degrees Celsius hot in certain areas. I burned my finger and immediately doused it with apple cider vinegar to minimize the after effects. So far, so non-blistery good.)

I plugged in the tool and started tracing the lines on the wood with the tip. It's really amazing how quickly the wood burns!

Hello Giggles - New Dress A Day - Revenge - wooden infinity box - DIY

After tracing my lines, the box turned out looking like this...

Hello Giggles - New Dress A Day - Revenge - wooden infinity box - DIY

This is a fine spot to end, however I wanted a pretty lacquered finish, so I coated the box with a layer of the Golden Pecan stain.

Hello Giggles - New Dress A Day - Revenge - wooden infinity box - DIY

A paintbrush or cloth will do the trick and just make sure to wipe the excess stain off when you're finished, if there is any.

Hello Giggles - New Dress A Day - Revenge - wooden infinity box - DIY

I let the box dry for a few hours...

Hello Giggles - New Dress A Day - Revenge - wooden infinity box - DIY

...and then was ready to use!!

Hello Giggles - New Dress A Day - Revenge - wooden infinity box - DIY

Pretty successful for my first attempt! With one project under my belt, I'm looking forward to keeping this up, sans any injuries! Pretty cute lookalike, eh?

Hello Giggles - New Dress A Day - Revenge - wooden infinity box - DIY

Have any of you worked with this kind of tool or with wood in general? Would love to hear your thoughts on what kinds of projects you've done or what has been successful!

DIY: Red Bow Tie with Mr. Peabody & Sherman

One of my hysterical comic friends has a web show called "Hot on the Red Carpet" where she goes to premieres with her own little red carpet in tow (seriously, it's amazing), and interviews/jokes with celebs as they head down the red carpet. (You'll see one of her videos in a sec.)  She had to cover the Mr. Peabody & Sherman premiere and had a little request for me...please make me a bow tie to match Mr. Peabody! New Dress A Day - bow tie - DIY - Mr. Peabody & Sherman

Ask and ye shall receive! She got pictures with her twinsie...

New Dress A Day - bow tie - DIY - Mr. Peabody & Sherman

...as well as Ty Burrell, who happens to be my fave!  I worked with him years ago and he was such a gent, not to mention that I'm obsessed with Modern Family as well!

New Dress A Day - bow tie - DIY - Mr. Peabody & Sherman

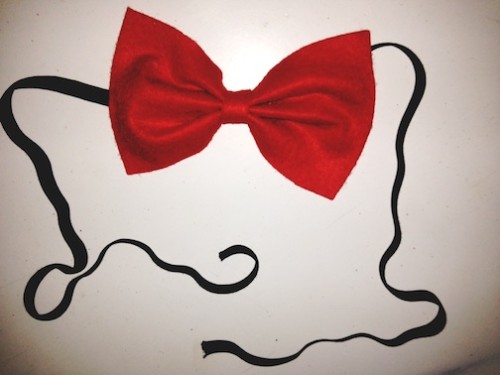
Felt and elastic duo = best DIY bow tie combo!  PS, did anyone go and see this?  It looks quite adorable!

New Dress A Day - bow tie - DIY - Mr. Peabody & Sherman

Here's Erin's clip...I think you'll enjoy!!

Amber's NDAD Creation

My girl Amber submitted a piece a while back (refresher HERE!) and I have to say that I'm obsessed with what she does. Her before looks are totally on par with mine as well, which cracks me up! I love the "let's give sour face when we're wearing something not so pleasant" move. It's my go-to when I'm shooting the before looks - I live for the sour face and she totally nails it. Also, her recreations have been über chic. See what she's up to today!!

My roommate was cleaning out her closet and was tossing this shirt, so I got it for free! Obviously it doesn't fit my bust region, so I'm going to turn it into a skirt!

New Dress A Day - DIY - thrift store shopping - upcycled shirt

Let’s turn this puppy into a truck, y’all!

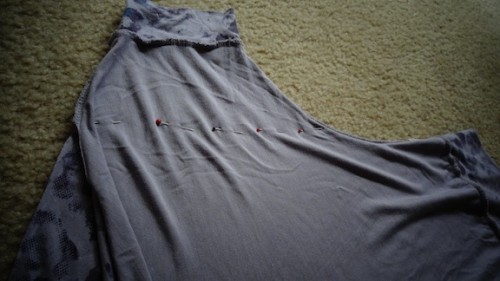
I sewed closed the arm holes first.

New Dress A Day - DIY - thrift store shopping - upcycled shirt

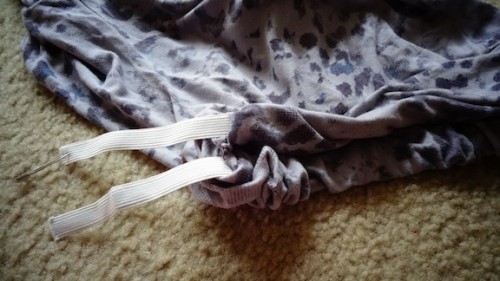
It might be hard to tell, but the 'bottom' of the skirt had a thick hem. It made a perfect 'top' of my skirt. I cut a tiny hole in the hem and fed some elastic through. 

New Dress A Day - DIY - thrift store shopping - upcycled shirt

The last thing I did was cut the original neck hem off. Since this was a jersey material there was no need to re-hem. 

New Dress A Day - DIY - thrift store shopping - upcycled shirt

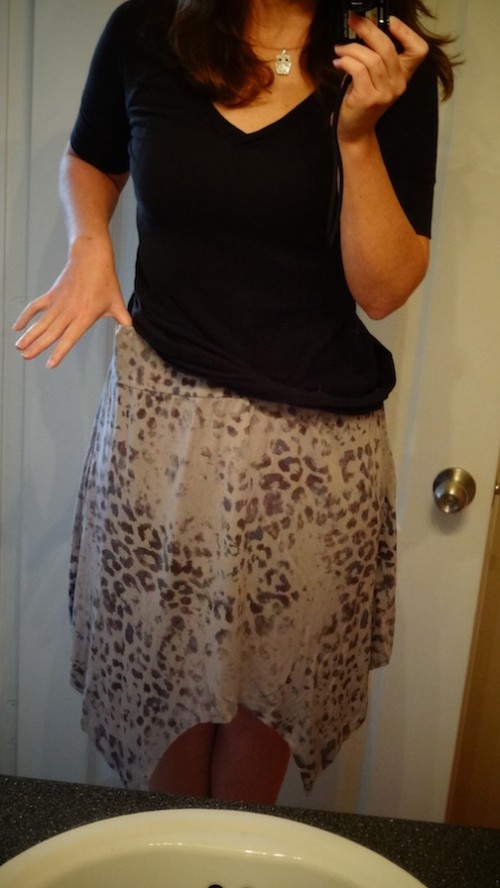
That's it! It was super easy.

New Dress A Day - DIY - thrift store shopping - upcycled shirt

Even Chip & Dale approve. :)

I'm jumping on that approval wagon too! I love your new skirt and I love even more that it started out as that too big, ill-fitted shirt that your roomie was going to toss. I bet you she's wishing she hadn't passed it your way after seeing what you did! Keep the remakes coming!!