muumuu

Remake: Black & Red Muumuu

You know I LOVE a muumuu. They’re flowy, they’re super comfortable, and they make you feel like you’re wearing pajamas! I mean, anytime I can get away with feeling like I’m in PJs outside my house, SIGN ME UP!

Check out this one I just picked up.

Black & Red Muumuu Before

I was obsessed with the pattern and loved the bottom portion of red!

Vintage Red & Black Muumuu

Because of the darker shades, I thought this would be something that could work as a chic dress to a cocktail party. And you’ve got to love the one pocket sitch!

Vintage Red & Black Muumuu

I didn’t want to change too much, so I’m keeping this project super simple. I started with my tiny Fiskars scissors and trimmed off the sleeves.

Vintage Red & Black Muumuu Cut Sleeves

Once both sides were trimmed…

Vintage Red & Black Muumuu Cut Sleeve

…I prepped a new seam, pinning the raw edges under. I started at the neckline and went all around the arms.

Vintage Red & Black Muumuu Pinned Sleeves

Quick stitch on the machine and I was ready to go!

Vintage Red & Black Muumuu Sewing

Hello cocktail party at the Parker Hotel in Palm Springs! I’ve arrived!

Vintage Red & Black Muumuu Upcycled

It’s so summery and feels very chic when you add some fun accessories and gladiator sandals!

Vintage Red & Black Muumuu Upcycled

I feel like I’m in a secret garden!

Vintage Red & Black Muumuu

Red sunnies and vintage necklaces rounded out the ensemble!

Vintage Red & Black Muumuu Upcycled

That’s right shoulders, you’re free from the sleeves! 😂

Vintage Red & Black Muumuu Upcycled

Easy, peasy, off with the sleevesies!

Vintage Red & Black Muumuu Before/After

Remake: Pink Floral Muumuu

You know that moment when you get into your car for the first time after it's been sitting in the sun all morning, and the heat literally envelopes you, and you feel like you might explode? What happens when it feels that hot ALL DAY LONG? You go as flowy as possible with that wardrobe!

Vintage Pink Floral Muumuu - 20

Hello, flowy!

Vintage Pink Floral Muumuu 1

This muumuu is exactly the piece for that sweat drippity kinda summer day. A few issues, though...

Ummmmm...this is probably not going to cut it as is.

Ummmmm...this is probably not going to cut it as is.

It's just a bit too big for me. No need for flashing.

Vintage Pink Floral Muumuu 3

It's hot but not THAT hot. :)

Vintage Pink Floral Muumuu 4

Time to make this ready for the heat!!

There were lots of snags at the seams, but because of the sizing, things are getting trimmed and these issues will be in the leftover fabric pile!

Vintage Pink Floral Muumuu 5

Woo for no snags!

Next it was onto the actual cutting. Length got trimmed as well as the sleeves, and the body of the muumuu got taken in as well. 

Vintage Pink Floral Muumuu 5

The bottom of the dress got prepped for a new hem before moving onto the neckline!

Vintage Pink Floral Muumuu 7

As you can see on the bottom right, I created two seams, with about an inch of space in-between. These are lying at the new neckline. (I added part of the leftover fabric and stitched it to the back of the current neckline.) New elastic is gonna live in the center of these two seams very soon! (PS, leave a little bit of space at the end of your seam - you'll need access for the next step!)

I took elastic and added a safety pin to the end of it to push through the space between the seams! New elastic neckline, here we come!

Vintage Pink Floral Muumuu 8

Once the elastic made the rounds around the entire neckline, instead of stitching the ends together, I pulled them together and tied a bow. This is going to help with making adjustments for how loose and how tight I want the neck to be. 

Vintage Pink Floral Muumuu 9

Off the shoulder action! 

Vintage Pink Floral Muumuu 10

I paired this piece with some Michael Kors heels and a green clutch! It's like I'm wearing a garden!

Vintage Pink Floral Muumuu 11

Cheese!!

Vintage Pink Floral Muumuu 12

Casual, comfortable, and COOL. Three key ingredients to the perfect ensemble.

Vintage Pink Floral Muumuu 13

I love this dress!! Seriously. I might even wear it to bed :)

Remake: Ruffle Neck Winter Florals

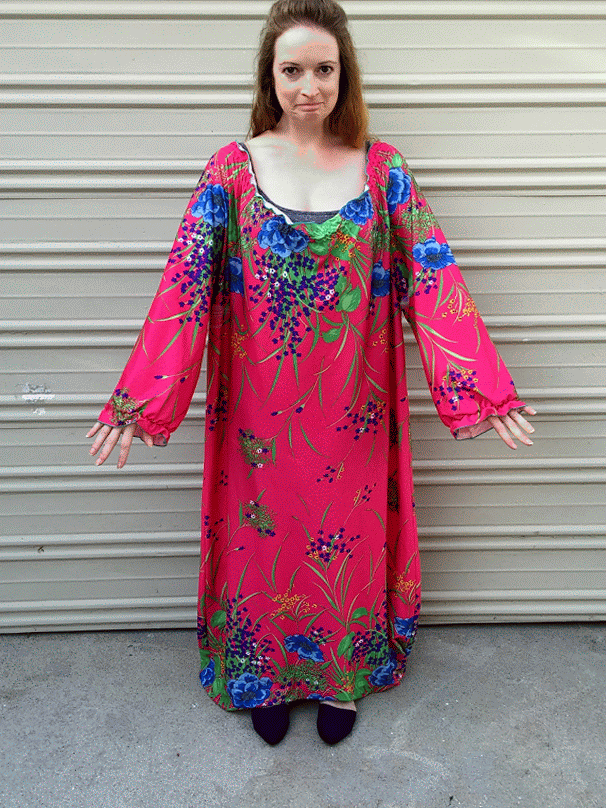
Weeee!! Here's the before shot of this gorgeous number... New Dress A Day - DIY - Vintage winter floral dress - clown collar - Goodwill

Lots of big, extra ruffles going on!

New Dress A Day - DIY - Vintage winter floral dress - clown collar - Goodwill

Feeling like the piece has just swallowed me.

New Dress A Day - DIY - Vintage winter floral dress - clown collar - Goodwill

Let's get this wearable!!

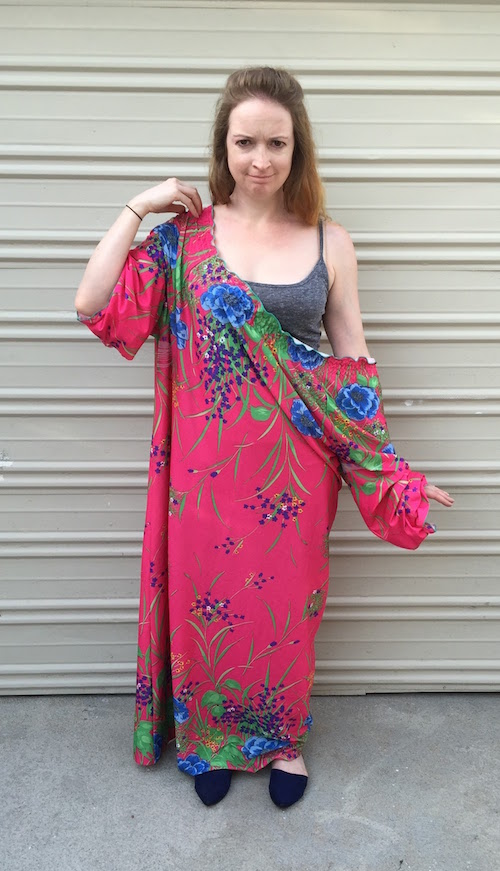
I began with removing one sleeve!!  I started removing stitches from the sleeve that was "in the middle" of all the ruffle action.

New Dress A Day - DIY - Vintage winter floral dress - clown collar - Goodwill

I got my one sleeve off...

New Dress A Day - DIY - Vintage winter floral dress - clown collar - Goodwill

...and then made a snip at the shoulder to completely open this side of the dress.

New Dress A Day - DIY - Vintage winter floral dress - clown collar - Goodwill

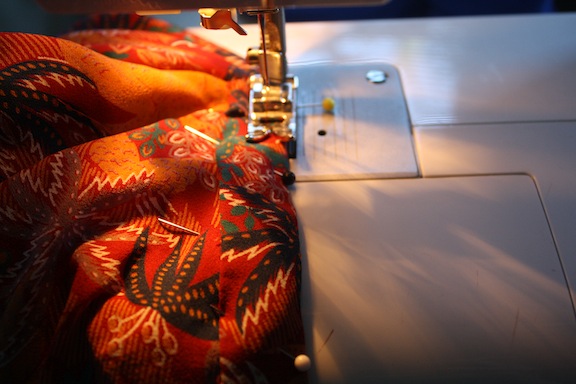
I wanted to follow the design and flow of that big ruffle, so I thought that turning this into a one-arm, asymmetrical piece would be just the thing to make it work!  With this side of the dress opened up, I began to fold and form the diagonal shape, pinning it in place.

New Dress A Day - DIY - Vintage winter floral dress - clown collar - Goodwill

I still needed to take the top portion in, but wanted to get the diagonal shape stitched down.  It's much easier to work when there aren't all kinds of pins holding the "work in progress"section in place.

New Dress A Day - DIY - Vintage winter floral dress - clown collar - Goodwill

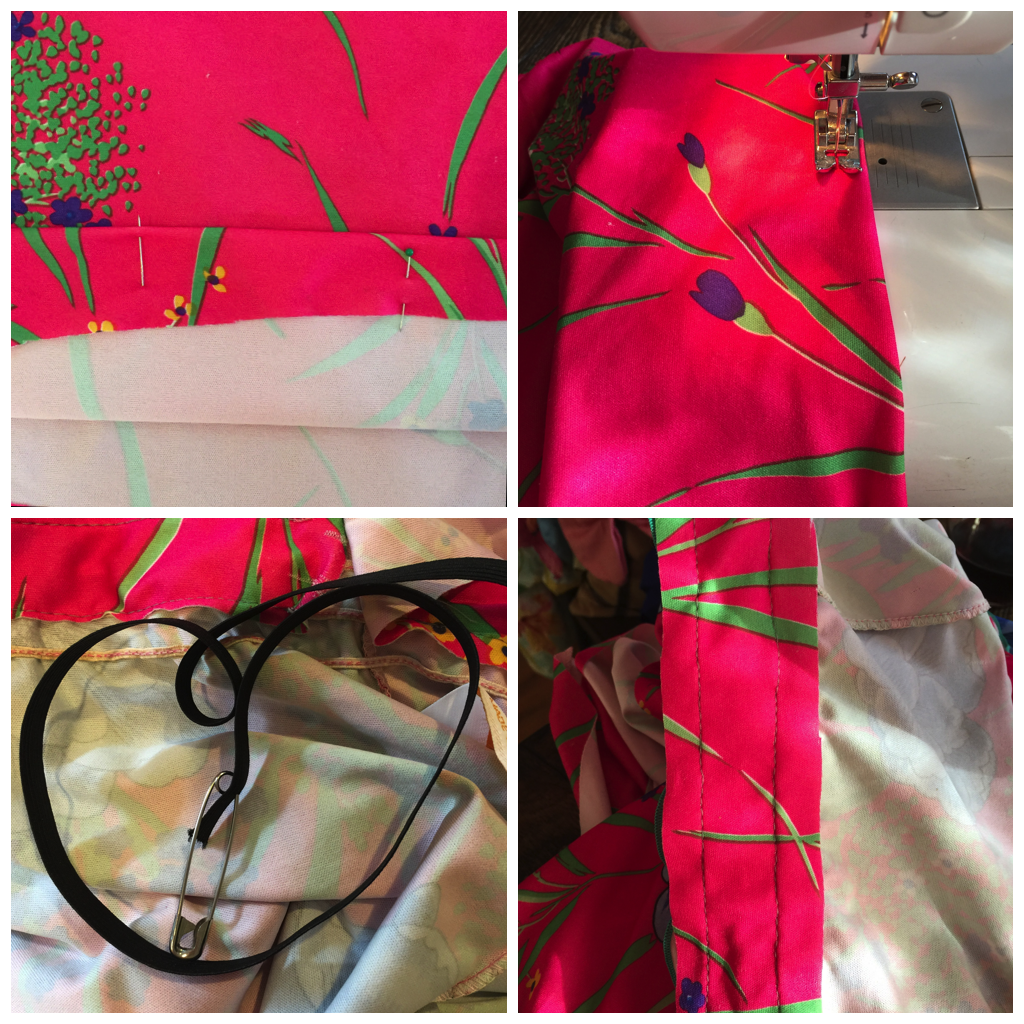
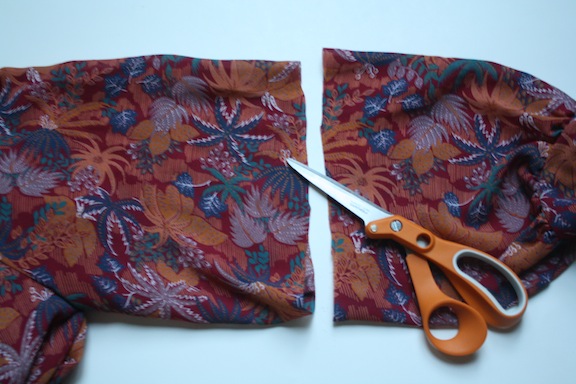
Once the neckline was stitched, I started working on the sleeve that was leftover.  I cut it short...

New Dress A Day - DIY - Vintage winter floral dress - clown collar - Goodwill

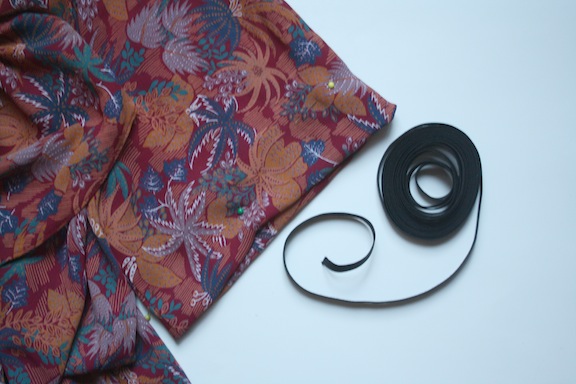
...and then got some elastic ready to add to the end.  I pinned under the raw edge leaving about 1/2" which was going to be the area to insert the elastic.

New Dress A Day - DIY - Vintage winter floral dress - clown collar - Goodwill

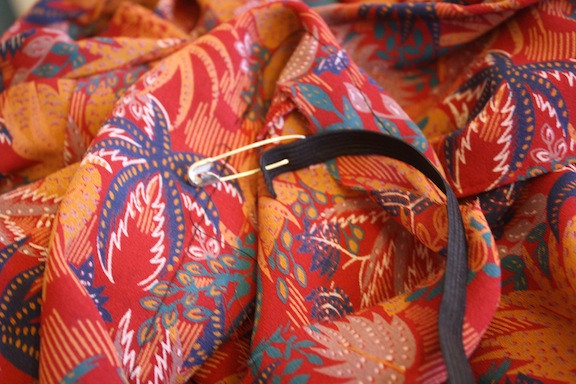
I stitched a new seam at the sleeve and then inserted the elastic in the open space, using a safety pin to guide the elastic around.

New Dress A Day - DIY - Vintage winter floral dress - clown collar - Goodwill

The last step was taking in the top of the piece.  I measured the area that needed to be fitted and stitched it all in place.
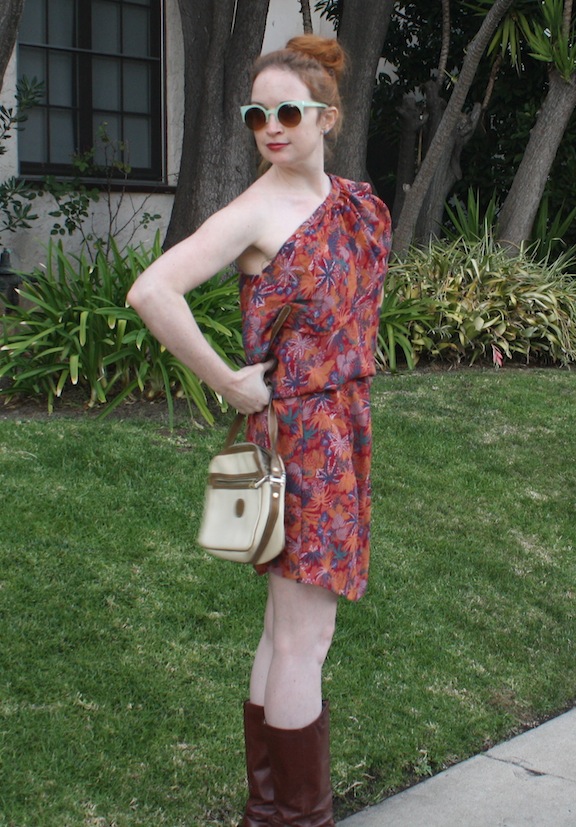
The final look??

New Dress A Day - DIY - Vintage winter floral dress - clown collar - Goodwill

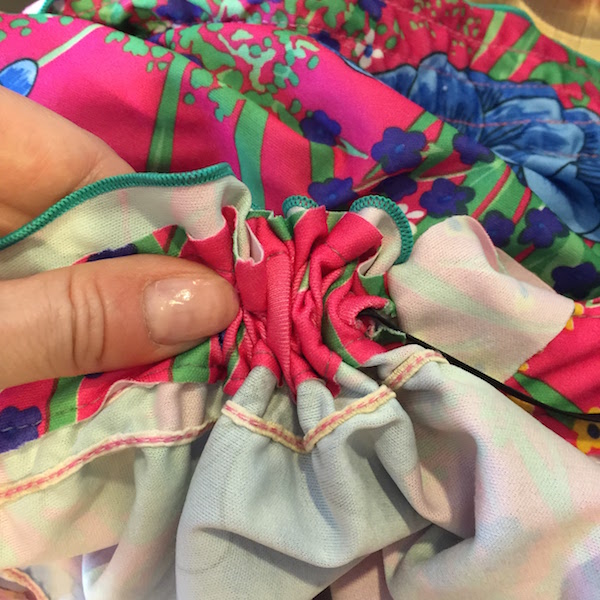
I paired the dress with a skinny belt and did some ruching at the waist.  I was thinking about shortening the dress but then thought if this was the plan of action, keeping it longer to save some length when it got pulled from the waist would be the smart choice.

New Dress A Day - DIY - Vintage winter floral dress - clown collar - Goodwill

I had some fun jumping around to really show the maximum wave of that ruff.  That's a big ruff!!

New Dress A Day - DIY - Vintage winter floral dress - clown collar - Goodwill

I also paired the dress with a vintage purse from the collection - it has an old Dooney & Bourke vibe, but is just a nameless, lookalike, cream/brown purse.  If it was a little larger, it would have been the perfect camera bag!

New Dress A Day - DIY - Vintage winter floral dress - clown collar - Goodwill

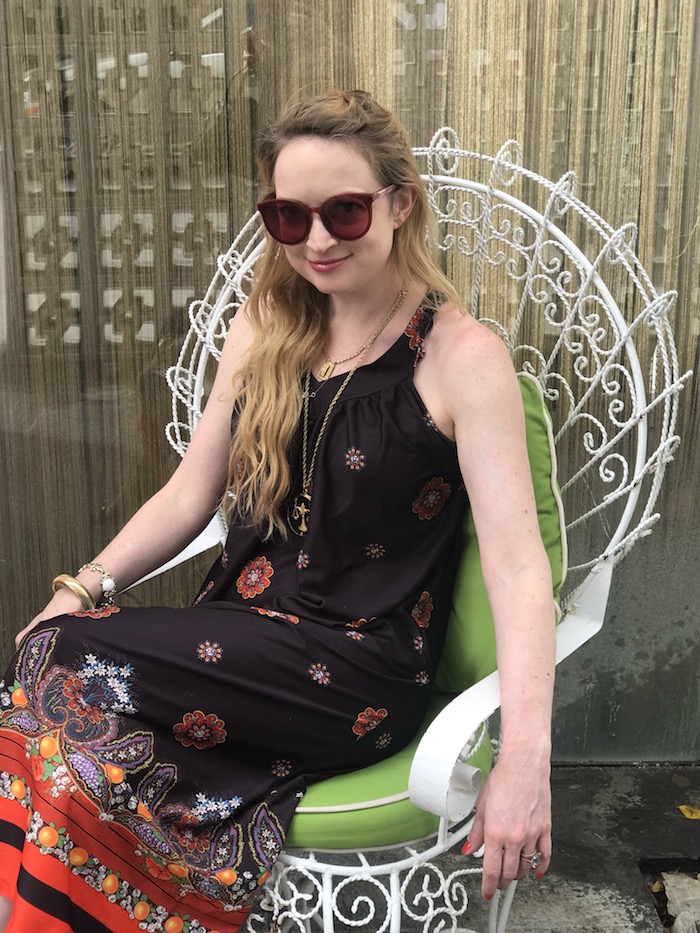
Oh, and those sunnies are from Forever 21 and are my new favorite purchase.  I ended up getting them on the fly when I left my sunglasses at home while I was out running errands on the brightest day ever.  Sometimes the forced purchase turns out better than the ones planned!!

New Dress A Day - DIY - Vintage winter floral dress - clown collar - Goodwill

I love the boho feel of the piece now.  It still maintains the flow, but doesn't feel overwhelmingly busy or heavy!!

New Dress A Day - DIY - Vintage winter floral dress - clown collar - Goodwill

Happy Monday, friends!!! And stay warm and safe all my East Coasters getting ready to get hit with crazy snow! xo